The Couchbase Autonomous Operator is a Kubernetes operator that provides cloud-native integration with open source Kubernetes and Red Hat Openshift. It allows a user to use Kubernetes’ declarative functionality to define what the Couchbase Server Cluster will be and manage that cluster’s attributes. This declarative functionality is useful as it allows you to store your environment definitions in source control.
The operator’s goal is to manage one or more Couchbase Server deployments fully. It manages the cluster lifecycle (provisioning, scaling, upgrade, auto-recovery) and configuration (persistent volumes, server groups, XDCR, TLS, RBAC, backup/restore). The operator is a potent tool in managing a large-scale Couchbase environment and it is highly recommended you read the Couchbase Operator’s Documentation.
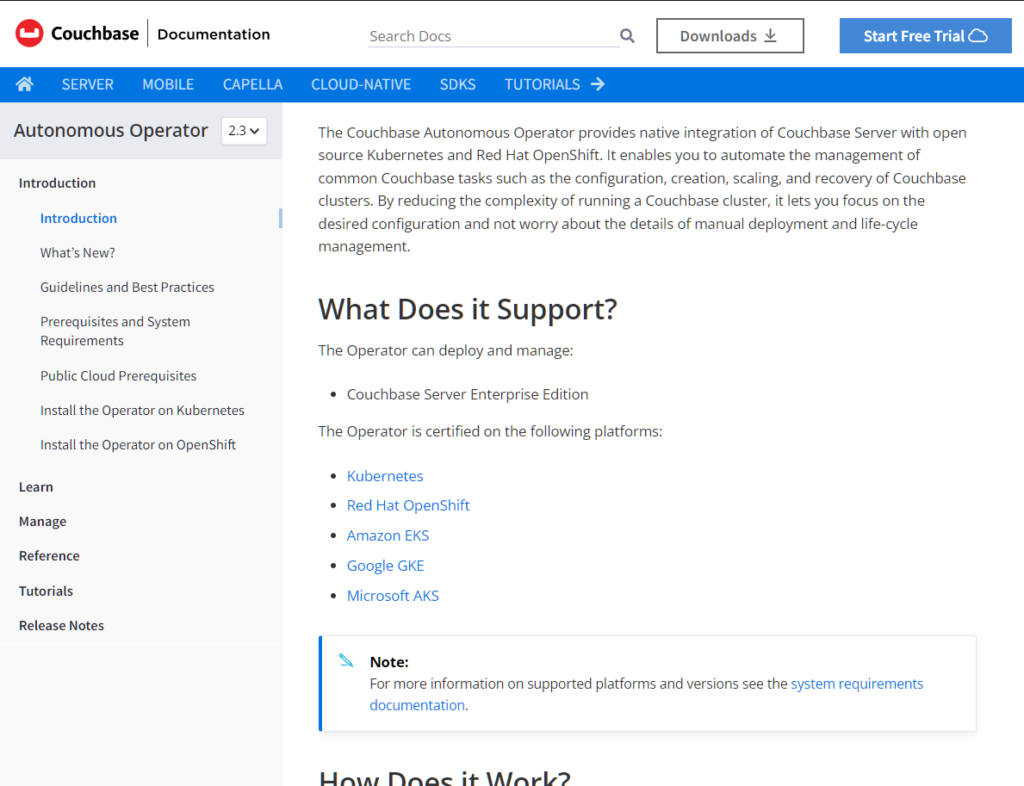
Save and Restore: How to migrate a non-managed topology
We added the Save and Restore feature In Couchbase Autonomous Operator v2.3. This feature allows users to migrate a non-managed Couchbase Cluster and turn it into a managed cluster. This functionality allows you to probe a Couchbase Cluster created by the Autonomous operator with un-managed data topology and retrieve a data topology YAML file that matches that Couchbase cluster’s current data topology. A user can take this deployment YAML file and apply it to the existing cluster to lock down the topology or apply it to a new cluster environment to migrate the environment.
The use cases for this feature are numerous! Still, the one we will focus on in this post is migrating an environment from a manually managed data topology in a rapid/agile R/D environment to a more stable production environment.
Whether you are new to Couchbase or a seasoned pro, the new Save and Restore feature of the Couchbase Autonomous Operator significantly simplifies your CI/CD pipeline. Being able to transition easily from an unmanaged cluster to a managed cluster allows you to continue fast-paced development while maintaining control of environments down the pipeline.
Demonstrating a Couchbase cluster schema migration
To demonstrate this functionality, we first need to create a Couchbase server cluster in Kubernetes in an unmanaged state. We’ll be using this unmanaged.yaml file:
|
1 2 3 4 5 6 7 8 9 10 11 12 13 14 15 16 17 18 19 20 21 22 23 24 25 26 27 28 29 30 31 |
apiVersion: v1 kind: Secret metadata: name: cb-example-auth type: Opaque data: username: QWRtaW5pc3RyYXRvcg== password: cGFzc3dvcmQ= --- apiVersion: couchbase.com/v2 kind: CouchbaseCluster metadata: name: cb-example-unmanaged spec: image: couchbase/server:7.0.3 security: adminSecret: cb-example-auth rbac: managed: false buckets: managed: false servers: - size: 3 name: all_services services: - data - index - query - search - eventing - analytics |
To create this cluster, use the command: This creates a simple unmanaged cluster with all the services, but turns off bucket and RBAC management. It also includes a secret to access the cluster with a username of Administrator and a password of password.
|
1 |
kubectl create -f ./unmanaged.yaml |
To access this cluster, we port-forward port 8091 so that we can access the Couchbase server Admin UI just for quick development access. If you want to access the admin port regularly, see the docs about setting up a load balancer port.
To create this port forwarding, use the command:
|
1 |
kubectl port-forward cb-example-0000 8091 |
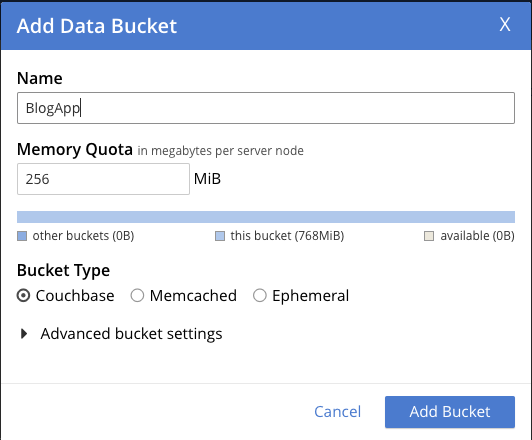
Now we can access the web UI on port 8091 using the administrator credentials and then create some buckets, scopes and collections. In this example, we create a BlogApp bucket, with a scope for en-US and some collections within that scope.
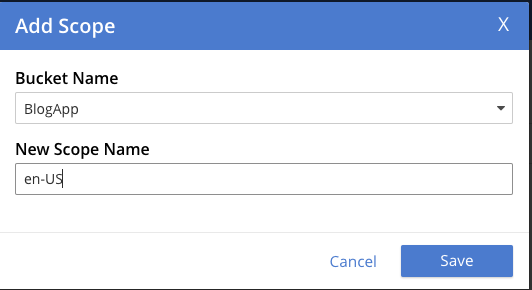
Next, we add the scope for en-US.
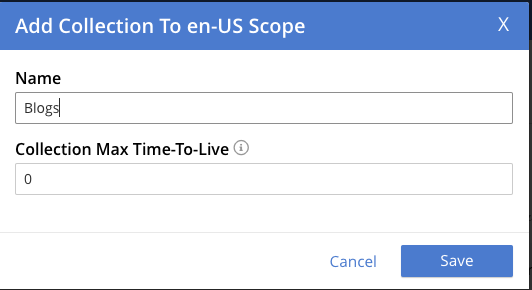
Lastly, we add the Blogs collections.
Now we have a tree structure that looks like this:
|
1 2 3 4 |
Bucket: BlogApp Scope: en-US Collection: Blogs Collection: Recipe |
Once we have our data topology, we can generate a YAML file using the cao binary with the command:
|
1 |
./cao save --couchbase-cluster cb-example-unmanaged --filename ./topology.yaml |
This will output our topology.yaml:
|
1 2 3 4 5 6 7 8 9 10 11 12 13 14 15 16 17 18 19 20 21 22 23 24 25 26 27 28 29 30 31 32 33 34 35 36 37 38 39 40 41 42 43 44 45 46 47 48 49 50 51 52 53 54 55 56 57 58 59 60 61 62 63 64 65 66 67 |
--- apiVersion: couchbase.com/v2 kind: CouchbaseBucket metadata: creationTimestamp: null name: bucket-629f6ab0-d3ad-442e-b8e8-33e71412fae8 spec: compressionMode: passive conflictResolution: seqno evictionPolicy: valueOnly ioPriority: low maxTTL: 0s memoryQuota: 256Mi minimumDurability: none name: BlogApp replicas: 1 scopes: managed: true resources: - kind: CouchbaseScope name: scope-48d41118-fafd-48fa-a128-a539ffdb5efa - kind: CouchbaseScope name: scope-9807f3f5-f798-43f6-bab0-32c44fada0ef --- apiVersion: couchbase.com/v2 kind: CouchbaseScope metadata: creationTimestamp: null name: scope-48d41118-fafd-48fa-a128-a539ffdb5efa spec: collections: managed: true resources: - kind: CouchbaseCollection name: collection-80bf5988-85ed-47b0-986b-44d52dca3389 - kind: CouchbaseCollection name: collection-6da06d0d-c07c-4847-b2b6-0c46f5fed67a name: en-US --- apiVersion: couchbase.com/v2 kind: CouchbaseCollection metadata: creationTimestamp: null name: collection-80bf5988-85ed-47b0-986b-44d52dca3389 spec: maxTTL: 0s name: Recipes --- apiVersion: couchbase.com/v2 kind: CouchbaseCollection metadata: creationTimestamp: null name: collection-6da06d0d-c07c-4847-b2b6-0c46f5fed67a spec: maxTTL: 0s name: Blogs --- apiVersion: couchbase.com/v2 kind: CouchbaseScope metadata: creationTimestamp: null name: scope-9807f3f5-f798-43f6-bab0-32c44fada0ef spec: collections: managed: true preserveDefaultCollection: true defaultScope: true |
Cloning a cluster topology
With the topology file we can now restore this to another cluster, cloning the structure to a new environment. To do this create a managed.yaml with this content:
|
1 2 3 4 5 6 7 8 9 10 11 12 13 14 15 16 17 18 19 20 21 22 |
apiVersion: couchbase.com/v2 kind: CouchbaseCluster metadata: name: cb-example-managed spec: image: couchbase/server:7.0.3 security: adminSecret: cb-example-auth rbac: managed: false buckets: managed: true servers: - size: 3 name: all_services services: - data - index - query - search - eventing - analytics |
Next, we create the managed cluster using: This is similar to our unmanaged.yaml, but instead, the buckets are managed and we re-used our secret from the unmanaged cluster.
|
1 |
kubectl create -f managed.yaml |
Restoring topology to managed cluster
Once that cluster has spun up, you can use the cao binary to restore the topology YAML to the newly created managed cluster:

Lastly, to verify, we’ll create a simple port-forward to the new, managed cluster and verify the data topology. Use the following command to create the port-forward and open your browser to http://127.0.0.1:8091.
|
1 |
kubectl port-forward cb-example-managed-0000 8091 |
You should be greeted with the appropriate data topology.
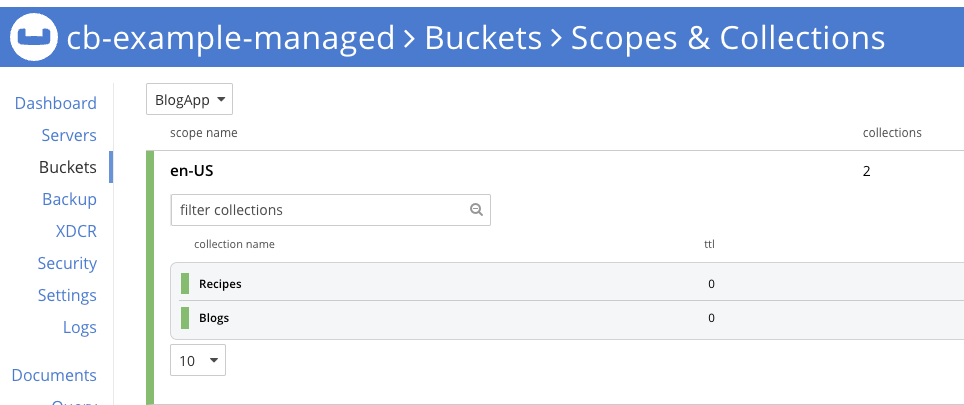
Now that we have migrated the data topology, we may want to migrate the data from one environment to another. I recommend using Cross Data Center Replication (XDCR) to facilitate data movement from one cluster to another. You can find more information about setting up XDCR from the Couchbase Operator Documentation.
Next steps and resources
Some things to keep in mind:
-
- Save does not save RBAC roles/groups. You will need to migrate those on your own.
- The cao tool will inform you of all changes to be made to the destination cluster. Any item marked as delete will be deleted, potentially resulting in data loss.
This post touched on the following topics: