With Couchbase 7.0 you’re now capable of allowing integration of Python UDFs with Couchbase Analytics. In Part 1 of this blog series, we covered the essentials for getting Couchbase and the Analytics for Machine Learning (ML) set up.
ML has radically transformed the ways in which organizations understand their customer’s needs. Advanced analytics domains like predictive analytics (customer churn, customer sentiment, etc.) and financial modeling are growing more reliant on processing data at scale, near real-time and extracting valuable insights from it.
To help our customers obtain analytical insights in real time, we have created a seamless pipeline from Python-based machine learning models to Couchbase Analytics. In this post, I walk through the following steps to show you how to apply external algorithms to data that is resident in Couchbase.
Six steps for applying ML models against your NoSQL data:
- Train the Model
- Codify the Model
- Package and Deploy the code
- Import the needed data for this project
- Writing the UDF
- Using the UDF in your instance for CB (DP Mode)
Before we dive in, let’s find a dataset that will make an interesting demonstration of the capabilities we are building. There are movie reviews on several different websites, but to have a holistic understanding of critic reviews there is no better place than Rotten Tomatoes. This website allows you to compare the ratings given by regular users (audience score) and the ratings or reviews given by critics (tomatometer) who are certified members of various writing guilds or film critic associations.
The two datasets used for this blog can be found on kaggle.com. These are rather large files so a link to them is provided so you can download them when you follow along.
In the movies dataset, each record represents a movie available on Rotten Tomatoes, with the URL used for scraping the movie title, description, genres, duration, director, actors, user ratings, and critic ratings. In the movie_reviews dataset, each record represents a critic review published on Rotten Tomatoes, with the URL used for scraping the critic name, review publication, date, score, and content.
Training the ML model
Before you start exploring the power of integration between ML and NoSQL, you’ll need to develop and train a machine learning model in Python.
For the purposes of this blog, we will use a simple logistic regression model that utilizes the scikit-learn library. At its core, the model takes in data and analyzes their sentiments regarding movie reviews. You can follow along with the steps outlined below or you can download all of the necessary files from our GitHub repo.
For this blog, we are using an open-source predictive algorithm on the movie reviews dataset to determine sentiment, i.e., to determine if the reviews are positive or negative for a given movie. In today’s examples, we have already trained the model using a subset from the file you downloaded earlier. For the purposes of this blog we utilize a CSV (comma-separated values) file to import our data.
Below is a sample of the code for the model itself:

The entirety of the code sample can be found in the GitHub repository.
When you run the model Python script shown above, you should get the following result:

You can read more about scikit-learn metrics like precision, recall, f1-score, and support here. We now have a functional, well-performing machine learning model fully trained in Python.
Creating a Python library
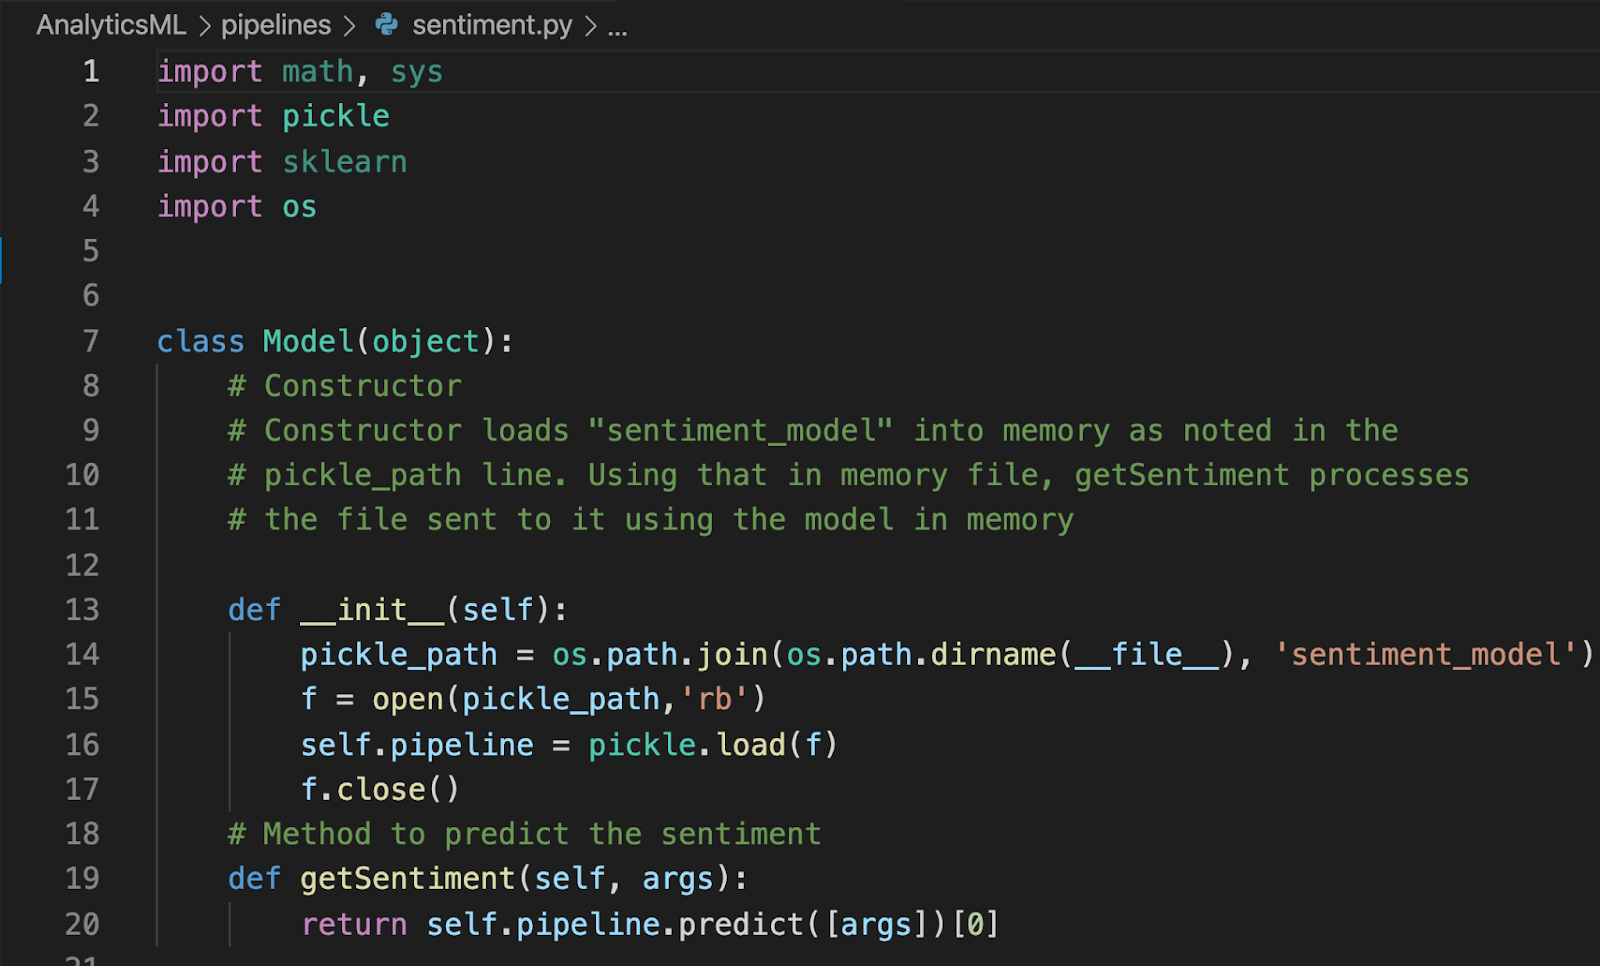
In order to reference the machine learning model, you will need to create a Python library. Below is the library for this particular example:

There are two primary components of the library:
Model constructor—This constructor creates a file called sentiment_model in the pipelines folder of our Jupyter environment.
getSentiment method—This method predicts the customer sentiment associated with the parameter (or argument) passed into it.
Save the file as sentiment.py within the pipelines folder with the file sentiment_model.
Packaging and deploying the library
This is a critical step in what will come next—unlocking the power of Python user-defined functions! Please pay attention to detail as it is more syntax-dependent than any of the others. Be sure to read the appropriate documentation closely. Follow the link to learn more about User-Defined Functions.
To package the model and library we created in the previous steps, we will use the shiv utility. If shiv is not already installed, use the command pip install shiv (or pip3 install shiv depending on your environment). Additionally, if you’re interested in reading the documentation for this command line utility, you can find it here.
Steps to package the model:
- On your laptop, package the sentiment model and the model code. This makes it self-executing and removes any library dependencies:
-
- shiv –site-packages pipelines/ -o pipeline.pyz –platform manylinux1_x86_64 –python-version 39 –only-binary=:all: scikit-learn
–platform manylinux1_x86_64 is only needed when using a virtual machine running Linux.
- Copy the self-contained Python package with the needed dependencies to the analytics server:
- docker cp pipeline.pyz cb-analytics:/tmp/
- Access the shell of the cb-analytics Docker container:
- docker exec -it cb-analytics bash
- From within the Docker shell, go to the tmp folder where the zip file is located and import the data needed for the two buckets:
- cd /tmp
- curl -v -X POST -F “data=@./pipeline.pyz” -F “type=python” “localhost:8095/analytics/library/Default/sentimentlibrary” -u Administrator:password;
- The system will update when it is complete and will be successful when you see this HTTP 200 response:

Importing Bucket Document For The UDF To Analyze
There are two steps to take on your local machine and three commands to run on the Docker instance.
Local machine
0. Create buckets movie or movie_reviews either in the web console or via the couchbase-cli command
- Run: docker cp rotten_tomatoes_critic_reviews.csv cb:/tmp/ This file is over the 100Mb limit of the GUI import utility and needs to be imported directly.
Docker instance
2. docker exec -it cb bash
3. cbimport csv –infer-types -c http://localhost:8091 -u Administrator -p password -d ‘file://rotten_tomatoes_critic_reviews.csv’ -b ‘movie_reviews’ –scope-collection-exp “_default._default” -g “%rotten_tomatoes_link%”
4. cbimport csv –infer-types -c http://localhost:8091 -u Administrator -p password -d ‘file://rotten_tomatoes_movies.csv’ -b ‘movies’ –scope-collection-exp “_default._default” -g “%rotten_tomatoes_link%”
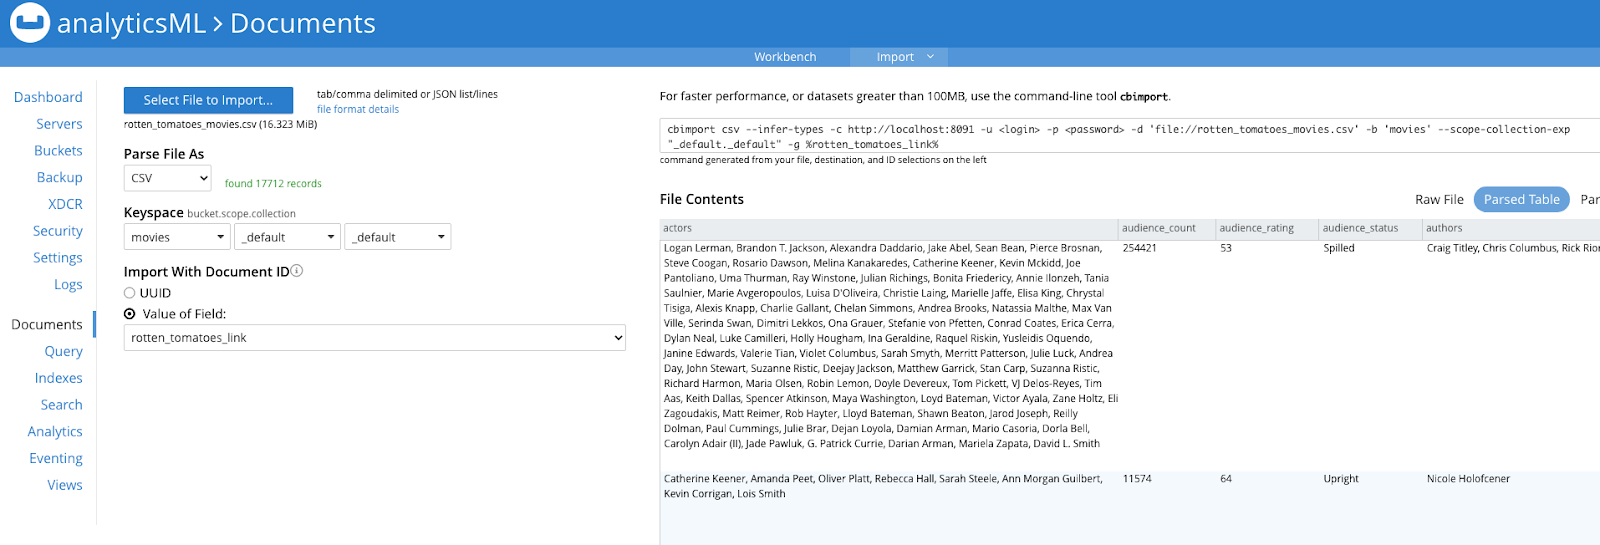
You can either import the last file (rotten_tomatoes_movies.csv) from the command line as shown above or from the Couchbase Web Console > Document > Import screen from the Couchbase portal as shown in this screenshot:

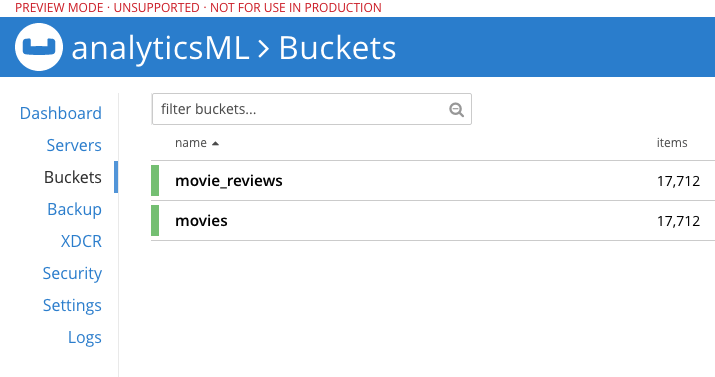
You now have documents in the two buckets and they contain the review and the movie summaries in Couchbase to run your sentiment analysis against.

Writing UDFs
It’s time to write our very own user-defined function in Couchbase Analytics. If you need a refresher, here is a link to our documentation on User-Defined Functions. Refer to the library (the Model constructor and getSentiment method) we created in Step 2 and then uploaded to the Analytics server in Step 3. Those are now referenced in the following user-defined function:
|
1 2 |
CREATE ANALYTICS FUNCTION getReviewSentiment(text) AS "sentiment", "Model.getSentiment" AT sentimentlibrary; |
Create the Analytics UDF in the same location (sentimentlibrary) as specified in the curl function.
Invoking the UDFs
Harnessing the capabilities of N1QL, we can now write predictive queries within Couchbase Analytics to derive powerful insights from our UDFs. Under the covers, when invoking this UDF it calls the underlying Model method which iterates over each row to do the sentiment analysis. The following is a basic example of such a query, but the possibilities are truly endless.
|
1 2 3 4 5 6 |
USE Default; SELECT getReviewSentiment(r.review_content) AS sentiment, COUNT(*) AS sentimentCount FROM movie_reviews r, movies m WHERE m.rotten_tomatoes_link = r.rotten_tomatoes_link GROUP BY getReviewSentiment(r.review_content) ORDER BY sentimentCount DESC; |
With such a query you will get results like the following:
|
1 2 3 4 5 6 7 8 9 10 |
[ { "sentimentCount": 10105, "sentiment": "Fresh" }, { "sentimentCount": 7601, "sentiment": "Rotten" } ] |
We now have an ordered count of positive, neutral, and negative sentiments as defined by our trained model.
Conclusion
Congrats, you just set up the needed Couchbase Server environment on Docker and successfully ran your first User Defined Function on Couchbase Analytics. As you can see, the integration of your Python ML models with UDFs and Couchbase Analytics promises to be an effective way of extracting valuable information from your data without compromising on performance or efficiency.
Please feel free to share any questions or feedback in the comments below or via a post in Couchbase Forums. We can’t wait to see how you’ll combine the power of ML and NoSQL for your enterprise.
Want to learn more about Couchbase Analytics watch our Connect Session: Machine Learning Meets NoSQL: Python UDFs.
Here is a summary of the links and topics mentioned in this post:
- Part 1 – ML Meets NoSQL: Integrating Python User-Defined Functions with N1QL for Analytics
- Couchbase AnalyticsML GitHub repository
- Kaggle dataset of Rotten Tomatoes reviews
- Couchbase User-defined Functions documentation
Acknowledgments
Thanks to Anuj Kothari, a summer Product Management Intern for Couchbase Analytics service, who’s initial efforts got this started and off the ground last summer. Thanks to Idris Motiwala, Principal Product Manager on the Couchbase Analytics Service, and Ian Maxon, a software engineer for the Couchbase Analytics Service, for their editorial work in making this a more functional blog.
