Aaron Benton is an experienced architect who specializes in creative solutions to develop innovative mobile applications. He has over 10 years experience in full stack development, including ColdFusion, SQL, NoSQL, JavaScript, HTML, and CSS. Aaron is currently an Applications Architect for Shop.com in Greensboro, North Carolina and is a Couchbase Community Champion.

For our last post in the FakeIt series we are going to explore how we can leverage FakeIt + Couchbase Server + Sync Gateway to get our local environment up and running for mobile development. We will be doing this by using Docker and docker-compose. Disclaimer: I am by no means a Docker expert, this is simply an example of what I’ve done to quickly setup a development environment and dataset.
Docker
We will be using two Docker Containers, one for Couchbase Server and one for Sync Gateway. We could define a docker-compose.yaml file that simply pulled from couchbase:latest and couchbase/sync-gateway:latest but there would still be a need for manual configuration and we want to be able to automate as much as possible for our application. To do that we will need to build our own containers from both of these adding our own scripts and configuration.
|
1 2 3 4 5 6 7 8 9 10 11 12 13 14 15 16 17 18 19 20 21 22 23 |
./docker-compose.yaml version: '2' services: fakeit-couchbase: build: context: ./.docker/couchbase/ container_name: fakeit-couchbase ports: - "8091-8094:8091-8094" - "11210:11210" volumes: - ./:/app fakeit-syncgatway: build: context: ./.docker/sync-gateway/ container_name: fakeit-syncgateway depends_on: - fakeit-couchbase ports: - "4984-4985:4984-4985" volumes: - ./:/app |
Our docker-compose.yaml file is first building a container in the Dockerfile from ./.docker/couchbase/Dockerfile which looks like this.
|
1 2 3 4 5 6 7 8 9 10 |
./.docker/couchbase/Dockerfile # start with couchbase FROM couchbase:latest # copy the configure script COPY scripts/configure-node.sh /opt/couchbase # execute the configure-node.sh script CMD ["/opt/couchbase/configure-node.sh"] |
This Dockerfile is really only doing two things, copying a configuration script and executing that script. The configure-node.sh script looks like this.
|
1 2 3 4 5 6 7 8 9 10 11 12 13 14 15 16 17 18 19 20 |
./.docker/couchbase/scripts/configure-node.sh set -m /entrypoint.sh couchbase-server & echo 'Waiting 20 seconds for Couchbase service to start' sleep 20 # configure the cluster echo 'Configuring Cluster' /opt/couchbase/bin/couchbase-cli cluster-init -c localhost:8091 --cluster-username=Administrator --cluster-password=password --cluster-port=8091 --cluster-ramsize=500 --service=data # create the ecommerce bucket echo 'Creating ecommerce bucket' /opt/couchbase/bin/couchbase-cli bucket-create -c localhost:8091 -u Administrator -p password --bucket=ecommerce --bucket-eviction-policy=fullEviction --bucket-type=membase --bucket-priority=high --enable-index-replica=0 --bucket-port=11211 --enable-flush=1 --bucket-replica=1 --bucket-ramsize=200 echo 'Couchbase server is ready' fg 1 |
The configure-node.sh script is doing a couple of things:
- Waiting for the Couchbase service to start so it can be configured
- Initializing the Cluster configuration
- Creating our ecommerce bucket
The Couchbase container is now built, the next container that needs to be built is the Sync Gateway container. By default the Sync Gateway container uses the walrus memory only sync gateway bucket. We will need to update this configuration by providing our own sync-gateway.json file so we can update the storage and access settings. Lastly, the Sync Gateway container only exposes port 4984, which is the public port, as this is for development purposes we will go ahead and expose port 4985 which is the administrator port.
|
1 2 3 4 5 6 7 8 9 10 11 12 13 14 15 16 17 18 19 20 21 22 23 24 25 26 27 28 29 30 31 32 33 34 35 36 37 38 39 40 41 42 43 44 45 46 47 48 49 50 51 52 53 54 55 56 57 58 59 60 61 62 63 64 65 66 67 68 69 70 71 |
./.docker/sync-gateway/Dockerfile # Start with the base sync gateway FROM couchbase/sync-gateway:latest # Copy the sync-gateway.json into the container COPY sync-gateway.json /opt/sync_gateway/sync-gateway.json # Create Volume for data to persist RUN mkdir -p /opt/sync_gateway/data # Copy Entry Point COPY scripts/entrypoint.sh / ENTRYPOINT ["/entrypoint.sh"] # Copy the configure script COPY scripts/configure-node.sh /opt/sync_gateway # Configure the Sync Gateway and Start it CMD ["/opt/sync_gateway/configure-node.sh"] # port 4984: public port # port 4985: admin port EXPOSE 4984 4985 ./.docker/sync-gateway/sync-gateway.json { "interface": "0.0.0.0:4984", "adminInterface": "0.0.0.0:4985", "log": ["CRUD+", "REST+", "Changes+", "Attach+"], "CORS": { "Origin":[ "http://localhost:8000", "*" ], "LoginOrigin":[ "http://localhost:8000", "*" ], "Headers":["Content-Type"], "MaxAge": 1728000 }, "databases": { "ecommerce": { "server": "http://fakeit-couchbase:8091", "bucket": "ecommerce", "users": { "GUEST": { "disabled": false } }, "sync": "function(doc, oldDoc) { channel(doc.channels); }" } } } ./.docker/sync-gateway/scripts/configure-node.sh #!/bin/bash set -m echo 'Waiting 20 seconds for Couchbase service to start and warm up' sleep 20 echo 'Starting the Sync Gateway Service' /entrypoint.sh sync_gateway /opt/sync_gateway/sync-gateway.json echo 'Couchbase Sync Gateway is ready' |
Again, this is for development purposes only. You should never allow access from anywhere to your adminInterface or enable GUEST access to your sync-gateway unless there is a very good reason to do so.
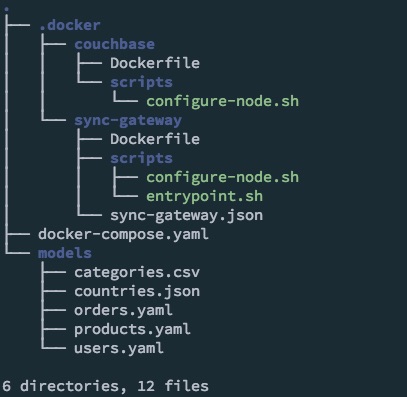
The structure of our app now looks like this:

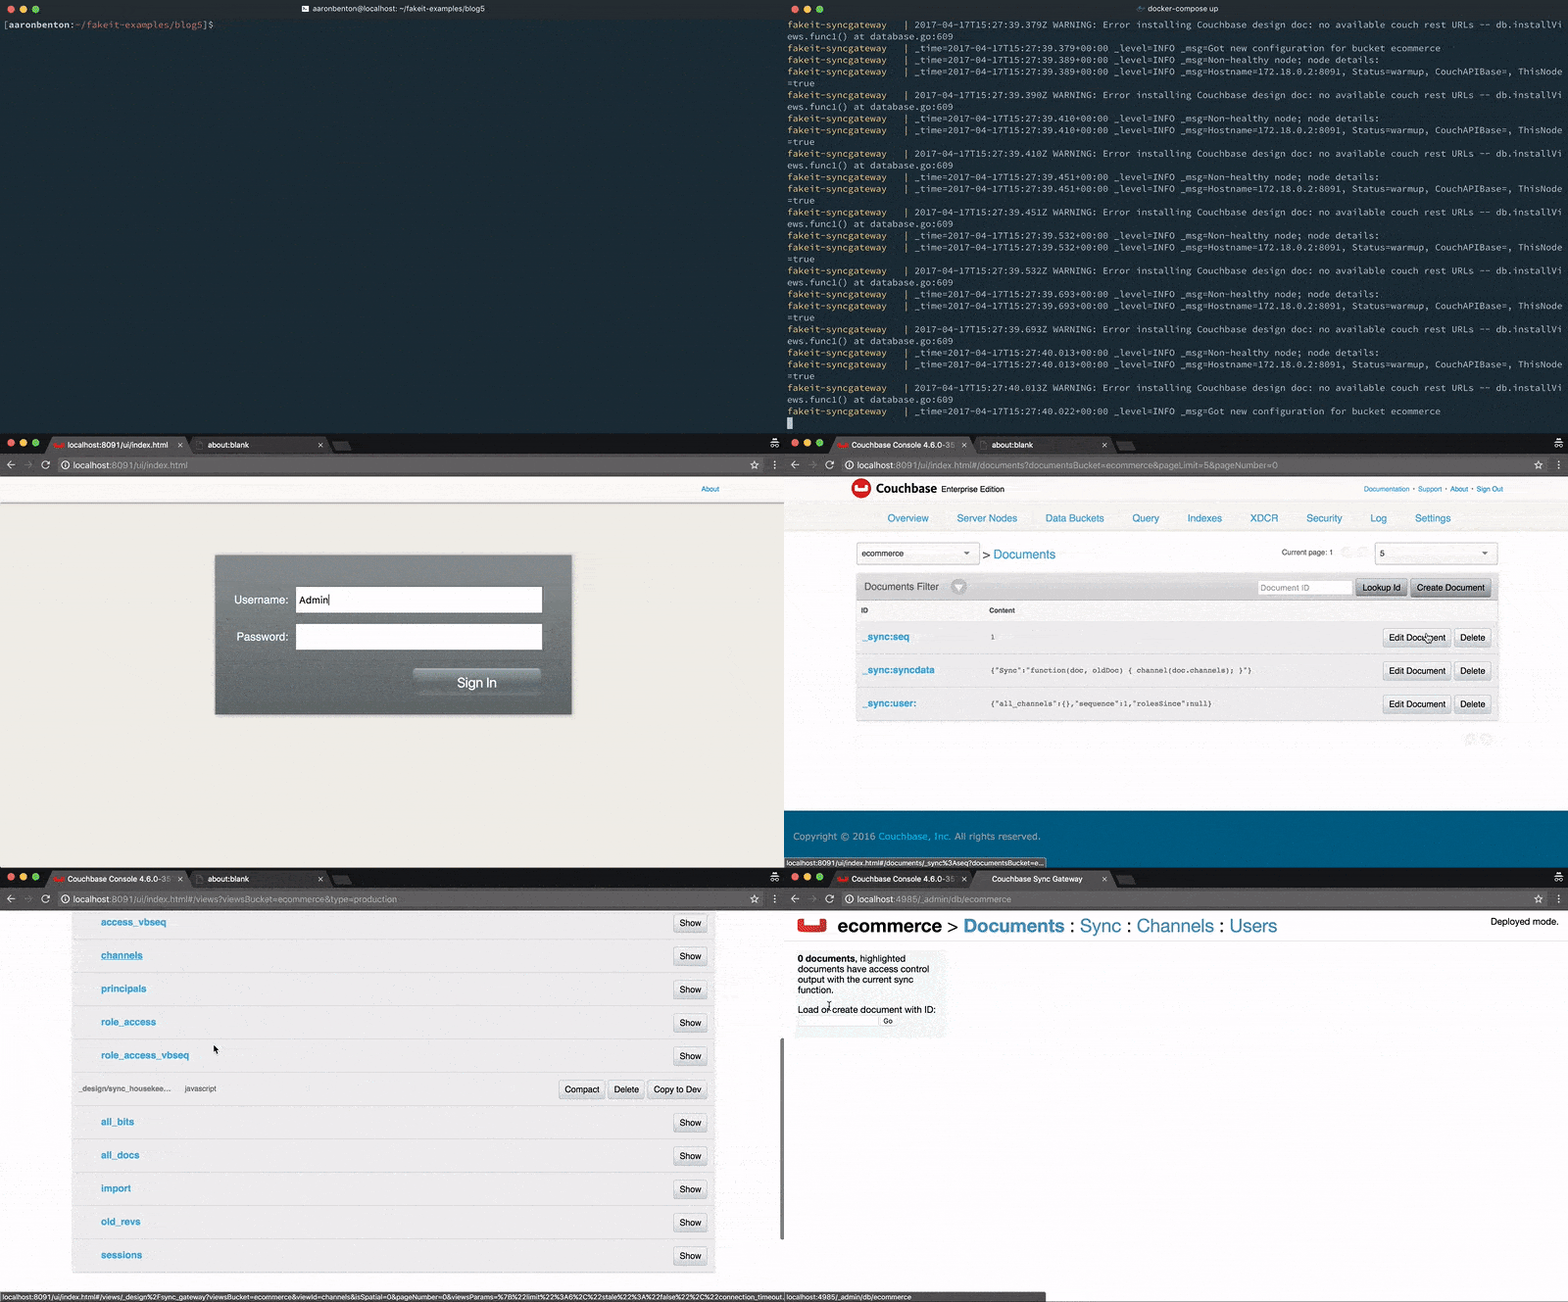
Now that we have configured out Docker containers and setup our docker-compose.yaml file we need to build and start the containers. We do this by executing the following command from within our applications directory:
|
1 |
docker-compose up -d |
Note: for the purposes of the screencast, the -d parameter to run the containers in detached mode is omitted.

Models
Our containers are now started, the next thing we need to do before we generate our dataset is update the models to support the channels attribute.
|
1 |
users.yaml |
This model will only be synced to user specific channels.
|
1 2 3 4 5 6 7 8 9 10 11 12 13 14 15 16 17 18 19 20 21 22 23 24 25 26 |
name: Users type: object key: _id data: min: 1000 max: 2000 inputs: ./countries.json properties: _id: type: string description: The document id built by the prefix "user_" and the users id data: post_build: `user_${this.user_id}` channels: type: array data: post_build: | return [ `channel-user-${this.user_id}` ]; doc_type: type: string description: The document type data: value: "user" ... products.yaml |
Just for fun we will publish this model to a global channel all of our users will be subscribed to.
|
1 2 3 4 5 6 7 8 9 10 11 12 13 14 15 16 17 18 19 20 21 22 23 24 25 26 27 28 |
name: Products type: object key: _id data: min: 500 max: 1000 inputs: - ./categories.csv pre_build: globals.current_category = faker.random.arrayElement(inputs.categories); properties: _id: type: string description: The document id data: post_build: `product_${this.product_id}` channels: type: array data: build: | return [ `channel-products` ]; doc_type: type: string description: The document type data: value: product ... orders.yaml |
This model will only be synced to user specific channels.
|
1 2 3 4 5 6 7 8 9 10 11 12 13 14 15 16 17 18 19 20 21 22 23 24 25 26 |
name: Orders type: object key: _id data: dependencies: - products.yaml - users.yaml min: 5000 max: 6000 properties: _id: type: string description: The document id data: post_build: `order_${this.order_id}` channels: type: array data: build: | return [ `channel-user-${this.user_id}` ]; doc_type: type: string description: The document type data: value: "order" ... |
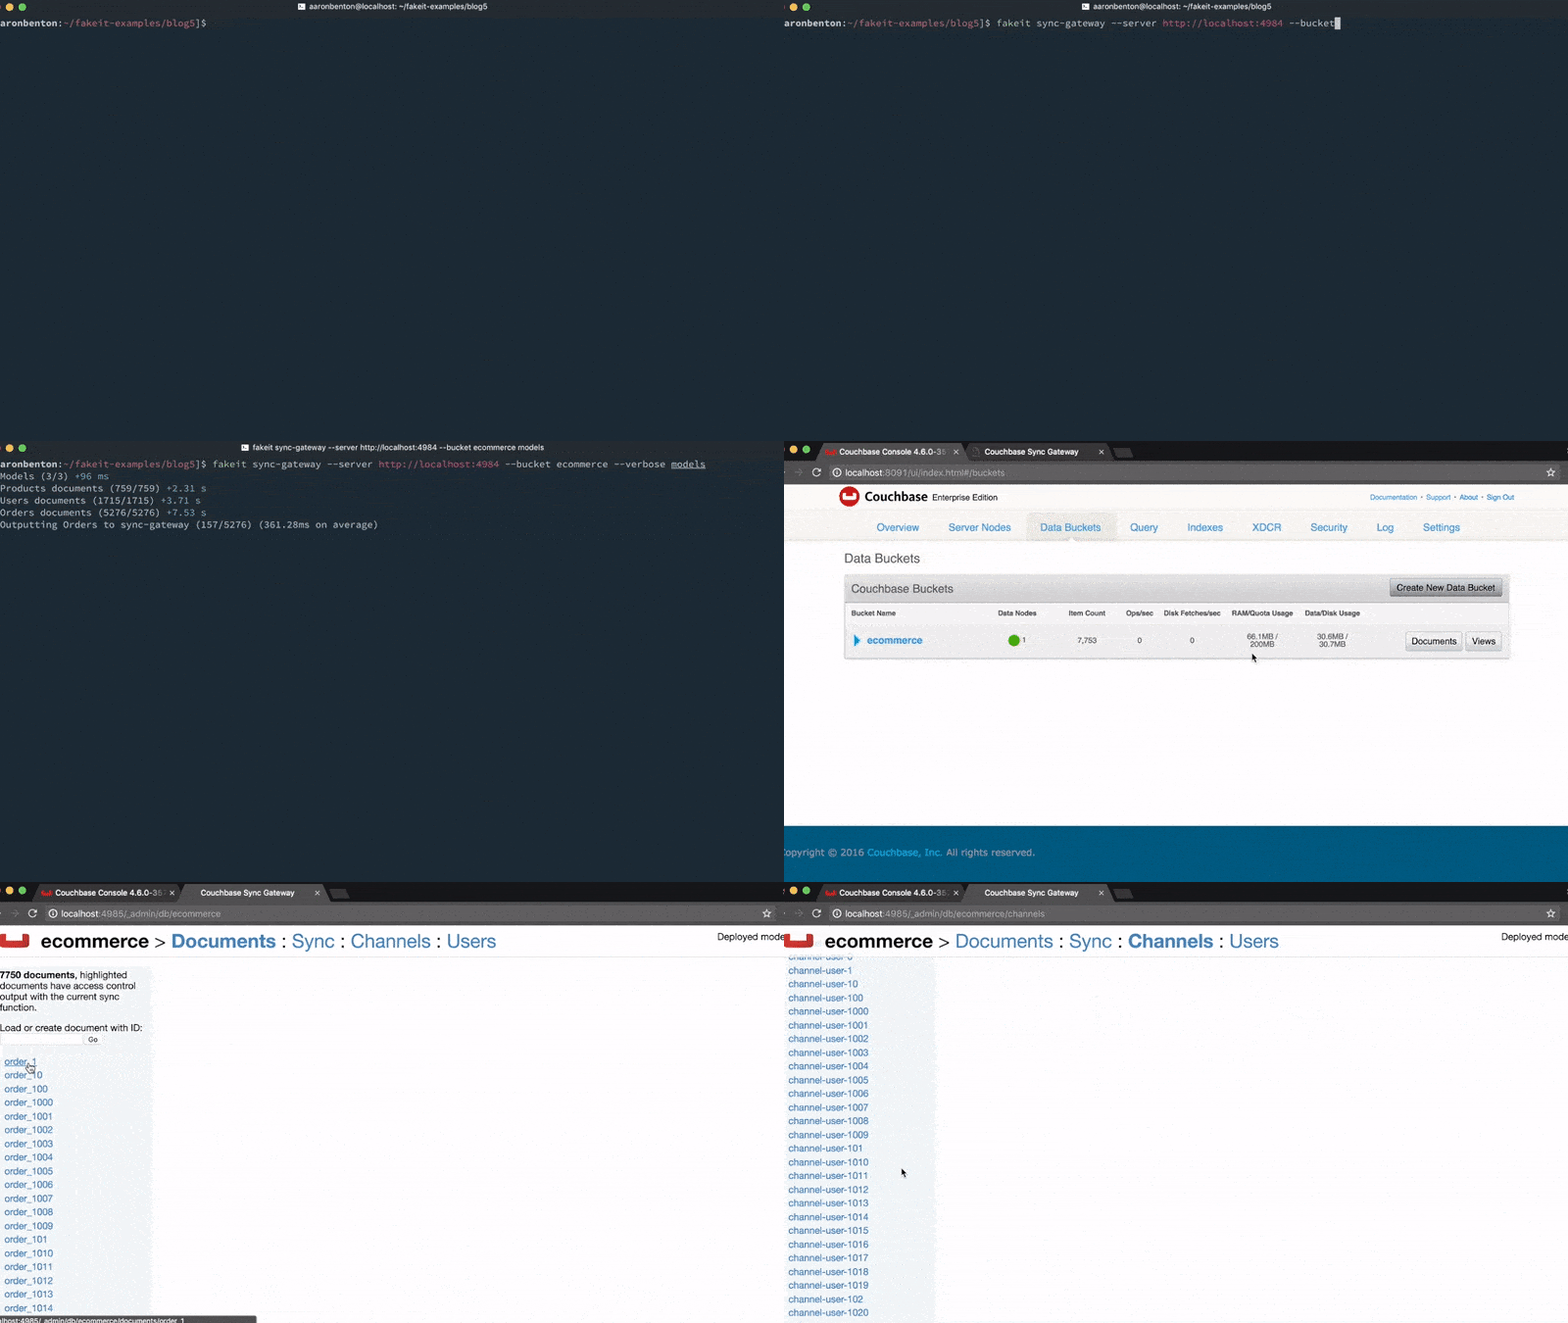
Now that our models have been updated to support channels, we can generate our random dataset and push it into Couchbase Server through the Sync Gateway REST API. We tell FakeIt to do this by using the following command:
|
1 |
fakeit sync-gateway --server http://localhost:4984 --bucket ecommerce --verbose models/* |
For development purposes we have allowed guest access to our Sync Gateway. However, if you have guest access disabled, you can still use FakeIt by specifying a username and password to an existing user by using the following command:
|
1 |
fakeit sync-gateway --server http://localhost:4984 --bucket ecommerce --username YOURUSERNAME --password YOURPASSWORD --verbose models/* |
Before the generated dataset is output, FakeIt will authenticate against the Sync Gateway to retrieve the necessary session information.

Testing
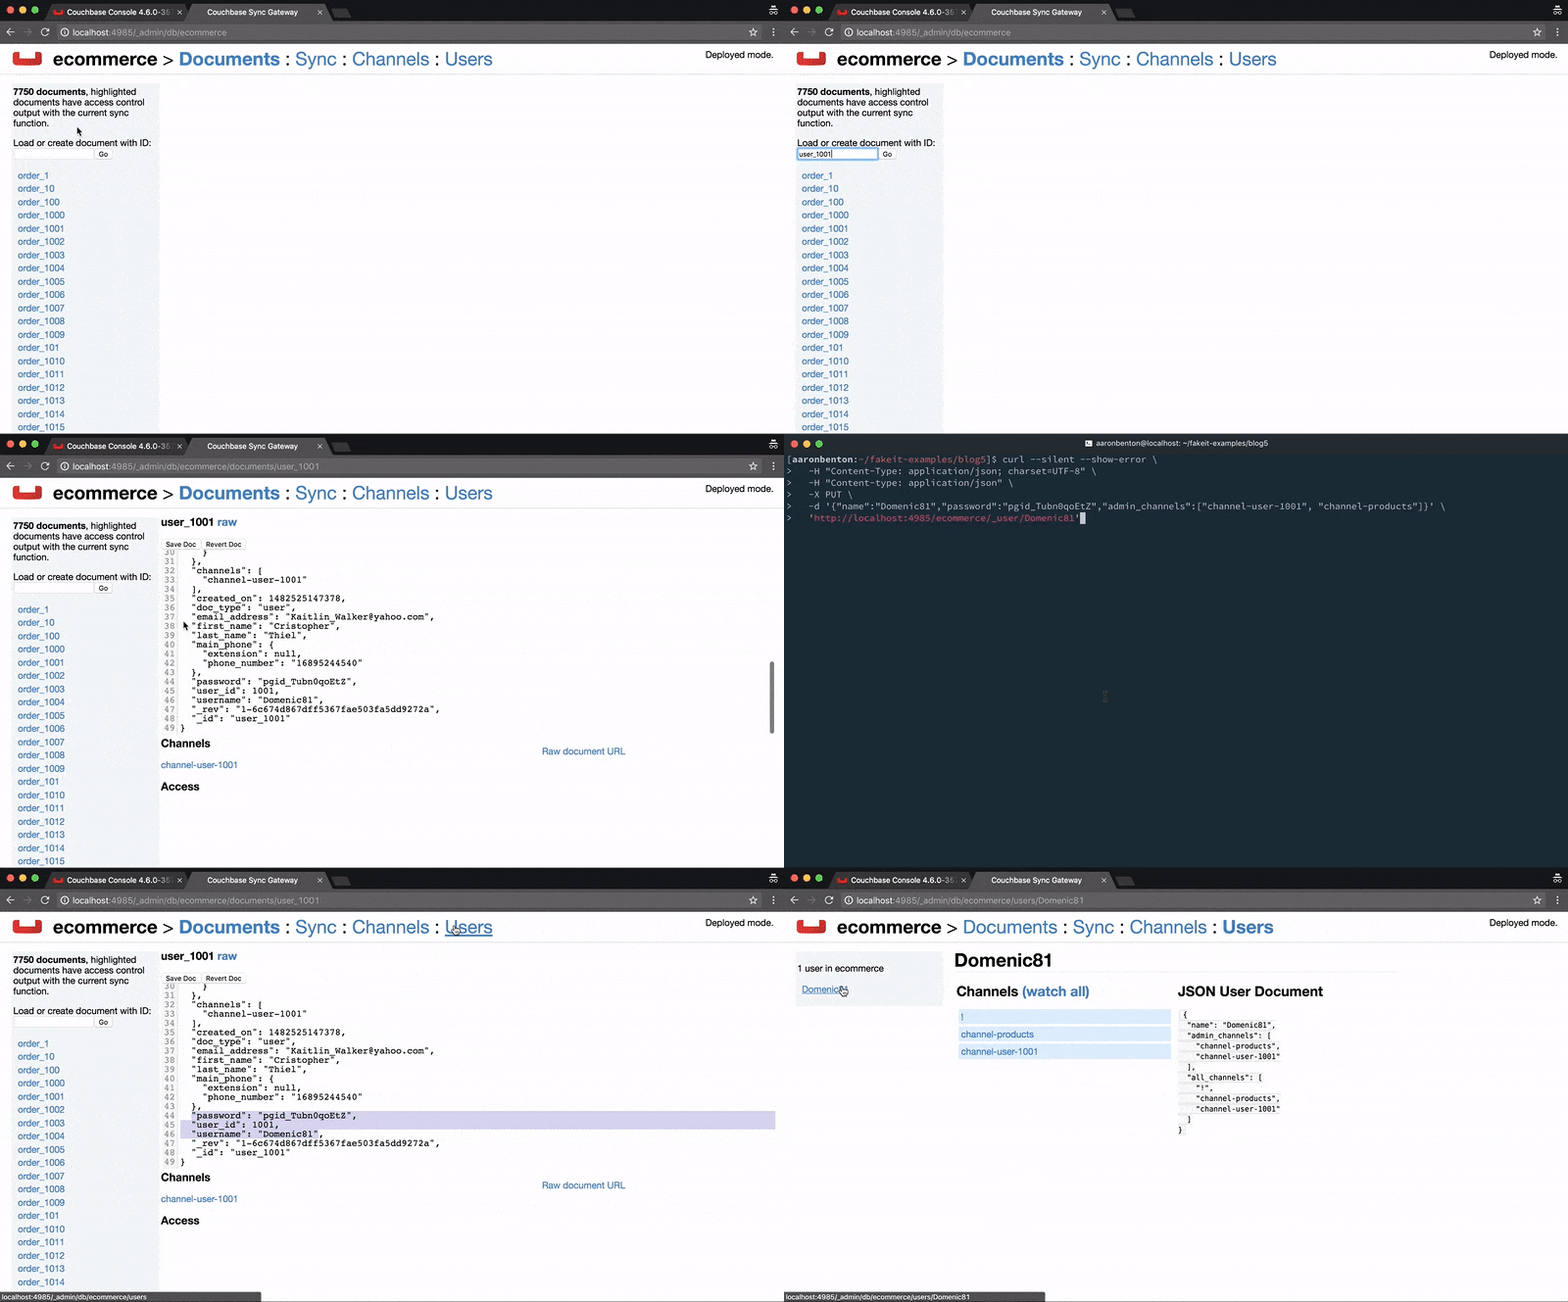
The next thing we need to do is to create a sync gateway user so that we can sync their documents locally. For this test, we are going to grab a random user document from our Users model and create a user from that document. In this example it will be user_1001, and we will create the user using the curl command:
|
1 2 3 4 5 6 |
curl --silent --show-error \ -H "Content-Type: application/json; charset=UTF-8" \ -H "Content-type: application/json" \ -X PUT \ -d '{"name":"Domenic81","password":"pgid_Tubn0qoEtZ","admin_channels":["channel-user-1001", "channel-products"]}' \ 'http://localhost:4985/ecommerce/_user/Domenic81' |

Application
We’ve created a small VueJS project that utilizes PouchDB to connect to the Sync Gateway and pull an authenticated users documents. Our application is going to just show the different types of documents available, their IDs and content.
|
1 2 3 4 5 6 7 8 9 10 11 12 13 14 15 16 17 18 19 20 21 22 23 24 25 26 27 28 29 30 31 32 33 34 35 36 37 38 39 40 41 42 43 44 45 46 47 48 49 50 51 52 53 54 55 56 57 58 59 60 61 62 63 64 65 66 67 68 69 70 71 72 73 74 75 76 77 78 79 80 81 82 83 84 85 86 87 88 89 90 91 92 93 94 95 |
// register highlight.js vue component Vue.use(VueHighlightJS) // create local ecommerce database var db = new PouchDB('local_ecommerce', { auto_compaction: true, revs_limit: 3 }); // create remote ecommerce database var remote_db = new PouchDB('http://localhost:4984/ecommerce/', { auth: { username: 'Domenic81', password: 'pgid_Tubn0qoEtZ' }, skip_setup: true }); // merge remote database with local database PouchDB.sync(db, remote_db, { live: true, retry: true }) var app = new Vue({ el: '#app', data: { current_type: '', items: [], id: '', current: JSON.stringify({}), types: [], }, watch: { id(id) { if (id) { db.get(id).then((current) => this.current = JSON.stringify(current, null, 2)) } }, current_type(type) { this.id = '' // update the current item to be blank this.current = JSON.stringify({}) // when `current_type` changes update the items list with the current types list this.updateItems(type) .then(() => { if (!this.id) { this.id = this.items[0] } }) } }, methods: { updateItems(type) { return db.query('ecommerce/by_doc_type', { key: type, reduce: false }) .then((result) => { this.items = result.rows.map((item) => item.id) }) }, removeStyle(el) { setTimeout(() => { el.style = '' }, 1000) } }, created() { // create the view to be queried var ddoc = { _id: '_design/ecommerce', views: { by_doc_type: { map: function(doc) { if (doc.doc_type) { emit(doc.doc_type); } }.toString(), reduce: '_count' } } } db.put(ddoc) // design document created // call the design document view index immediately to trigger a build .then(() => db.query('ecommerce/by_doc_type', { limit: 0 })) .catch((err) => { // it is fine if this fails and returns a document conflict that just means it doesnt need to be created if (err.status !== 409) { throw err; } }) // get all of the doc types available .then(() => db.query('ecommerce/by_doc_type', { reduce: true, group: true })) .then((types) => { this.types = types.rows.map((type) => type.key) this.current_type = this.types[0] }) } }) |

The entire sample application can be viewed at https://github.com/bentonam/fakeit-couchbase-mobile-example
Conclusion
Throughout this series you’ve seen how FakeIt can take simple YAML models and generate vast amounts of fake data and send that data to multiple different destinations. Please checkout the repository, pull requests are welcome, we are always looking for improvements and enhancements to make the tool more useful for the community. I would also like to take this time to thank those who’ve made contributions to the project. The 1.0 version would not have been released without the help of Tyler Benton (@tjbenton21), also Trevor Brindle (@VinceKerrazzi), Jessica Kennedy (@mistersender), Adam Burdette (@RavenStorms619) and Brant Burnett (@btburnett3)
Previous
- FakeIt Series 1 of 5: Generating Fake Data
- FakeIt Series 2 of 5: Shared Data and Dependencies
- FakeIt Series 3 of 5: Lean Models through Definitions
- FakeIt Series 4 of 5: Working with Existing Data
