ASP.NET Core Microservices: applications that will be responsible for a single “vertical” slice of an overall application/service architecture.
Why ASP.NET Core microservices?
There are a lot of opinions and recommendations about what microservices are, when to use microservices vs a monolith, and more.
Microservices pic.twitter.com/3xYWUgP2QW
— David Neal 🥓🥑 (@reverentgeek) July 10, 2017
This article is not going to tackle those questions in full. Instead, we’re just going to try to walk before we can fly.
Let’s consider that we’re exploring microservices architecture, and we want to take advantage of polyglot persistence to use a NoSQL database (Couchbase) for a particular use case. For our project, we’re going to look at a Database per service pattern, and use Docker (docker-compose) to manage the database for the ASP.NET Core Microservices proof of concept.
This blog post will be using Couchbase Server, but you can apply the basics here to the other databases in your microservices architecture as well.
I’m using ASP.NET Core because it’s a cross-platform, open source framework. Additionally, Visual Studio (while not required) will give us a few helpful tools for working with Docker and docker-compose. But again, you can apply the basics here to any web framework or programming language of your choice.
Step 1: Create a new solution
I’ll be using Visual Studio for this blog post, but you can achieve the same effect (with perhaps a little more work) in Visual Studio Code or plain old command line.
Create a new ASP.NET Core project. I called mine HelloMicroservice (and the full source code is available on GitHub for your reference.
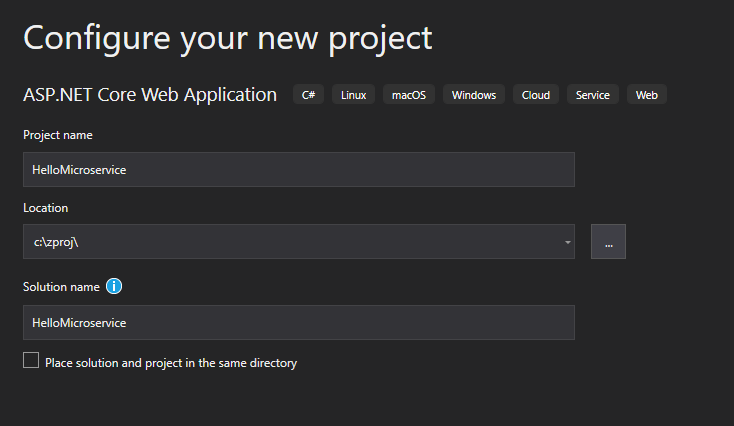
For my ASP.NET Core Microservice, I made these decisions in Visual Studio as well:
- Web application MVC (This generates some basic HTML for display purposes, but you could just as easily use an API project instead)
- ASP.NET Core 3 (the latest ASP.NET Core at the time of writing)
- Configure for HTTPS (not strictly necessary, but a good idea)
- Enable Docker support
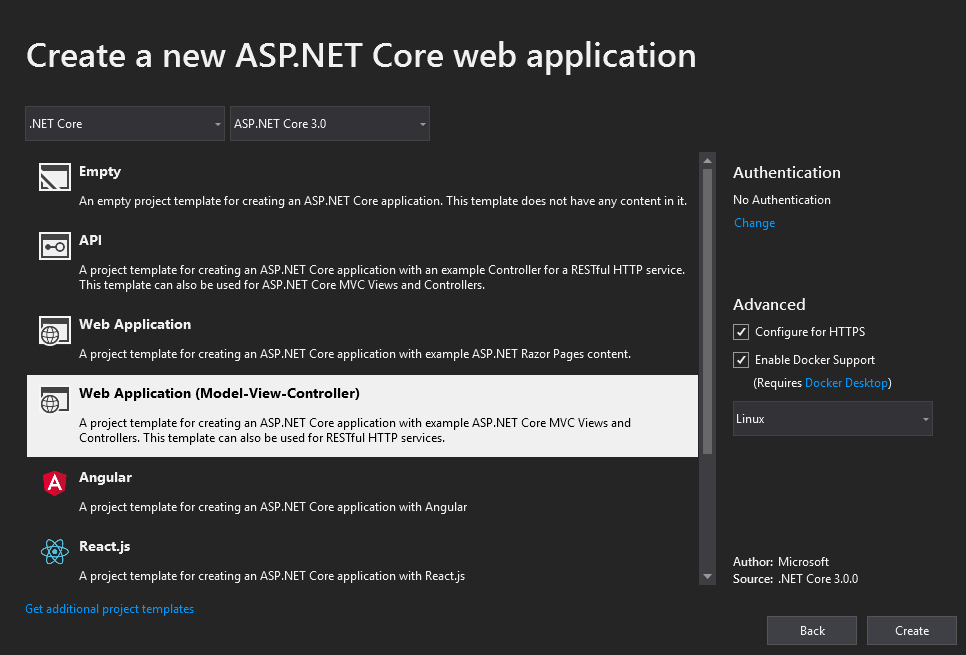
At this point, you should have a very basic ASP.NET Core project. Next, we’ll add some orchestration and a database.
Step 2: Add docker-compose support
Right click on the project, and click “Add” and then “Container Orchestrator Support”.
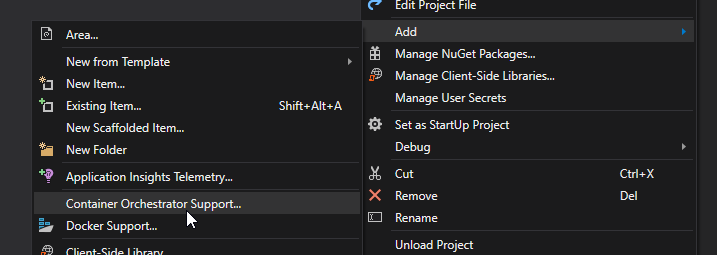
Keep in mind that the sole purpose of this project is to start development for a proof of concept for ASP.NET Core Microservices. Docker-compose is easier to deal with than Kubernetes for local machine development. This is why I’m choosing the “Docker Compose” option, even though I may eventually want to deploy to Kubernetes.

I also chose Linux, because that is what I expect to deploy to later.
After you complete this step, a “docker-compose” item will be added to your solution.
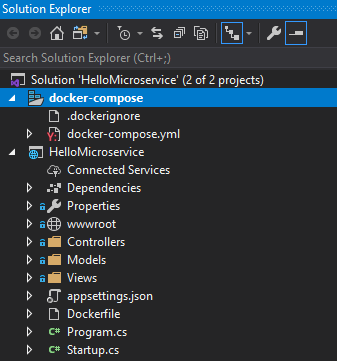
If you take a look at the docker-compose.yml file, you will see that it has one service defined in it: hellomicroservice. Also notice that “Docker Compose” now appears in the Visual Studio toolbar.
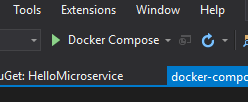
At this point, you can hit CTRL+F5 to run. Visual Studio will use Docker Compose to create an image of your project and run it within Docker. Your browser should open automatically, and you’ll see the standard “Welcome” screen
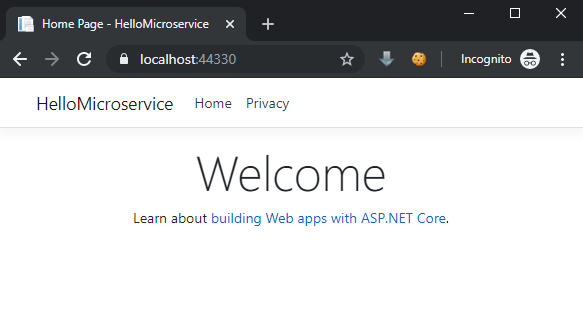
We’re making progress. The next thing we need to do is get a database running with docker-compose and get our ASP.NET Core application talking to the database. Once those next steps are complete, we’ll have the very basic minimal shell of ASP.NET Core Microservices.
Step 3: Add database orchestration to docker-compose
Couchbase makes official container images available on Docker Hub. To use these images, lets add another service under services: in the docker-compose.yml file:
|
1 2 3 4 5 6 7 |
services: couchbase: image: couchbase:enterprise-6.0.3 volumes: - "./couchbase:/opt/couchbase/var" # local folder where couchbase data stored ports: - "8091:8091" # Allows local access to mgmt UI |
The basics of what you need are:
couchbase:This starts a service definition named “couchbase” (you can name it something else if you’d like)image: couchbase:enterprise-6.0.3The image to use for this service. It’s always a good idea to be explicit and use a tag like this, otherwise it may default to the “latest” image, which isn’t necessarily what you want.ports:This defines which port number(s) to expose outside of Docker. I’m exposing only 8091, because that is the Couchbase UI port numbers (see also: Network and Firewall Requirements)
The volumes: isn’t strictly necessary. However, using a volume means that even when the couchbase image stops running, the data files in /opt/couchbase/var will be saved to the host computer (your computer’s file system) and can be mounted again the next time you run the image. This means that any data you put in couchbase will still be there the next time you run the image.
If you hit CTRL+F5 to run the application, Docker Compose will start orchestration, including both the hellomicroservice and the couchbase image. They don’t have anything to do with each other (yet) other than they are running side-by-side inside of Docker. If you open a command line and run docker ps, you should see something like this:
|
1 2 3 4 5 |
PS C:\WINDOWS\system32> docker ps IMAGE COMMAND CREATED STATUS PORTS NAMES hellomicroservice:dev "tail -f…" 8 min… Up 8… 0.0.0.0... dockercompose1524…56534_hellomicroservice_1 couchbase:enterprise-6.0.3 "/entryp…" 8 min… Up 8… 8092-8096... dockercompose1524…56534_couchbase_1 PS C:\WINDOWS\system32> |
(I heavily truncated the above text to fit the relevant information in the width of this blog post).
Step 4: Configuration changes
Because I’ve used the stock couchbase:enterprise-6.0.3 Docker image, I still need to open the Couchbase UI (http://localhost:8091) and setup the cluster manually. See “next steps” at the end for some options to automate.
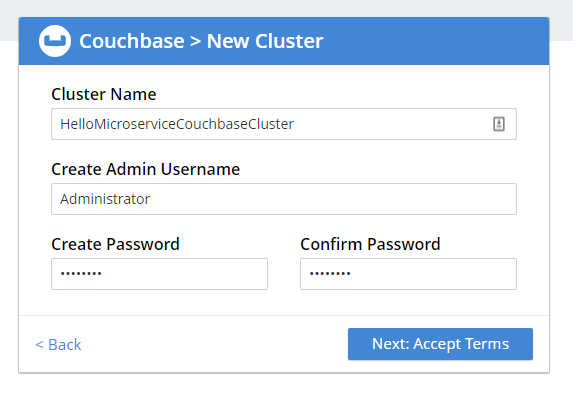
There is plenty of documentation to walk you through this process, so I won’t repeat that here. I will note that I am using credentials “Administrator” and “password”. I’ve also created a bucket called hellomicroservice.
After you have created the bucket, the next step is to get the ASP.NET Core application talking to the database. Open up docker-compose.yml, and update the hellomicroservices: definition to:
|
1 2 3 4 5 6 7 8 9 10 |
hellomicroservice: image: ${DOCKER_REGISTRY-}hellomicroservice build: context: . dockerfile: HelloMicroservice/Dockerfile environment: Couchbase__Servers__0: http://couchbase:8091/ # Reference to the "couchbase" service name on line 4 depends_on: - couchbase # Reference to the "couchbase" service name on line 4 command: ["./wait-for-it.sh", "http://couchbase:8091"] |
Let’s break down each of these parts:
environment:This tells docker-compose to create environment variables.Couchbase__Servers__0The name of an environment variable. The naming here is important. This will correspond with appsettings.json later.http://couchbase:8091/The URL that ASP.NET Core will need to connect to the couchbase service. If you named the service something other than “couchbase”, use that name here too.depends_onThis is how docker-compose will know which order to start the services.commandA command to execute once the service starts.
In this example, I’m using wait-for-it.sh, a script that will wait for the given host/port to become available. In the stock Couchbase Server Docker image, it will take a few seconds for Couchbase Server to actually start, so this script will wait until that happens to proceed.
Finally, to make the ASP.NET Core project talk to Couchbase, I used the Dependency Injection Extension from NuGet:
|
1 |
services.AddCouchbase(Configuration.GetSection("Couchbase")); |
Configuration will be pulled from appsettings.json by default. HOWEVER, recall that an environment variable of Couchbase__Servers__0 is defined in docker-compose.yml. ASP.NET Core will examine environment variables and override the appsettings using those values. So it doesn’t really matter what value is in appsettings.json (or appsettings.Development.json) for “Servers”:
|
1 2 3 4 5 6 7 8 9 10 11 12 13 14 |
{ "Logging": { "LogLevel": { "Default": "Debug", "System": "Information", "Microsoft": "Information" } }, "Couchbase" : { "Username": "Administrator", "Password": "password", "Servers" : ["http://thiswillbeoverwritten"] } } |
The Username/Password are still read from appsettings, however.
Step 5: Using the database
Finally, let’s make sure that the ASP.NET Core application is able to communicate with the database. I added a very simple Insert and Get to the HomeController Index method:
|
1 2 3 4 5 6 7 8 9 10 11 12 13 14 15 16 17 18 |
public IActionResult Index() { var id = Guid.NewGuid().ToString(); _bucket.Insert(new Document<dynamic> { Id = id, Content = new { hello = "microservice", foo = Path.GetRandomFileName() } }); var doc = _bucket.Get<dynamic>(id); return View(doc); } |
A few corresponding changes to the view in Index.cshtml:
|
1 2 3 4 5 6 7 8 9 10 11 12 13 14 15 |
@model Couchbase.IOperationResult<dynamic> @{ ViewData["Title"] = "Home Page"; } <div class="text-center"> <h1 class="display-4">Welcome</h1> <p>Learn about <a href="https://docs.microsoft.com/aspnet/core">building Web apps with ASP.NET Core</a>.</p> </div> <p>Created a new document:</p> <ul> <li>ID: @Model.Id</li> <li>Document: @Model.Value</li> </ul> |
And now, we have the basics of ASP.NET Core Microservices in place. Hit CTRL+F5 to run the service. When the browser opens, you should see something like this:
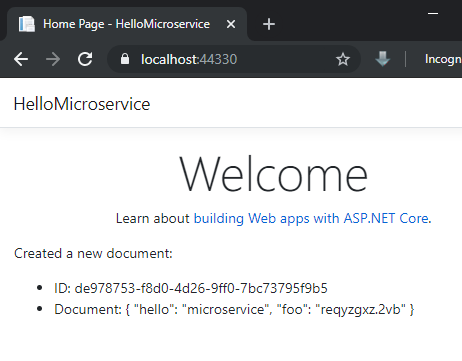
If you instead see an error message, make sure that you’ve setup Couchbase Server correctly, created a bucket with the right name, have used the correct login credentials in appsettings.json, and make sure that your docker-compose.yml matches the above examples.
Next steps
You are now able to develop your ASP.NET Core microservices. As a developer, the Docker image of your ASP.NET Core application will be your deliverable. Depending on where/how your organization plans to deploy, your next steps will vary a great deal.
This is only the beginning, but here are some more things you should explore:
Volumes. Close Visual Studio completely. After a few seconds, the Docker images will go away (try docker ps again to verify this). Now, open Visual Studio and CTRL+F5 again. Since we used a volume, the data you stored in Couchbase should still be there. If this is what you want for development, you’re in good shape.
Automation. If you’d rather data be wiped away and regenerated every time, you will need to look at creating a custom Docker image. You can also check out the excellent couchbasefakeit project, which includes a number of tools, variables, scripts, etc, to initialize Couchbase Server and populate it with indexes and fake data. You can see an example of this in a Gist that Brant Burnett shared with me.
Kubernetes. If you plan on deploying Couchbase Server (or indeed any database) to containers, you will likely want to look into Kubernetes and Kubernetes Operators, which make managing databases within Kubernetes clusters much easier. Many databases vendors have created Kubernetes Operators, and Couchbase was the first NoSQL vendor to release a Kubernetes Autonomous Operator.
Special Thanks
This blog post wouldn’t have been possible without the tremendous help of the Couchbase Community.
Thanks to Brant Burnett for sharing his company’s microservices development process with me.
Thanks to Calvin Allen for working through this process with me on my Twitch Live Coding stream and for introducing me to wait-for-it.