We are super excited to announce industry FIRST NoSQL Database natively integrated with kubernetes (k8s) API, via CRD, giving immense power, agility, cloud portability to the customers so that they can be free from
- Managing or administering Couchbase Cluster
- Worrying about node failures, k8s operator spins a pod for you
- Worrying about performing rebalance operation post node addition, k8s operator performs for you
- Vendor lock-in
Integrating natively with k8s gives us to define a custom controller, through which we can define workflow(s) for certain conditions that happen on the Couchbase cluster. By writing that logic in custom controller it gives us ability to manage the Couchbase Cluster’s better.
Running Couchbase Autonomous Operator on Azure AKS is currently in technical preview.
Here is what we are going to do
- Login to Azure with CLI (az login)
- Create a Resource Group
- Create a k8s cluster in AKS
- Access the k8s dashboard (Optional)
- Deploy Couchbase Autonomous Operator
- Deploy the Couchbase Cluster in AKS
- Insert some(~100K) documents in the cluster
- Scale up the cluster with one command
- Delete a pod, simulating a node failure
- See that k8s watches that event, and brings up the new pod, to match the cluster definition
- References
Now let’s go through the deployment of Autonomous Operator on Azure Kubernetes Service step by step in extremely detailed fashion
Login to Azure with CLI (az login)
|
1 2 3 4 5 6 7 8 9 10 11 12 13 14 15 16 |
az login To sign in, use a web browser to open the page https://aka.ms/devicelogin and enter the code BFU6N7R8L to authenticate. [ { "cloudName": "AzureCloud", "id": "xxxxxx-deff-4604-xxxxx-xxxxxxxxx", "isDefault": true, "name": "MyOrgAzure", "state": "Enabled", "tenantId": "xxbf6-f537-4fde-bc07-ooooooo777777", "user": { "name": "ram@couchbase.com", "type": "user" } } ] |
Create a Resource Group
|
1 |
az group create --name ramresourcegp --location eastus |
Create a k8s cluster
Login to Azure portal, and search for Azure Kubernetes Service in the search icon, we should see this screen
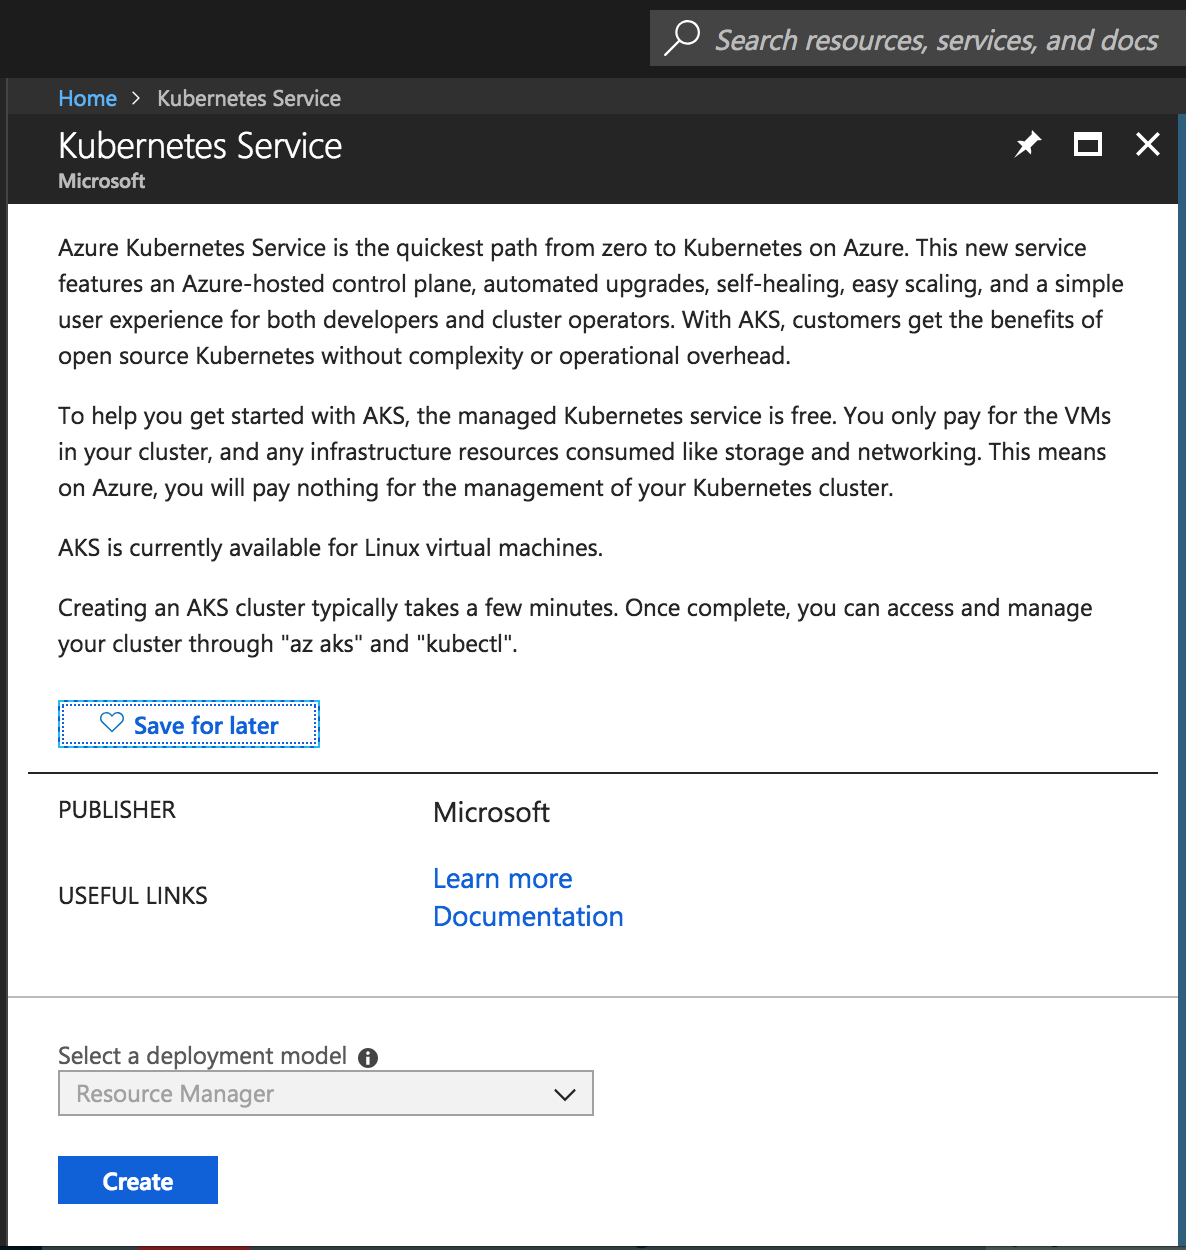
Create K8s Service
Chose the size of the instance for k8s nodes and select the number of nodes as per the requirements
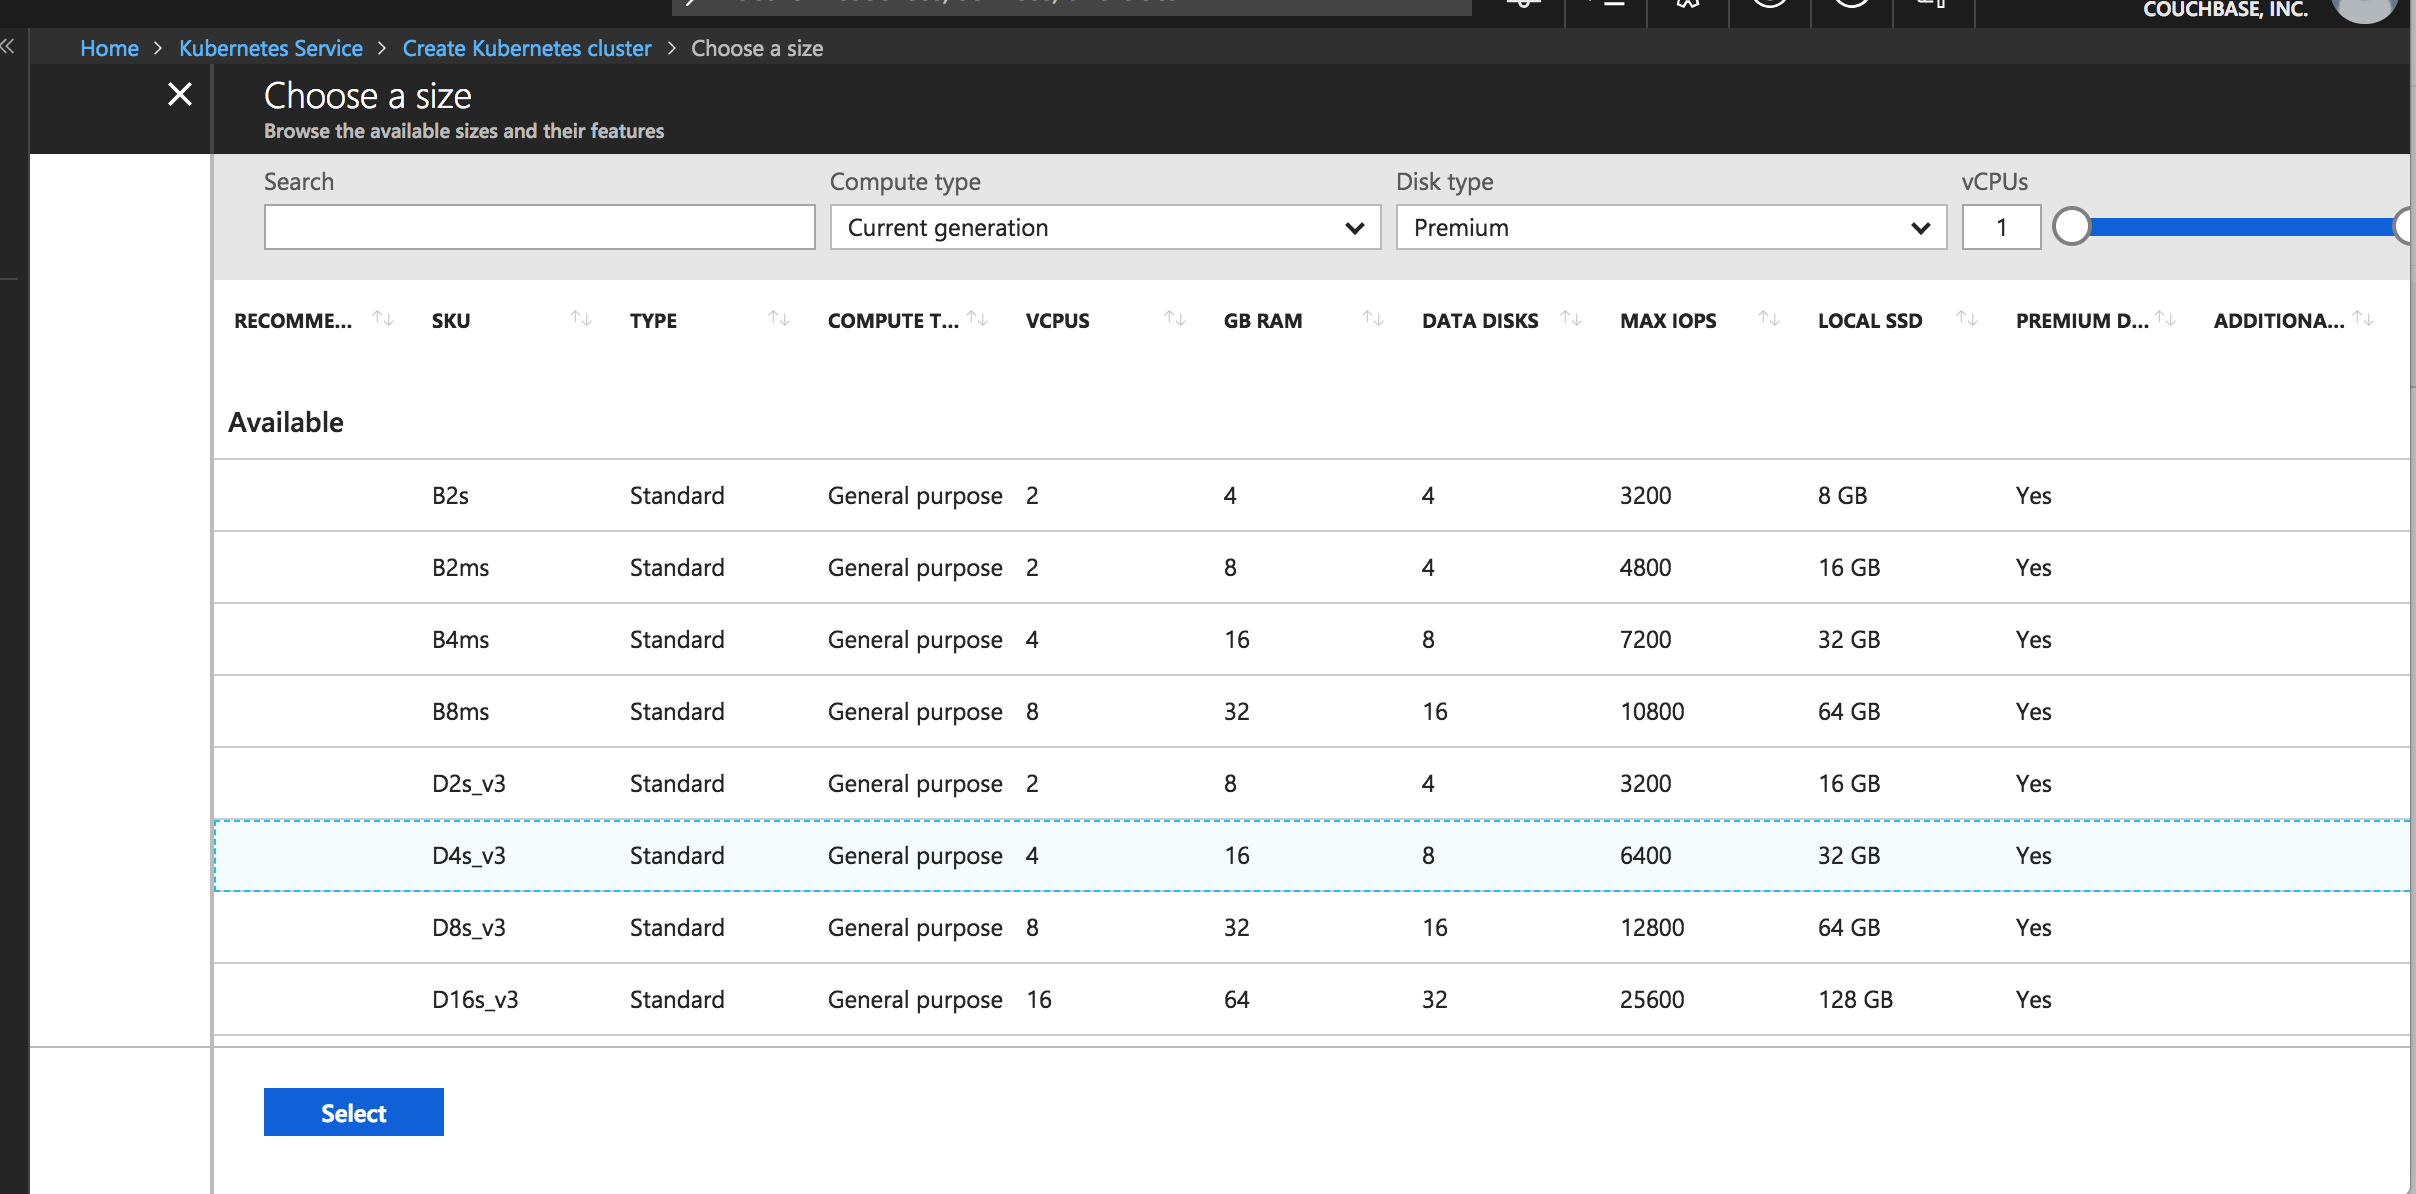
Choose the instance type
Selecting the instance types
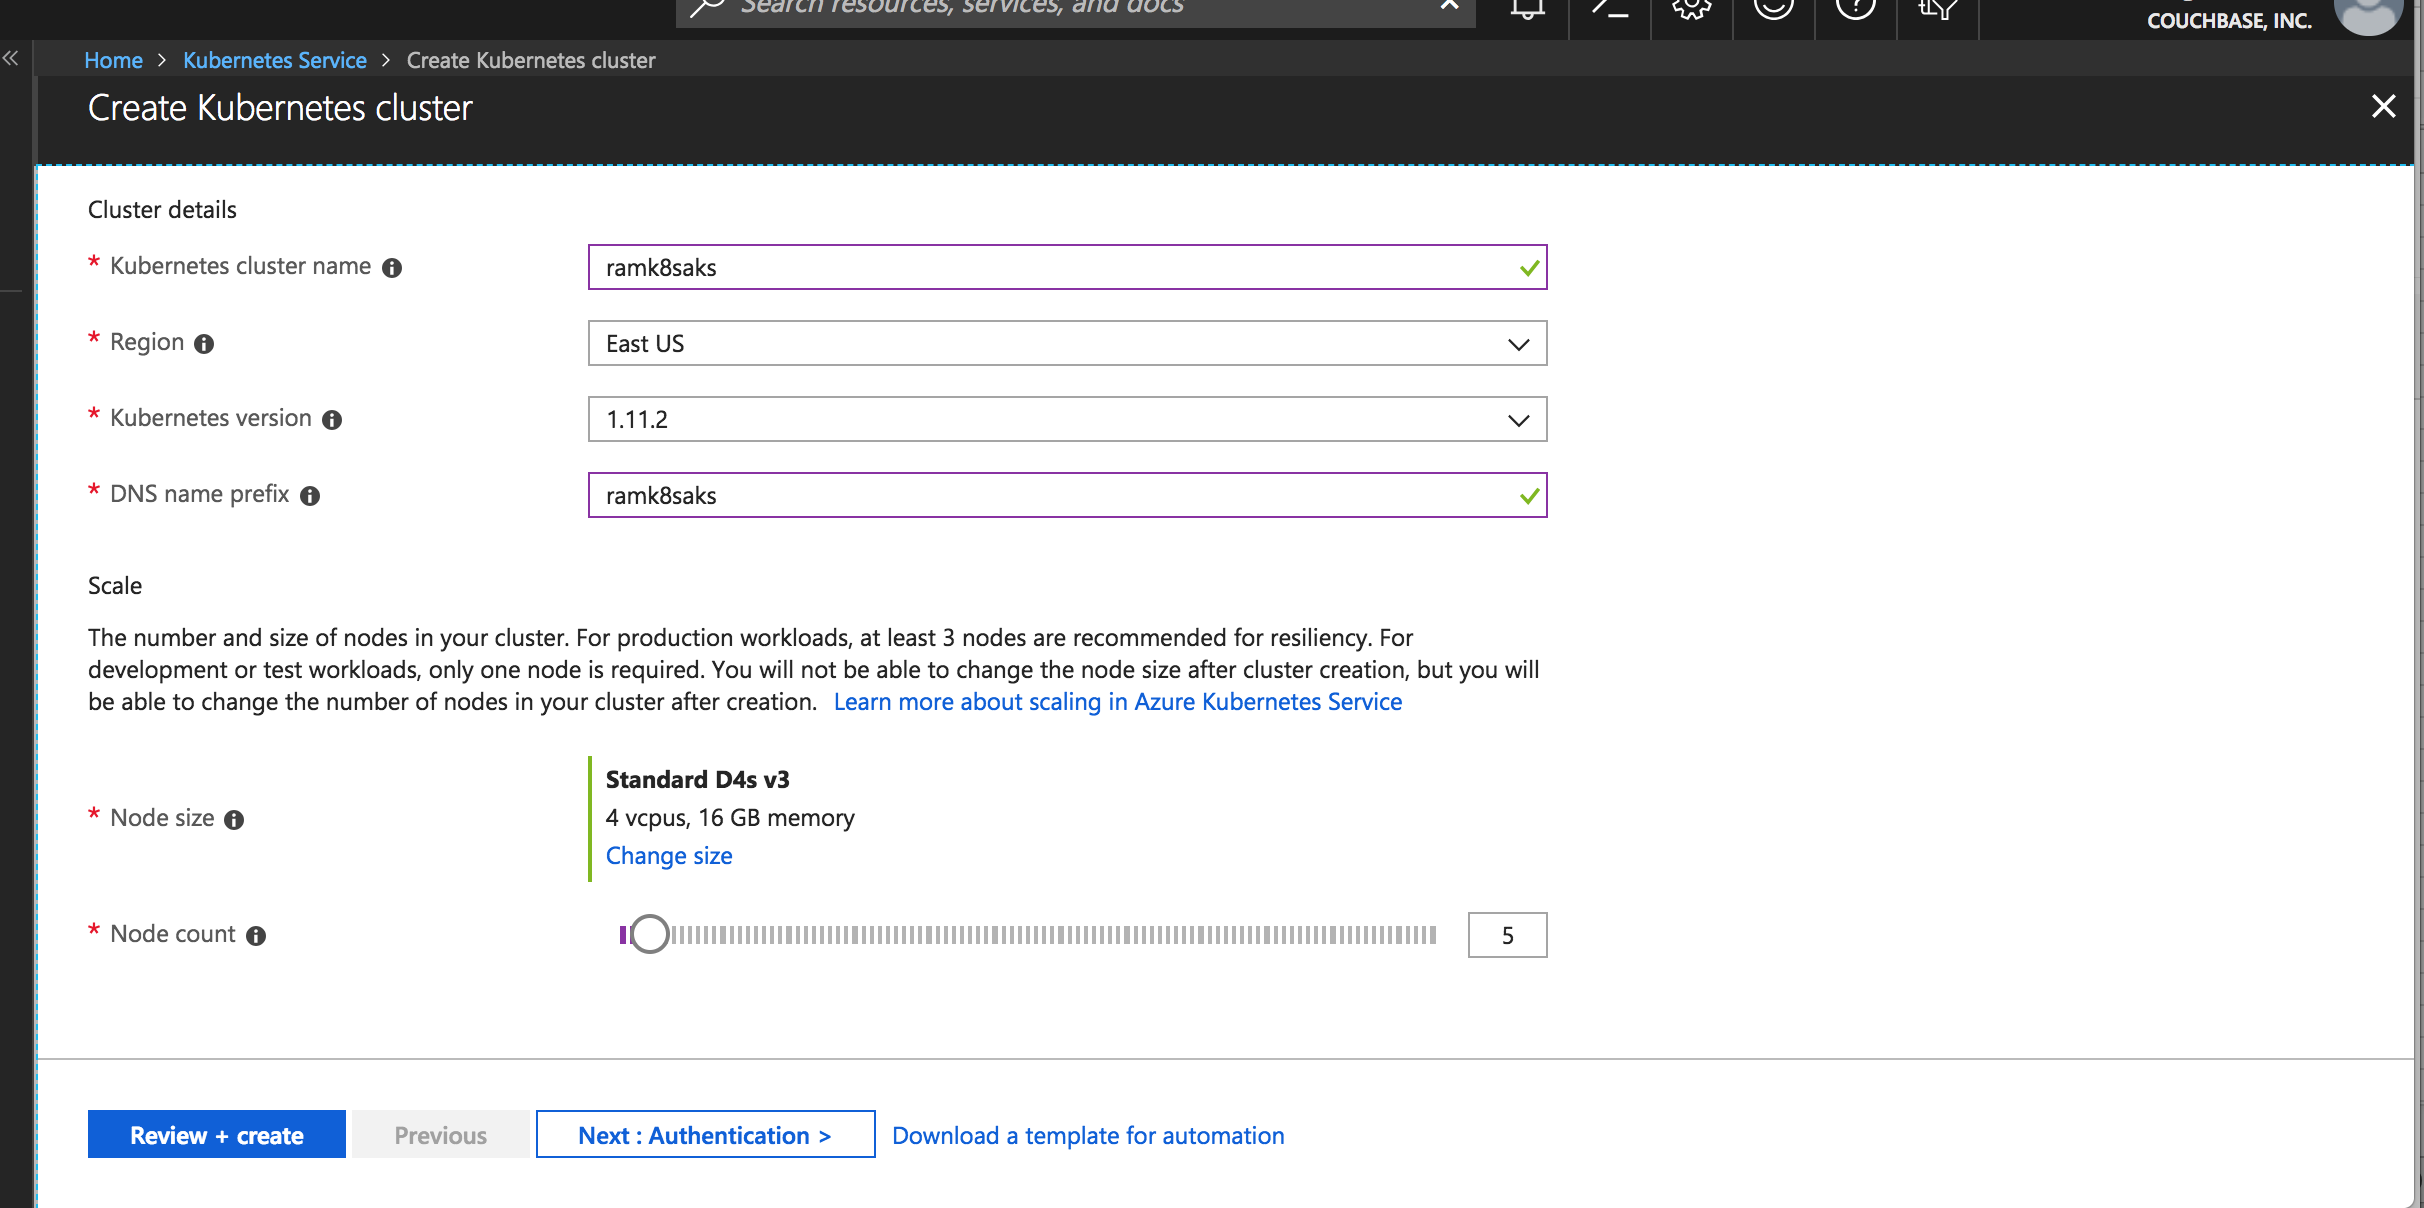
Choose the number the k8s worker nodes
Enable RBAC for k8s cluster
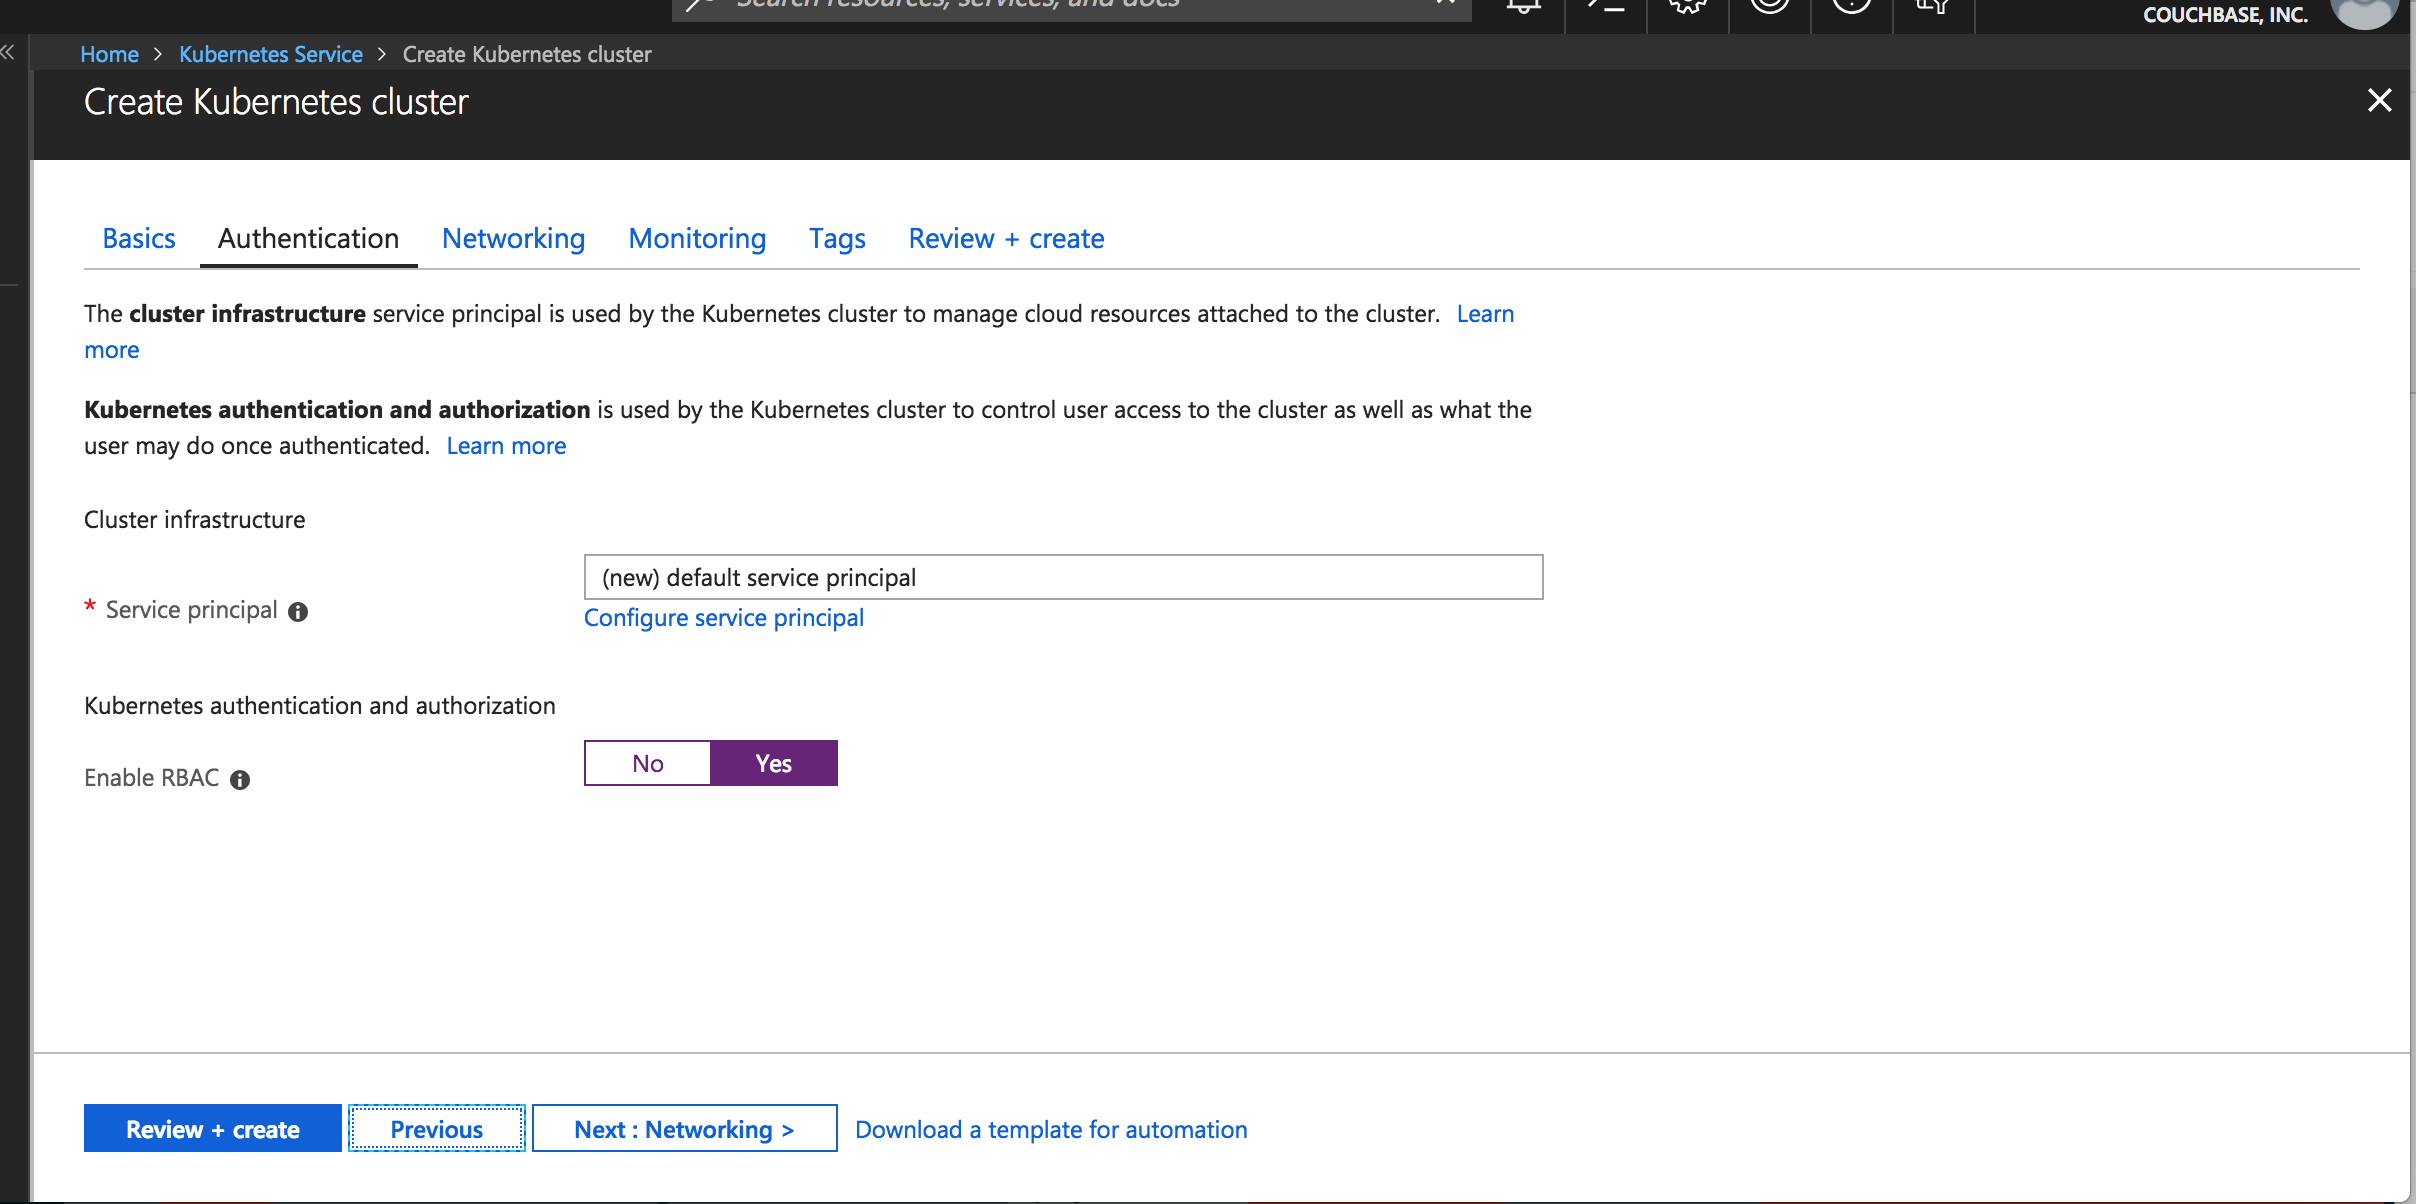
Choose RBAC for k8s
Choose default networking
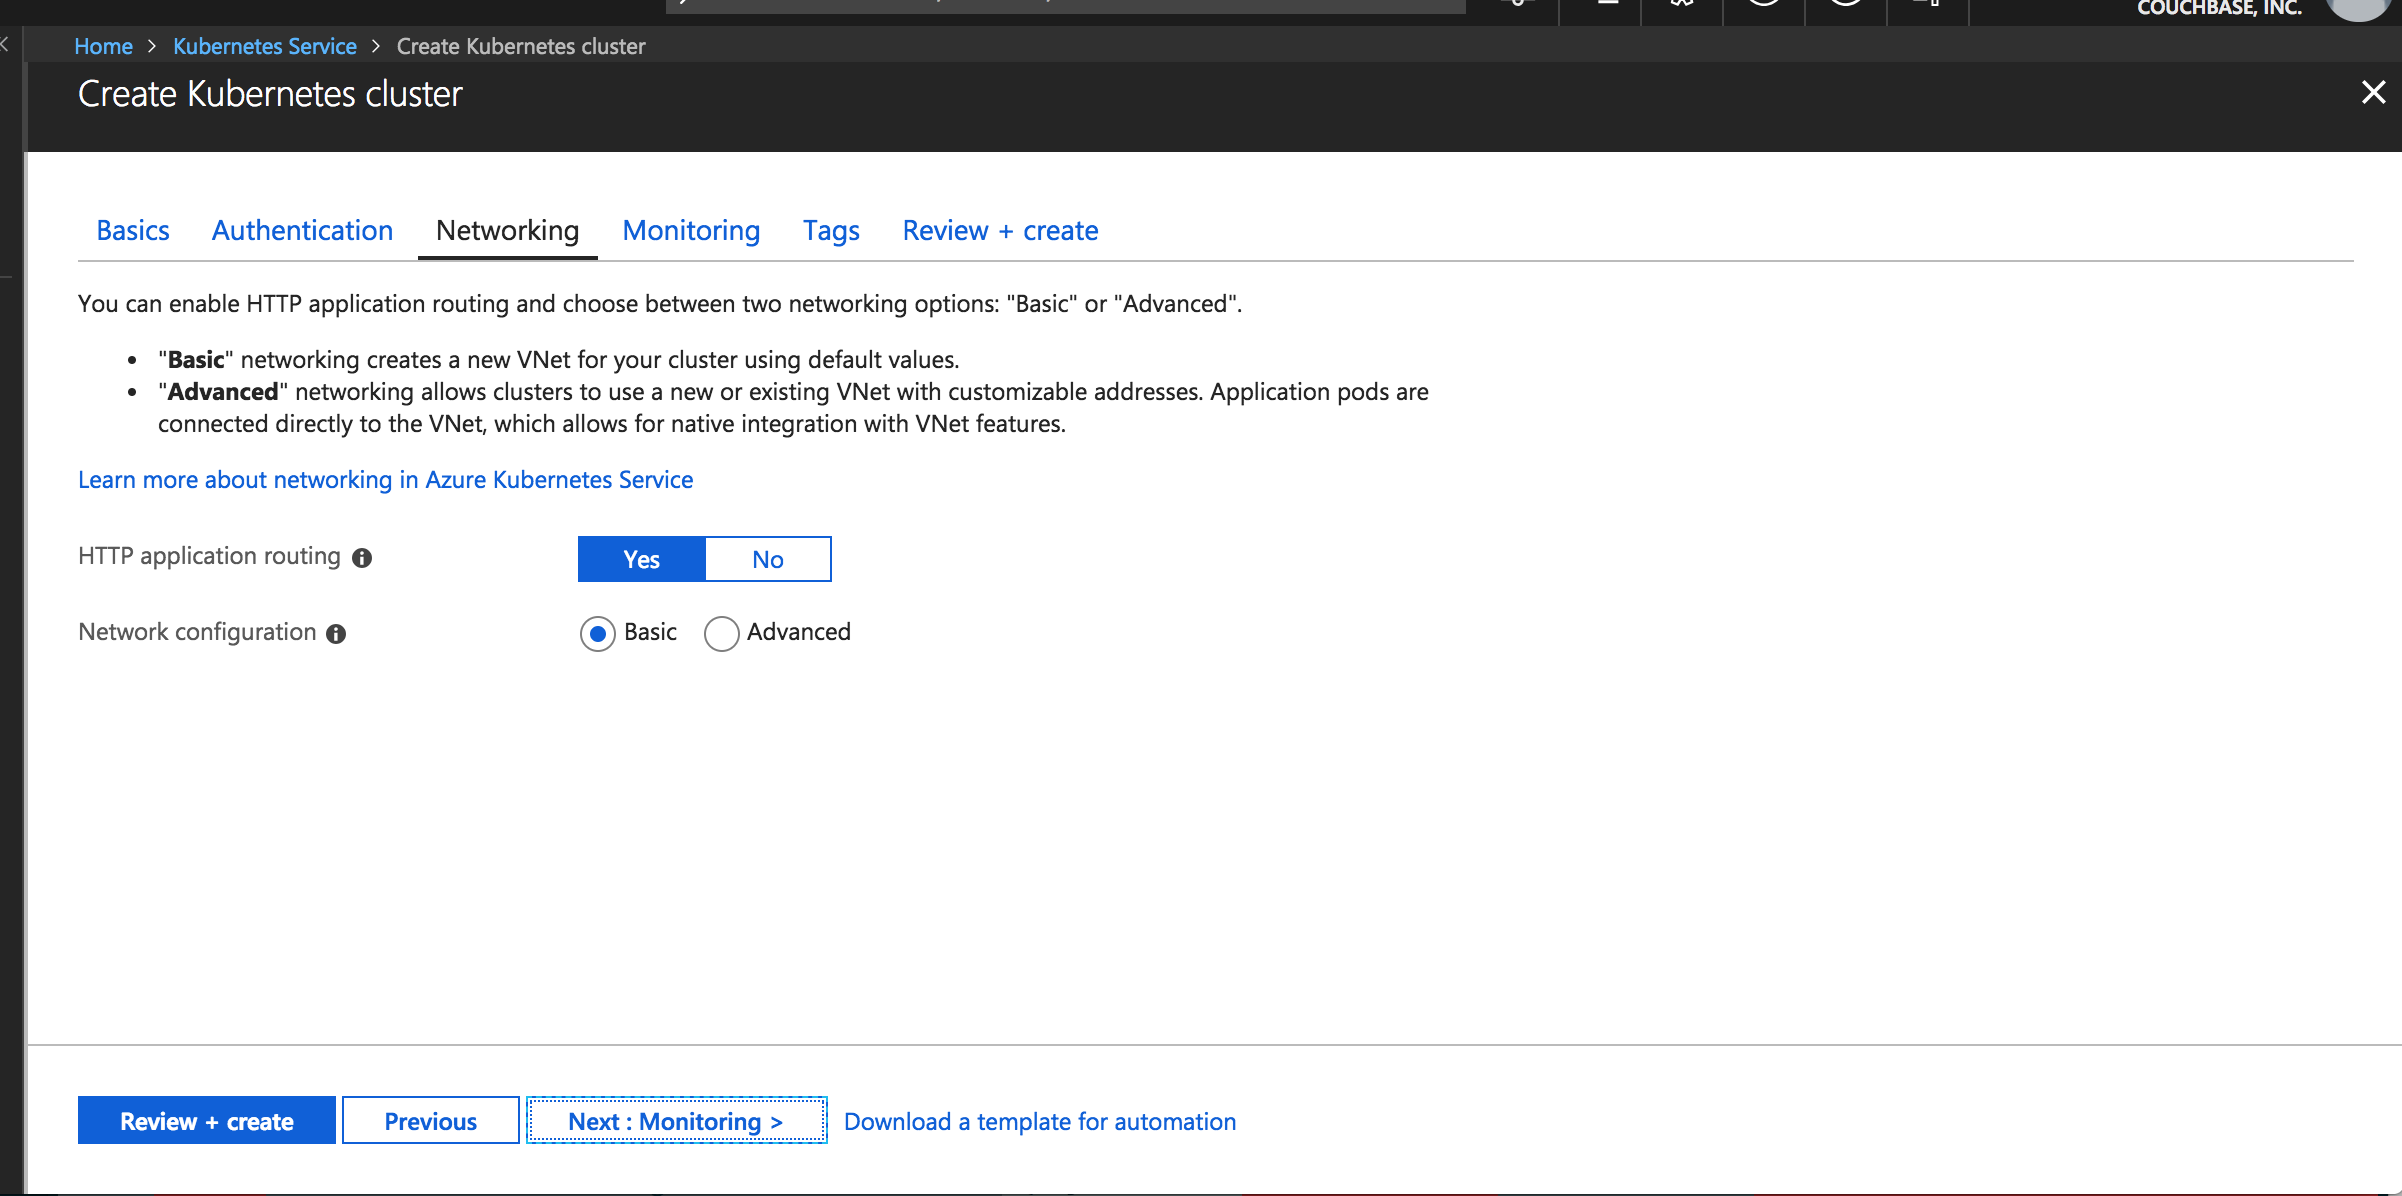
Pick default setting for Networking
Enable container monitoring
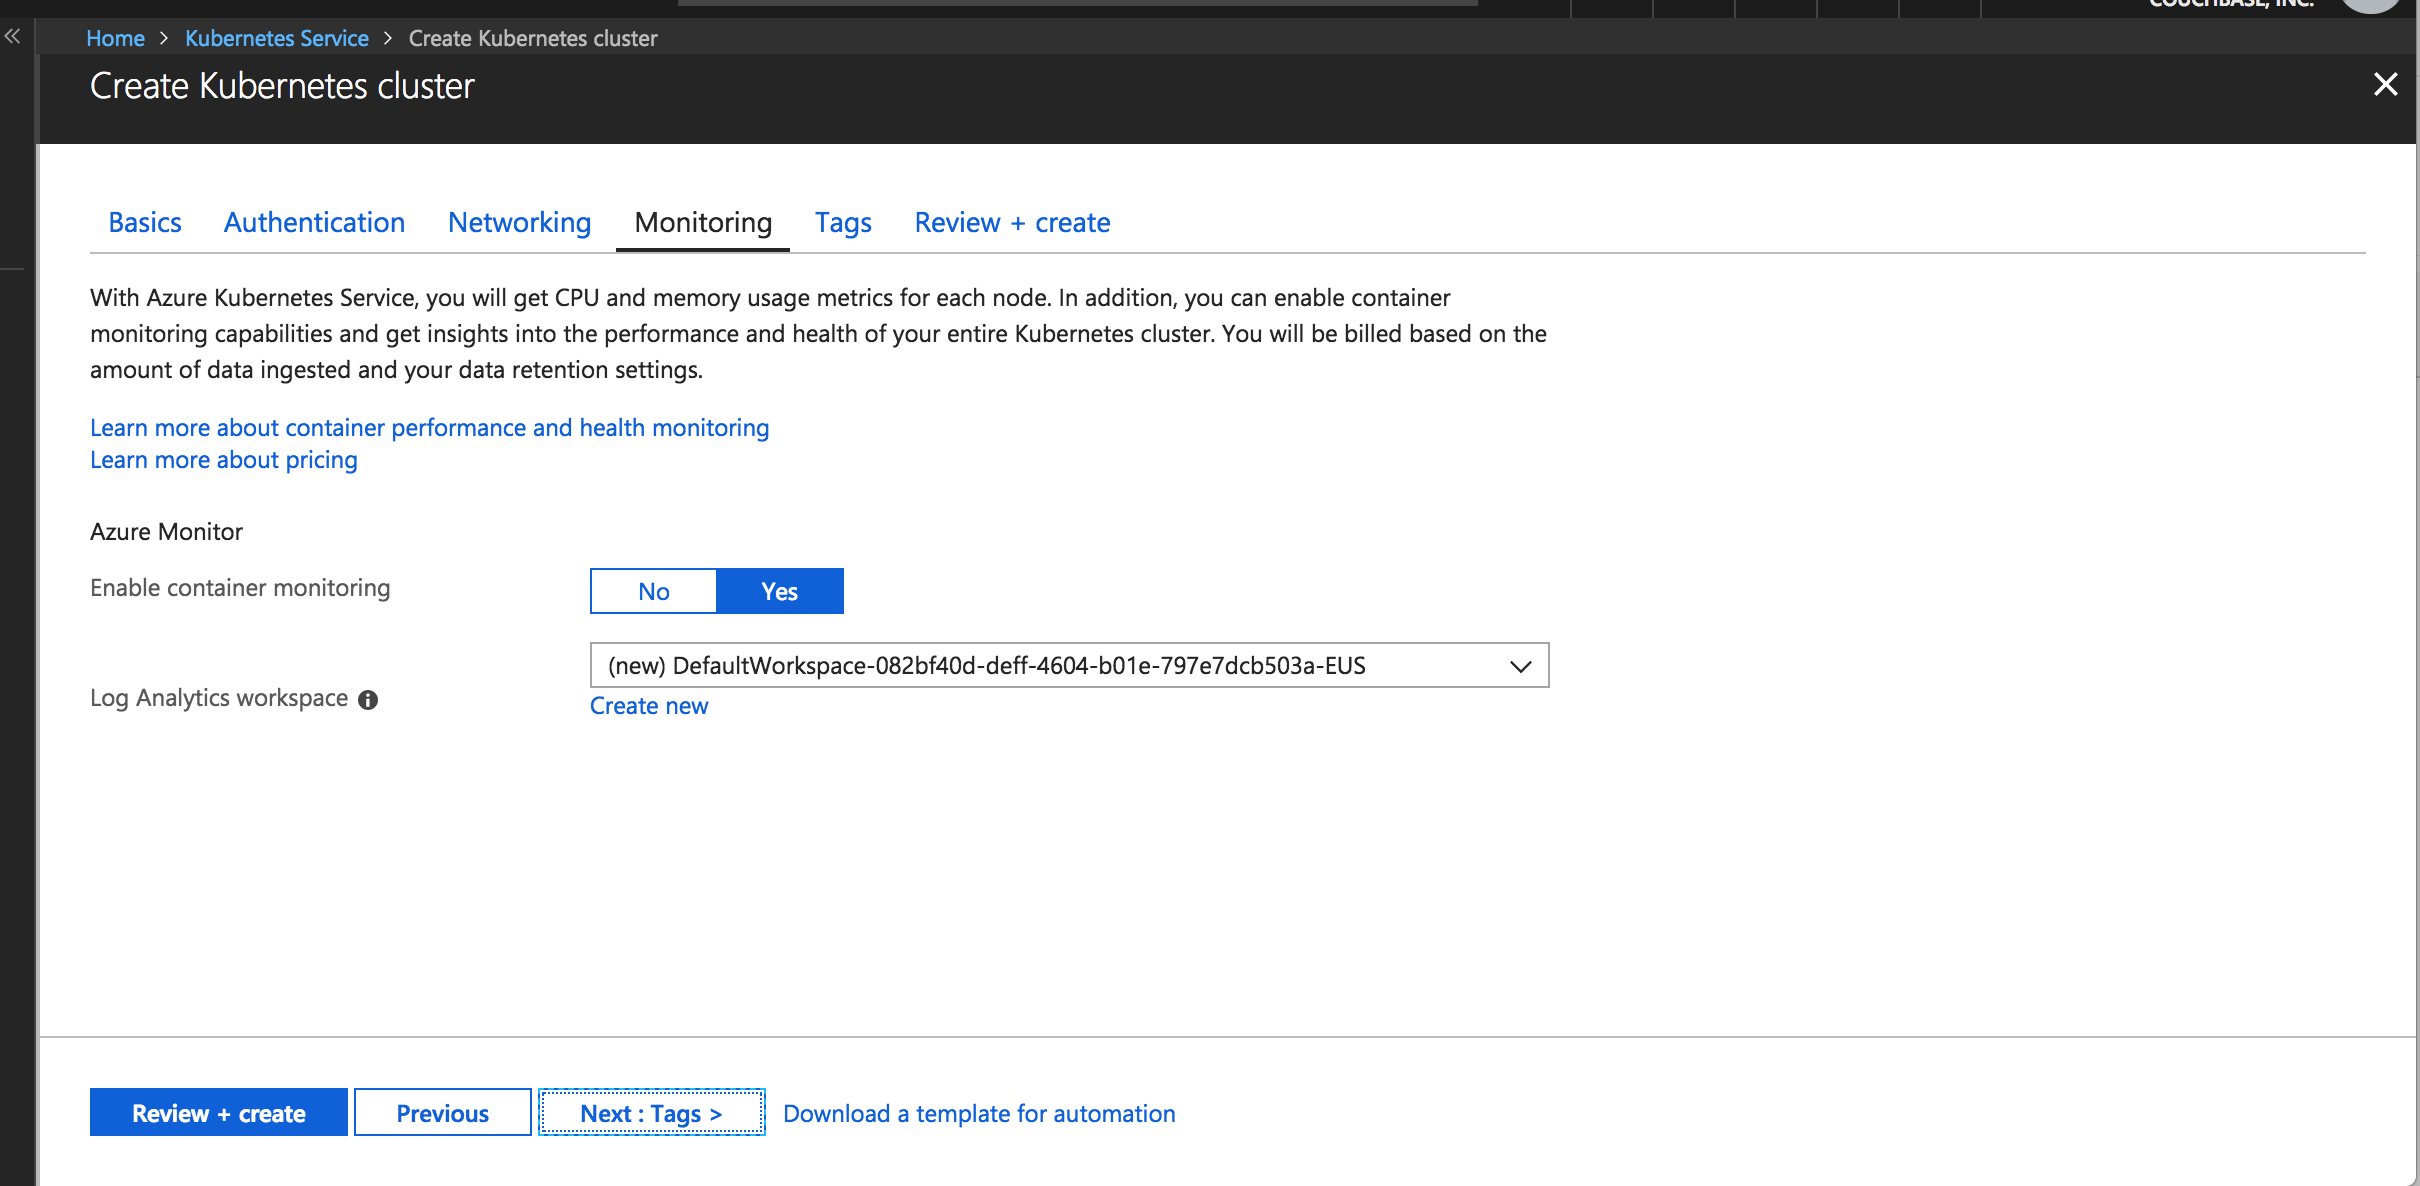
Pick default setting for monitoring containers
Make sure validation passes and hit create
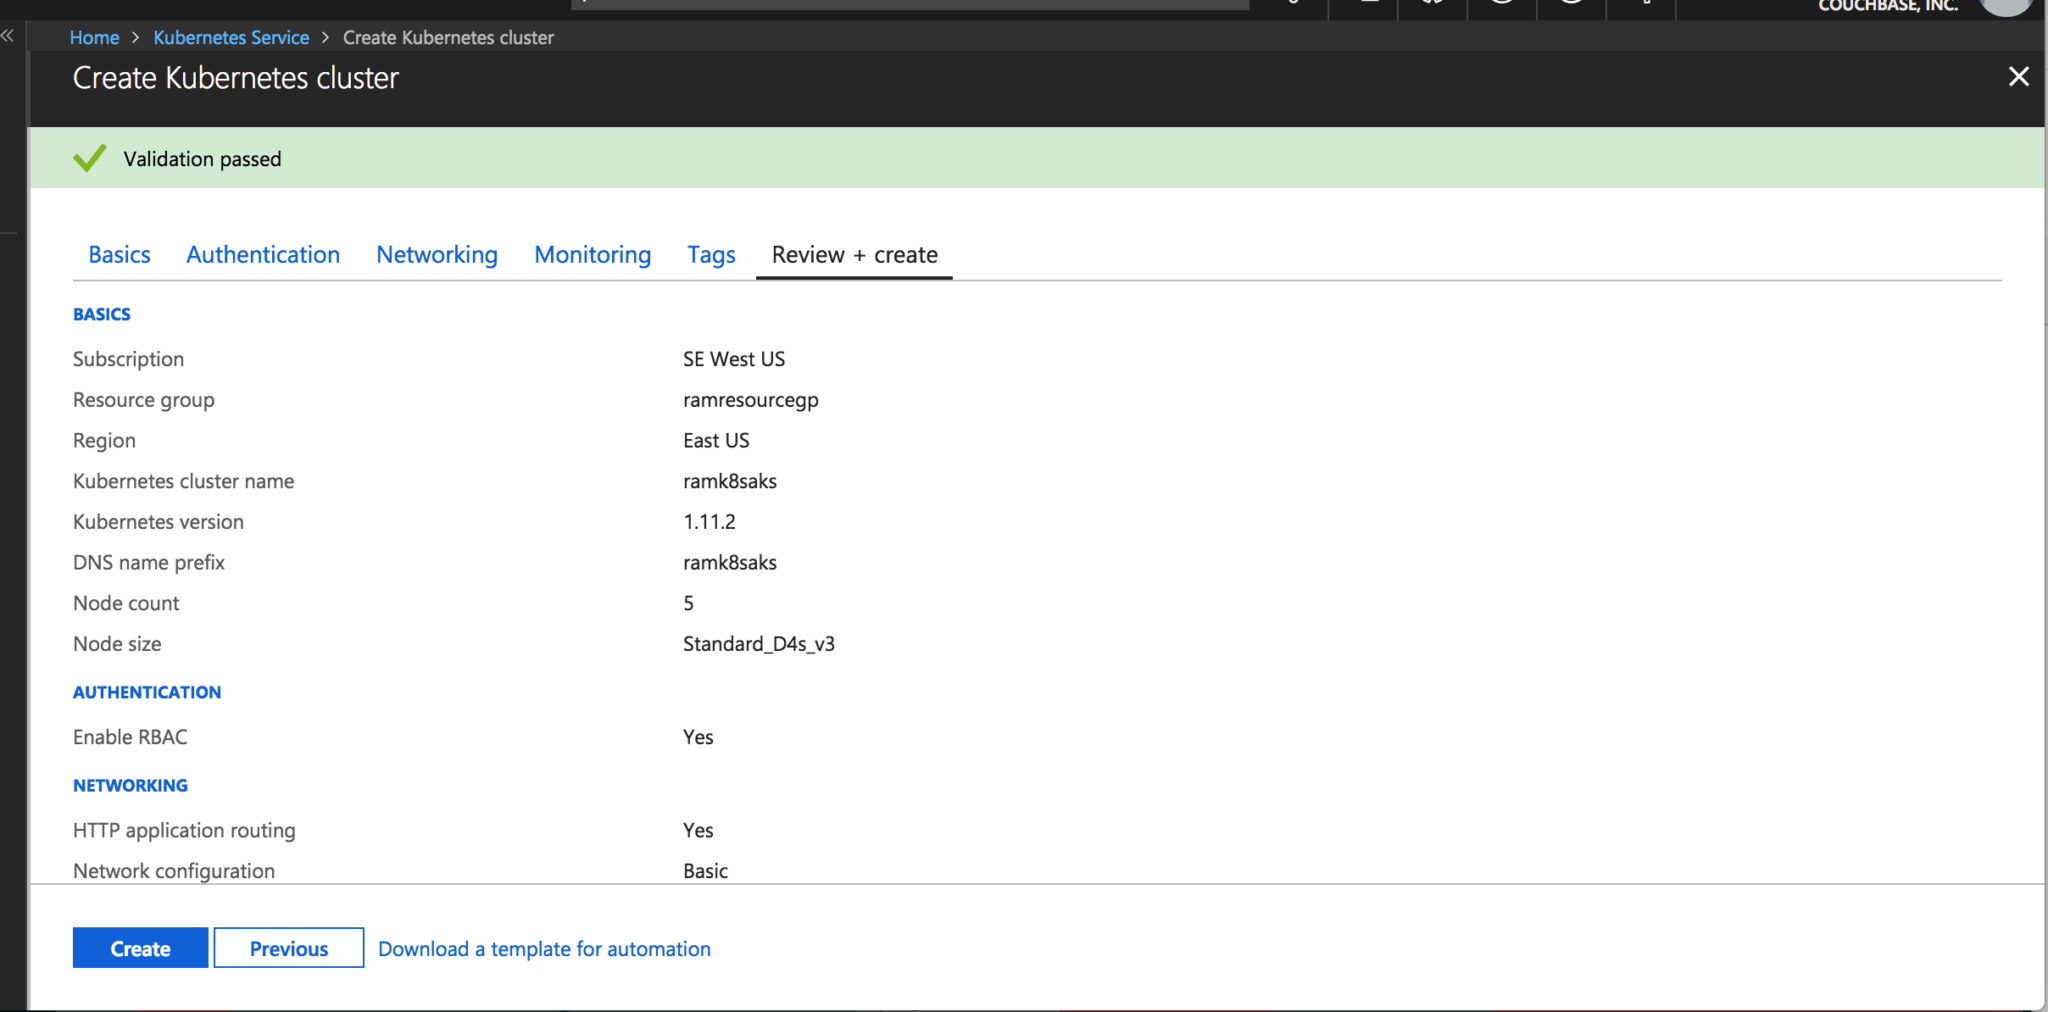
Click next and see that validation has passed for k8s cluster
Run command to get k8s cluster running in Azure, locally (I find it personally useful as gives me ability to manage remote k8s cluster running on AKS. Other option would to be use Azure Shell)
|
1 2 |
az aks get-credentials --resource-group=ramresourcegp --name=ramk8saks Merged "ramk8saks" as current context in /Users/ram.dhakne/.kube/config |
Below screenshot gives idea how to check if AKS cluster config is set correct locally or not.
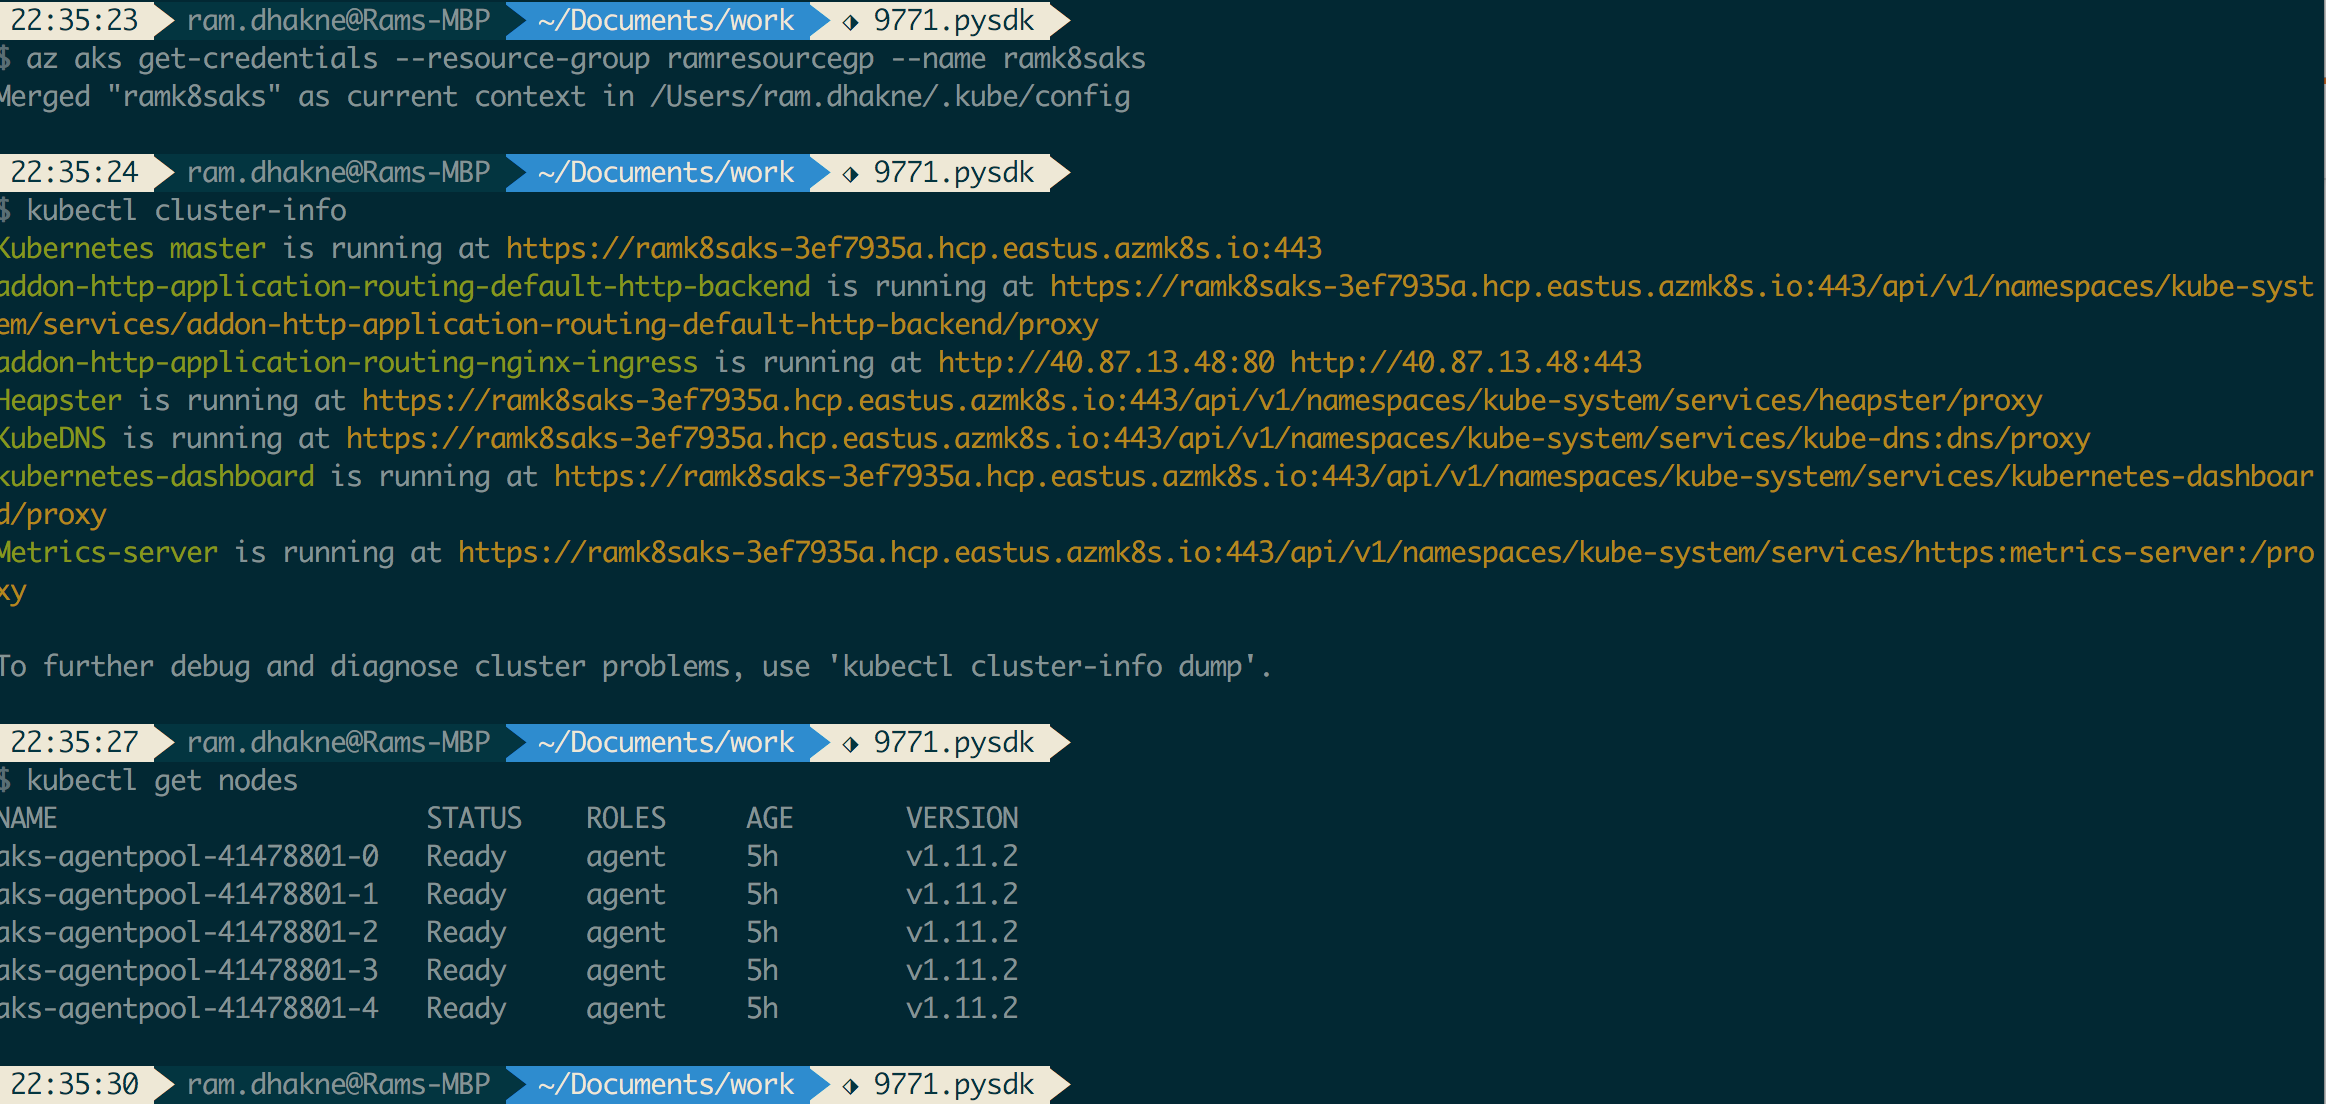
Check for k8s cluster running on AKS
Access the k8s dashboard (Optional)
All the k8s assets can be managed via kubectl and with GUI access to Couchbase cluster, it becomes more manageable. However I would like to do some administration of k8s assets via k8s Dashboard too.
|
1 2 3 4 5 6 7 |
az aks browse --resource-group ramresourcegp --name ramk8saks Merged "ramk8saks" as current context in /var/folders/0l/sr0jnvw10nb55xt8nz6zcrzc0000gn/T/tmpvw6ub8_7 Proxy running on http://127.0.0.1:8001/ Press CTRL+C to close the tunnel... Forwarding from 127.0.0.1:8001 -> 9090 Forwarding from [::1]:8001 -> 9090 Handling connection for 8001 |
[TIP] If k8s dashboard gives permission issues like
|
1 2 |
warning configmaps is forbidden: User "system:serviceaccount:kube-system:kubernetes-dashboard" cannot list configmaps in the namespace "default" |
then run the following command
|
1 2 |
kubectl create clusterrolebinding kubernetes-dashboard --clusterrole=cluster-admin --serviceaccount=kube-system:kubernetes-dashboard clusterrolebinding.rbac.authorization.k8s.io "kubernetes-dashboard" created |
At this time we should have access for k8s dashboard running at URL http://127.0.0.1:8001/
Deploy Couchbase Autonomous Operator
Remember that deploying CB operator is a one time job, and it’s very straightforward
I have downloaded the operator zip files on my local laptop from the URL Download Couchbase Operator Package
Enable RBAC for couchbase cluster in k8s
|
1 2 3 4 |
kubectl create -f cluster-role.yaml kubectl create serviceaccount couchbase-operator --namespace default serviceaccount "couchbase-operator" created kubectl create clusterrolebinding couchbase-operator --clusterrole couchbase-operator --serviceaccount default:couchbase-operatorclusterrolebinding.rbac.authorization.k8s.io "couchbase-operator" created |
Deploy the couchbase operator
|
1 2 |
kubectl create -f operator.yaml deployment.extensions "couchbase-operator" created |
|
1 2 3 |
kubectl get deployments NAME DESIRED CURRENT UP-TO-DATE AVAILABLE AGE couchbase-operator 1 1 1 0 9s |
It becomes ready in less than minute, we can watch the deployment as it is happening
|
1 2 3 4 |
kubectl get deployments -l app=couchbase-operator --watch NAME DESIRED CURRENT UP-TO-DATE AVAILABLE AGE couchbase-operator 1 1 1 0 8s couchbase-operator 1 1 1 1 13s |
Deploy the Couchbase Cluster in AKS
Now that we have deployed the Autonomous Operator in AKS, now lets deploy the Couchbase Cluster
With AKS, we get StorageClass by default, lets check
|
1 2 3 4 |
kubectl get sc NAME PROVISIONER AGE default (default) kubernetes.io/azure-disk 8h managed-premium kubernetes.io/azure-disk 8h |
For our deployment we will choose managed-premium
Detailed yaml file can be found here, couchbase-persistent-cluster.yaml
|
1 |
kubectl create -f couchbase-persistent-cluster.yaml |
It takes few minutes for couchbase cluster to come up and we will be creating 4 pods, and for the first time, it downloads the docker image from registry, perhaps good time to get coffee!
|
1 2 3 4 5 6 7 |
kubectl get pods --watch NAME READY STATUS RESTARTS AGE cb-op-aks-demo-0000 1/1 Running 0 48m cb-op-aks-demo-0001 1/1 Running 0 44m cb-op-aks-demo-0002 1/1 Running 0 40m cb-op-aks-demo-0003 1/1 Running 0 37m couchbase-operator-6cb7687498-zfzq5 1/1 Running 1 1h |
Exposing service cb-op-aks-demo-ui from NodePort(Default to LoadBalancer), gives us ability to access Couchbase Server GUI over public IP
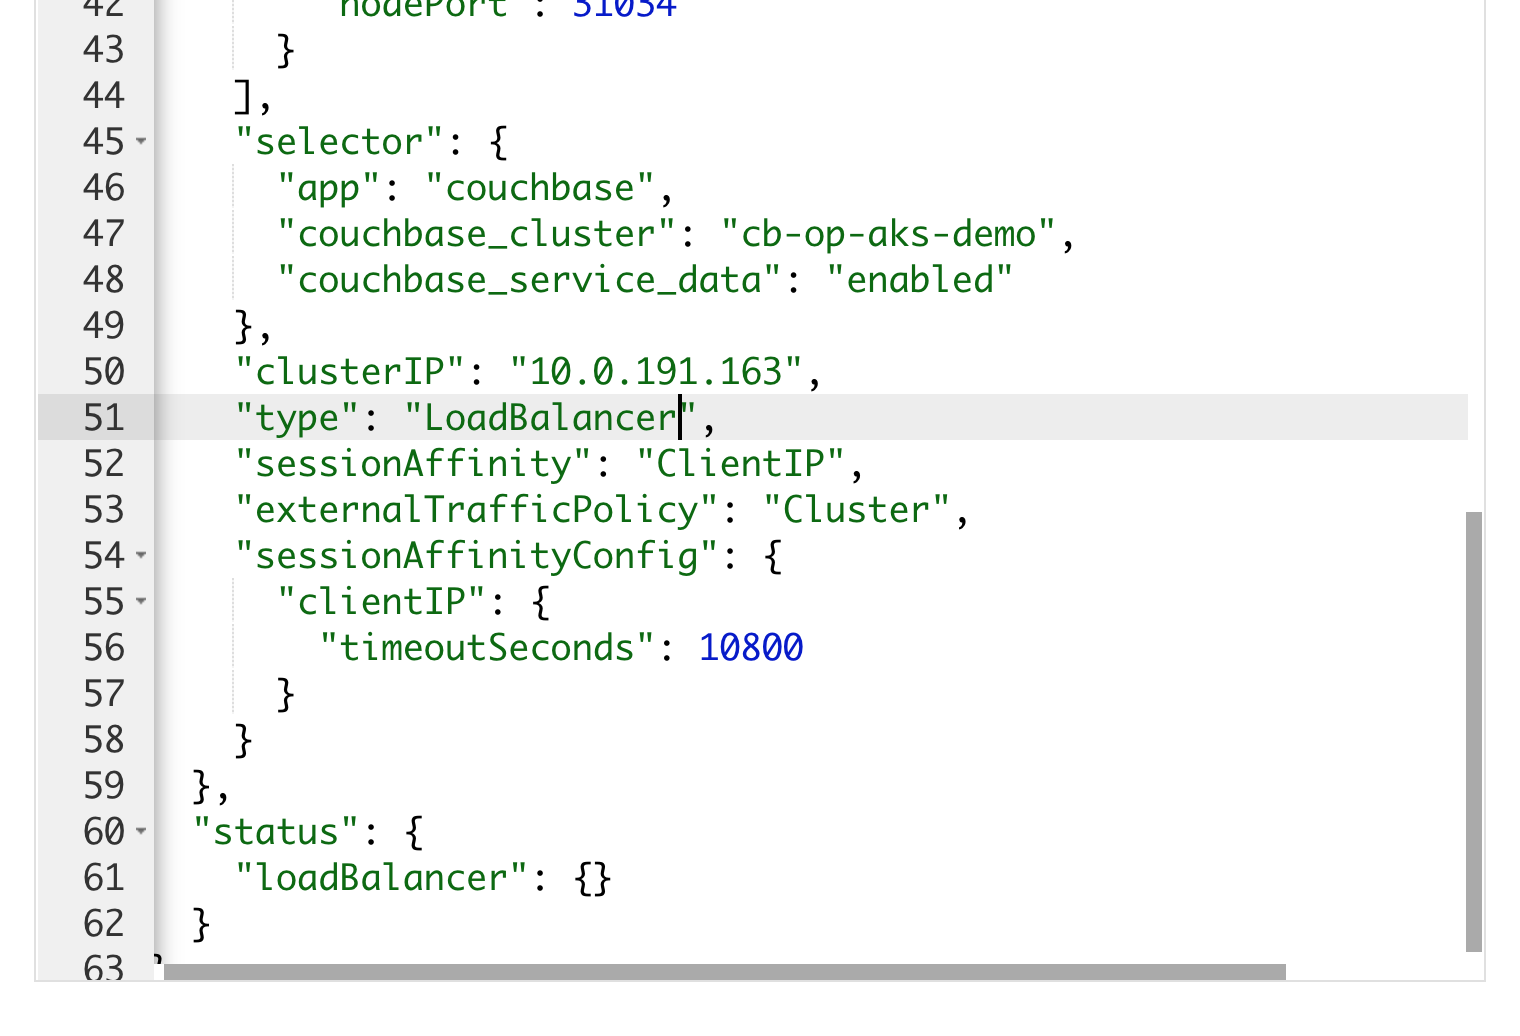
Expose cb-op-aks-demo-ui from NodePort to LoadBalancer
Running command
|
1 |
kubectl get services |
should give the output like below
|
1 |
cb-op-aks-demo-ui LoadBalancer 10.0.191.163 40.121.65.8 8091:30427/TCP,18091:31034/TCP |
Now login to the GUI with default username/password i.e Administrator/password
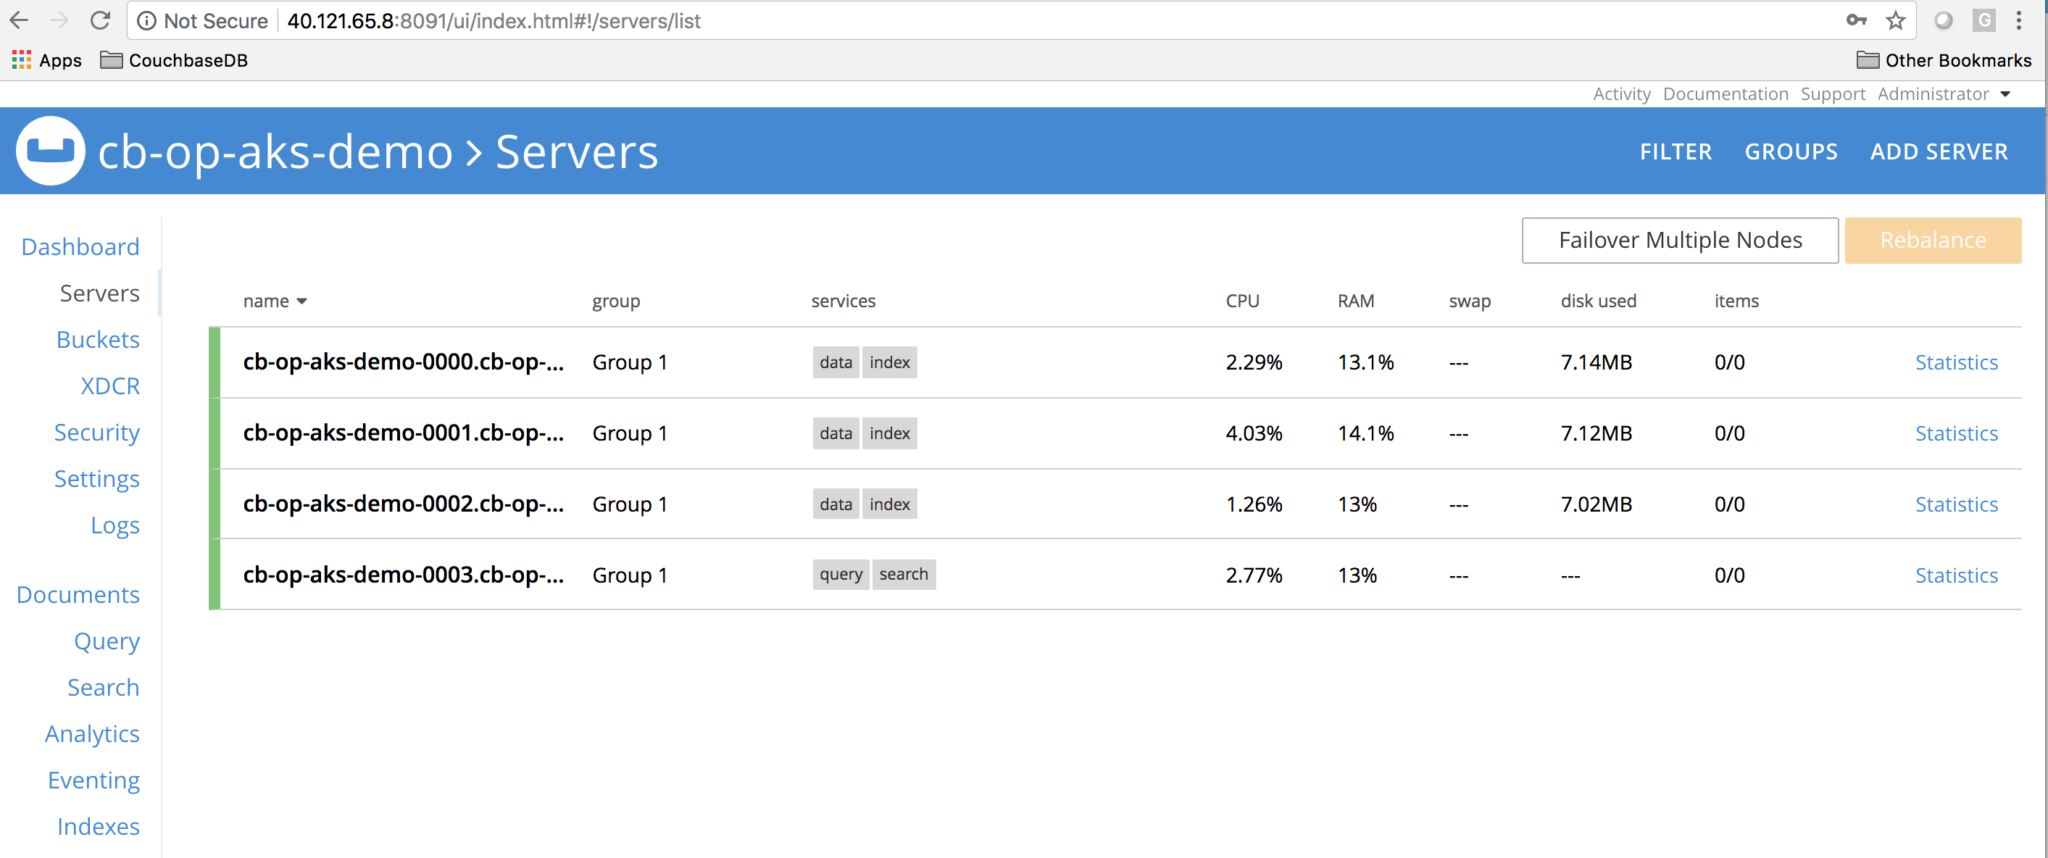
Login to the GUI on public IP exposed by Load Balancer
Insert some(~100K) documents in the cluster
|
1 |
cbc-pillowfight -U couchbase://localhost/default -u Administrator -P password -J -t 4 -I 99998 -p `hostname` |
[TIP] Utility cbc-pillowfight needs to be installed on the container before running it. Its installation is beyond the scope of this blog.
We should see bucket stats chart lit up
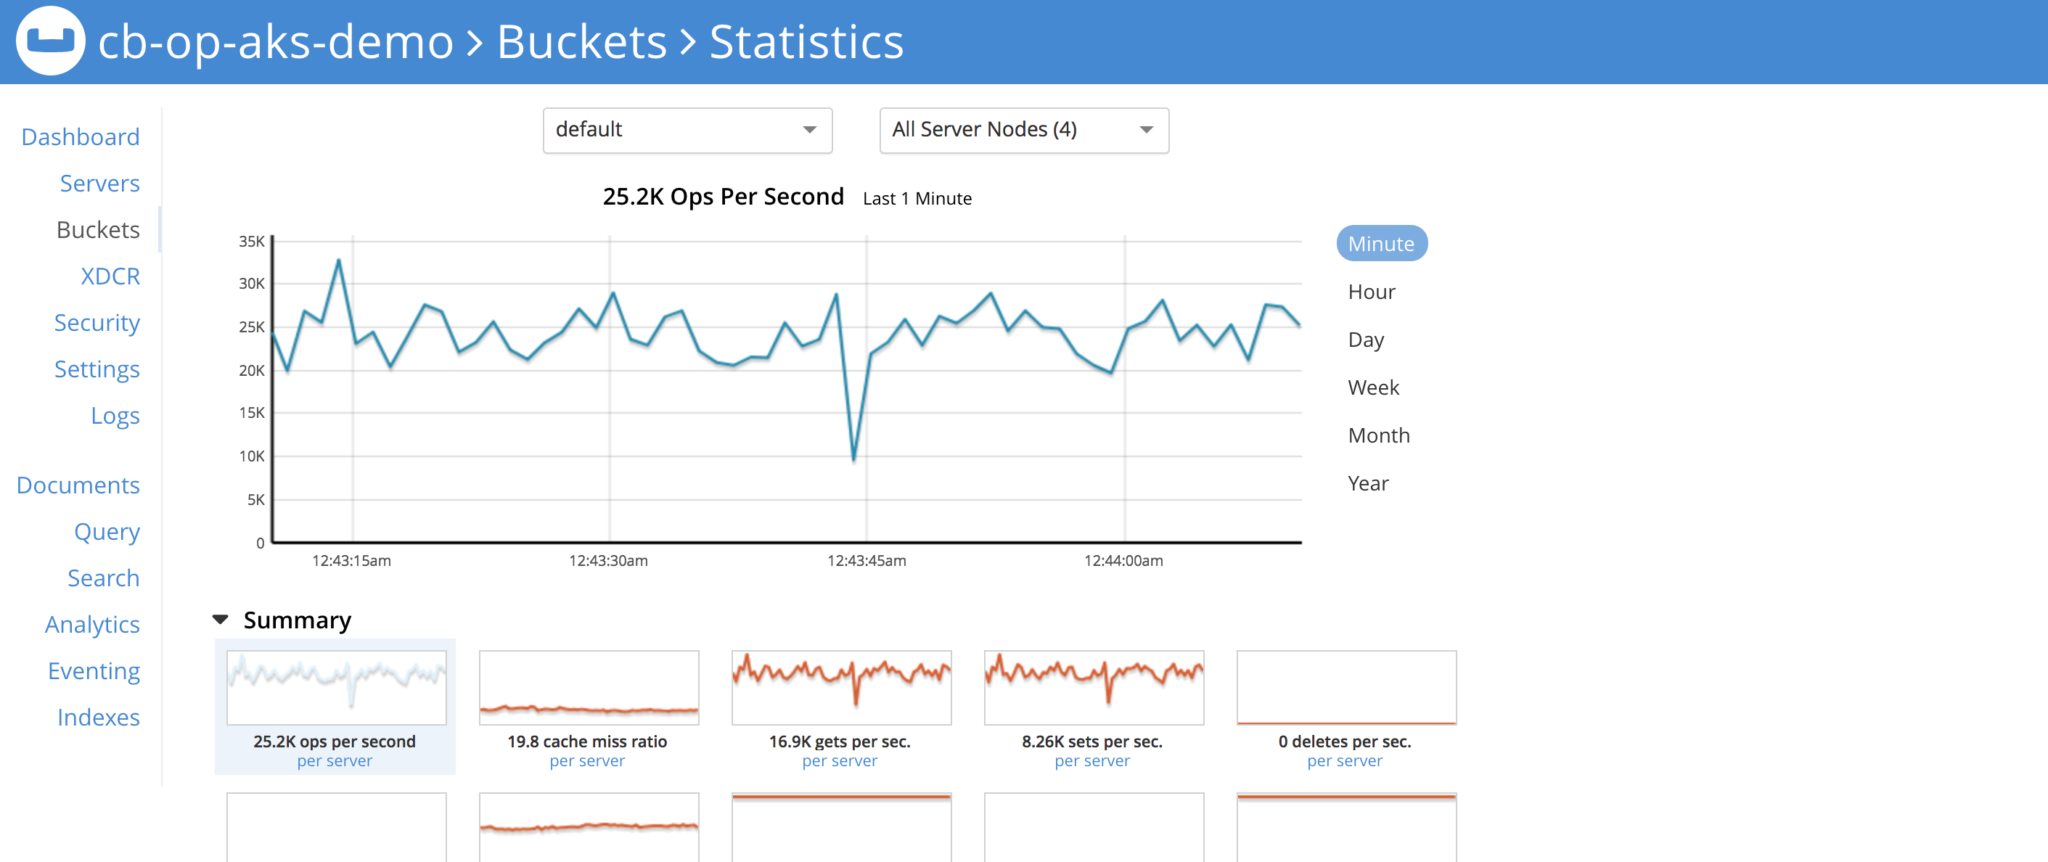
Bucket Stats when pillowfight is running
Scale up the cluster with one command
Scaling the couchbase cluster is very simple job with kubernetes, just update the couchbase-persistent-cluster.yaml file, say we want to increase data nodes capacity from 3 to 5, so change servers:size to 5
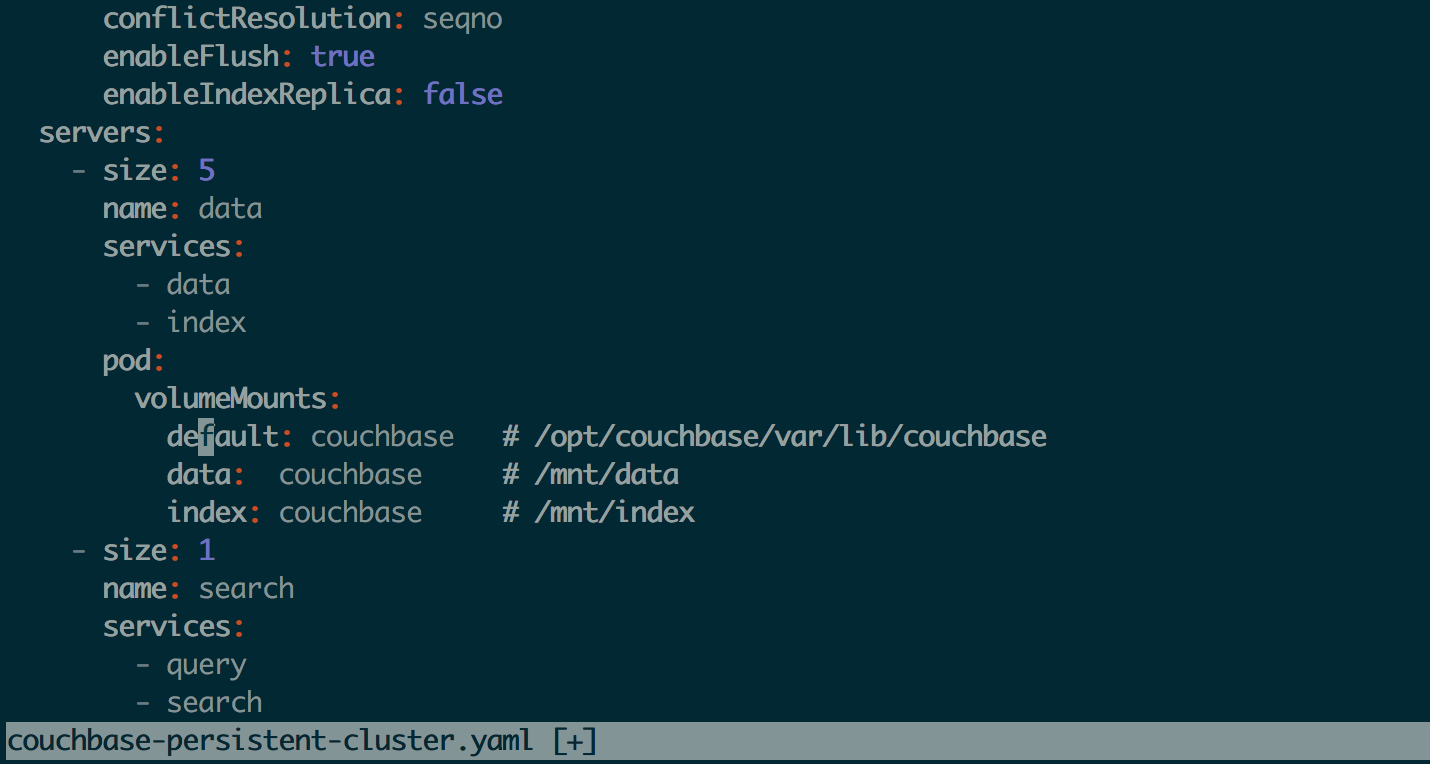
Scaling the cluster up
We will see the new pods are getting created and pods aks couchbase nodes are getting added to cluster, rebalance is performed, simply amazing!
|
1 |
kubectl logs -f couchbase-operator-6cb7687498-zfzq5 |

pods getting created and rebalance is performed
Cluster has been scaled up and new cluster definition looks like this, observer that out of total 100K items, each node has ~20K items/node

New cluster definition
[TIP] Let’s check if we have PV’s in our containers
Login to the pod, and run the command lsblk -a
|
1 |
kubectl exec -ti cb-op-aks-demo-0000 /bin/bash |
|
1 2 3 4 5 6 7 8 9 10 11 12 13 14 15 16 17 18 |
root@cb-op-aks-demo-0000:/# lsblk -a NAME MAJ:MIN RM SIZE RO TYPE MOUNTPOINT loop1 7:1 0 0 loop <strong>sdd 8:48 0 4G 0 disk /mnt/data</strong> sdb 8:16 0 32G 0 disk `-sdb1 8:17 0 32G 0 part loop6 7:6 0 0 loop loop4 7:4 0 0 loop sr0 11:0 1 690K 0 rom loop2 7:2 0 0 loop <strong>sde 8:64 0 4G 0 disk /mnt/index</strong> loop0 7:0 0 0 loop <strong>sdc 8:32 0 4G 0 disk /opt/couchbase/var/lib/couchbase</strong> sda 8:0 0 30G 0 disk `-sda1 8:1 0 30G 0 part /opt/couchbase/var loop7 7:7 0 0 loop loop5 7:5 0 0 loop loop3 7:3 0 0 loop |
In couchbase-persistent-cluster.yaml we had defined storage volume to be of size 4GiB, and in the highlighted snippet we see that we have Couchbase directories of 4GiB!
Delete a pod, simulating a node failure
Delete a pod cb-op-aks-demo-0000 from k8s dashboard, its a data service node

Delete a pod from k8s dashboard
With the autoFailoverTimeout variable timeout defined in couchbase-persistent-cluster.yaml, node gets auto-failed over and its detected by Autonomous Operator and hence by the Couchbase Cluster
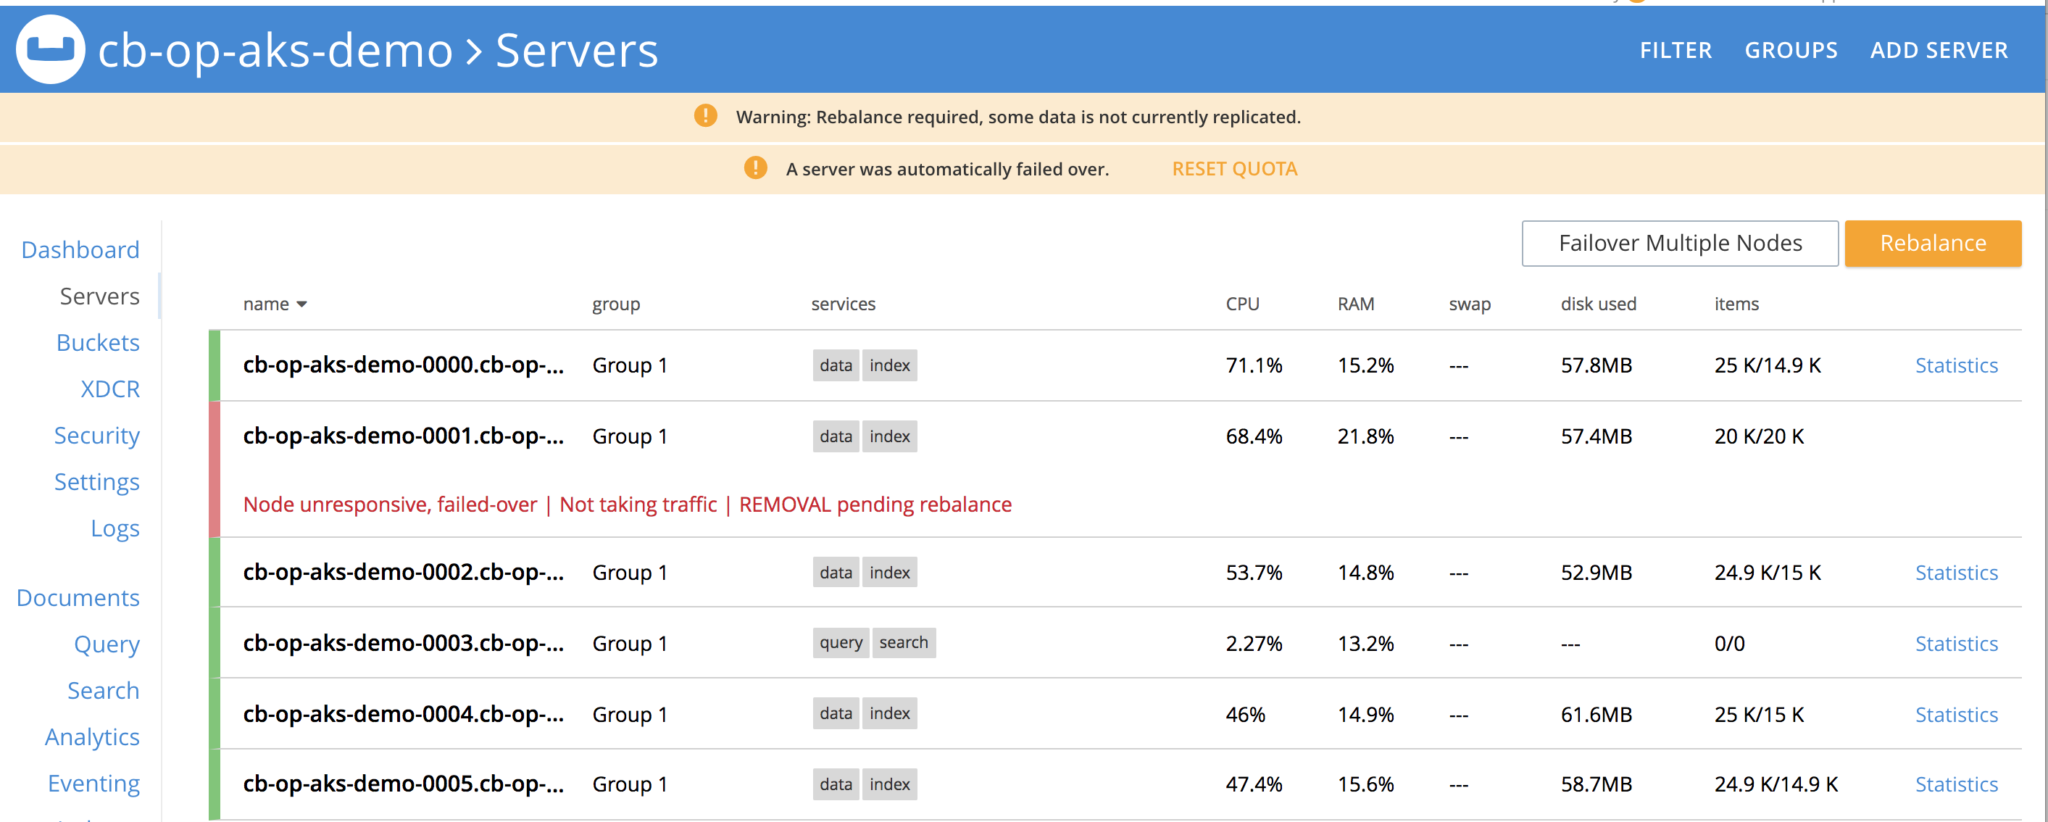
Node get deleted and failed over
Couchbase custom controller is constantly watching the cluster definition and it needs to have total of 4 nodes or k8s pods, and it sees one is gone, hence it creates a new pod, joins the cluster and rebalance is performed.
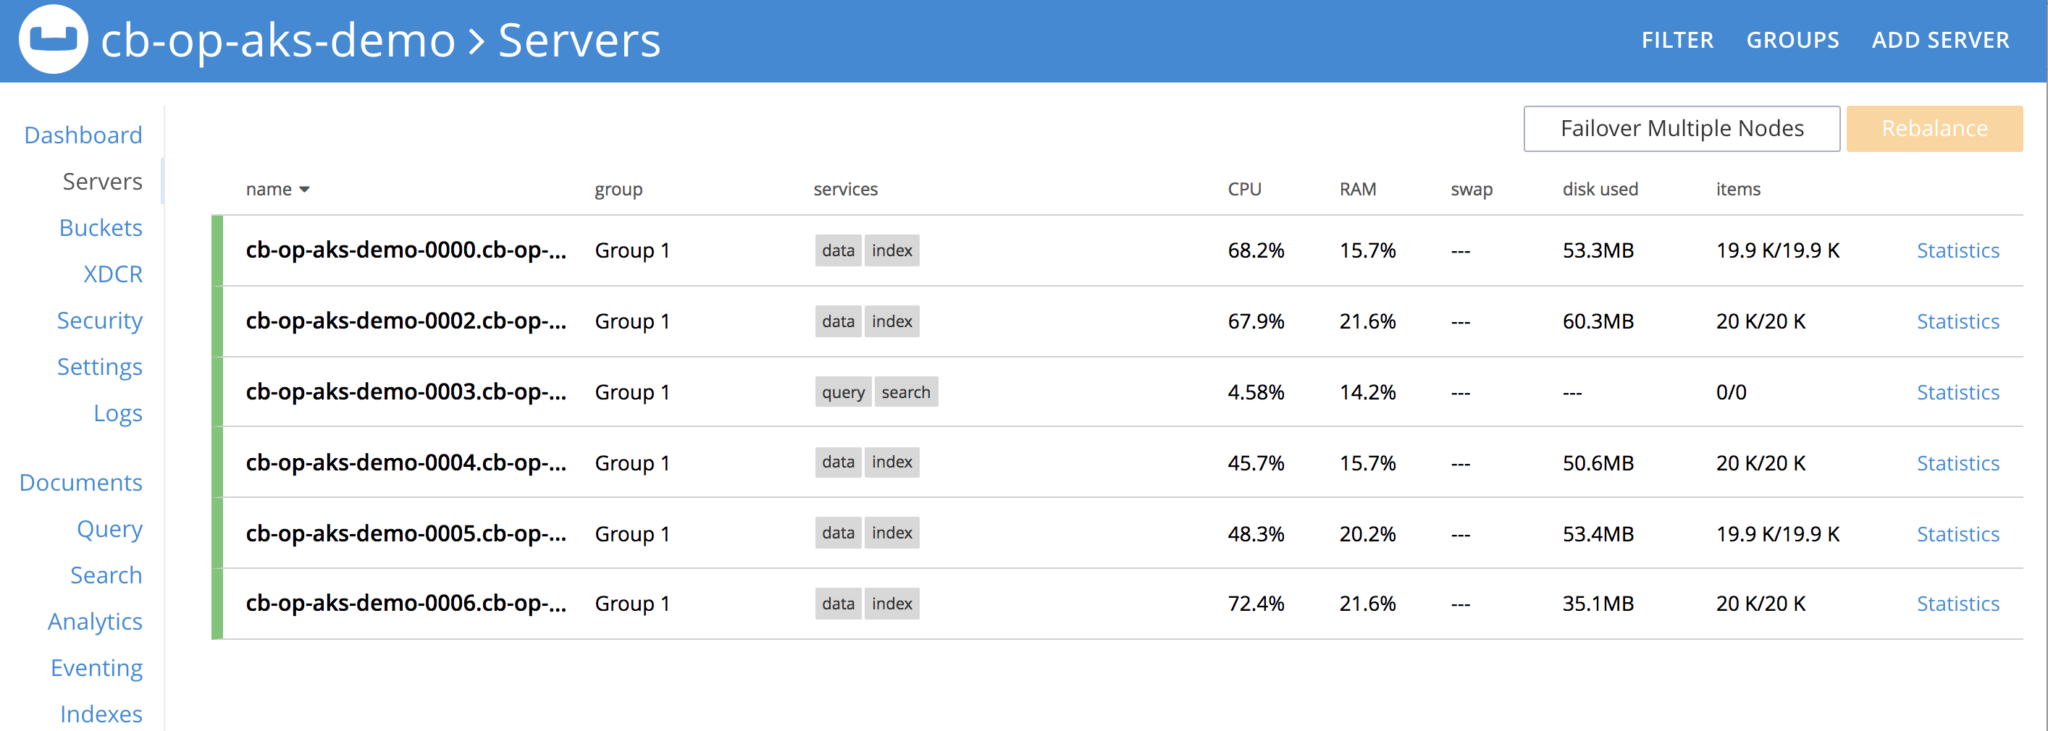
New pod is created, joined the cluster and rebalance operation is performed, all of it automatically
From couchbase operator pods logs

rebalance progress in coucbase-operator-xxx logs
Let’s take a moment, to see what happened here!
A node had failed, it was detected by Custom Controller aka Couchbase Operator, it also watches couchbase cluster definition and sees that it needs to have 7 pods or 7 couchbase nodes total, sees one is gone, it waits for autoFailoverTimeout, and spins a new pod, joins the cluster and rebalance operation is performed.
Here at Couchase we believe in sustained differentiation for better serving our customer in terms of agility, performance and cutting edge technology. This is certainly game changer. We will appreciate your feedback, looking forward to making your journey towards microservices a step easy with Couchbase Autonomous Operator on kubernetes running on AKS.
References
https://docs.microsoft.com/en-us/azure/aks/azure-disks-dynamic-pv
https://docs.microsoft.com/en-us/azure/aks/tutorial-kubernetes-deploy-cluster
The new Couchbase Autonomous Operator 1.0 for Kubernetes and OpenShift is now GA!
https://docs.couchbase.com/operator/1.0/overview.html