OpenShift is a platform as a service (PaaS) from Red Hat on top of Docker containers and Kubernetes. It is an open source container application platform by Red Hat based on Docker containers and the Kubernetes container cluster manager for enterprise app development and deployment.
Couchbase’s Operator also supports OpenShift. Now, let’s see how you can quickly scale up and down, recover from failures, or even change the architecture of your cluster with just a few line commands:
Video Transcription:
Code:
|
1 |
https://github.com/couchbaselabs/kubernetes-starter-kit |
Prerequisites
Starting Minishift
To start your minishift, just type the following command:
|
1 |
minishift start |
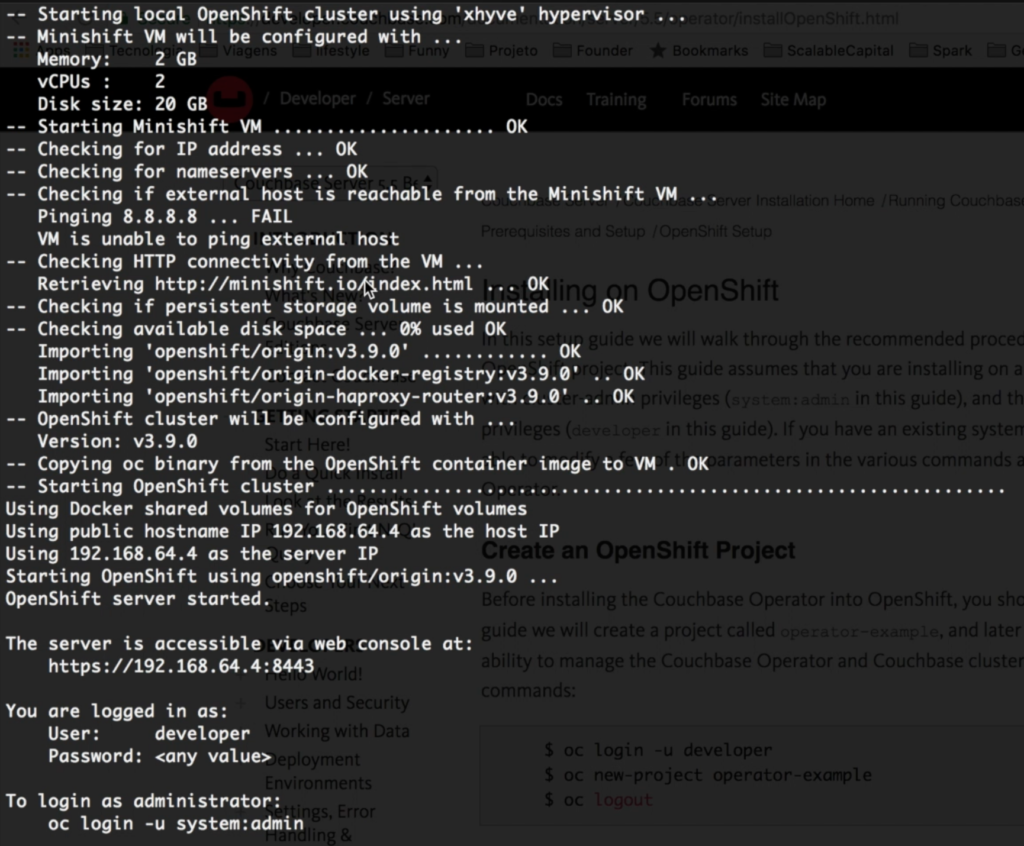
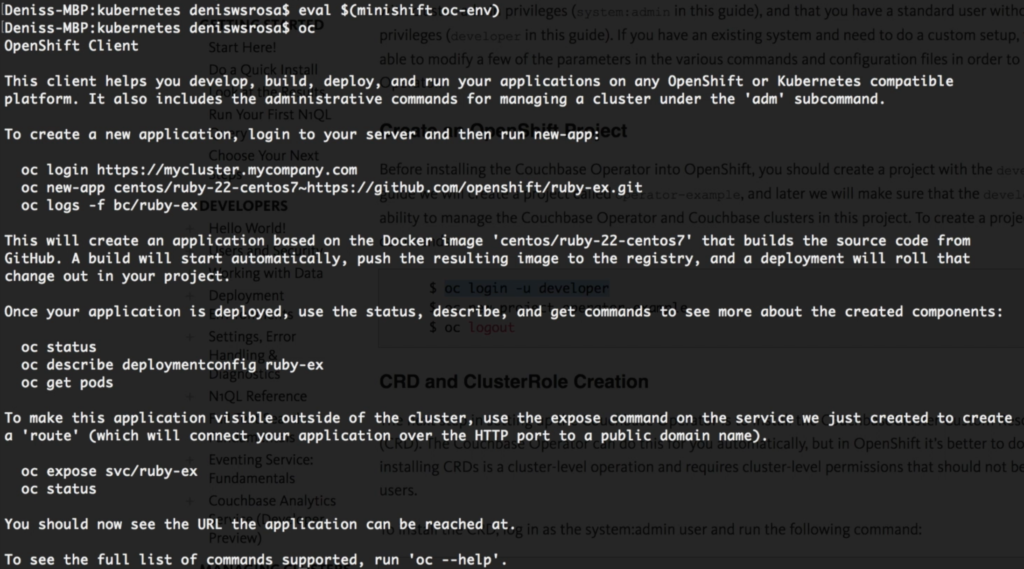
Once it has started, execute the following command to add oc to your Classpath:
|
1 |
eval $(minishift oc-env) |
Additionally, you can also include the following add-on to be able to access your cluster as an admin:
|
1 |
minishift addon apply admin-user |
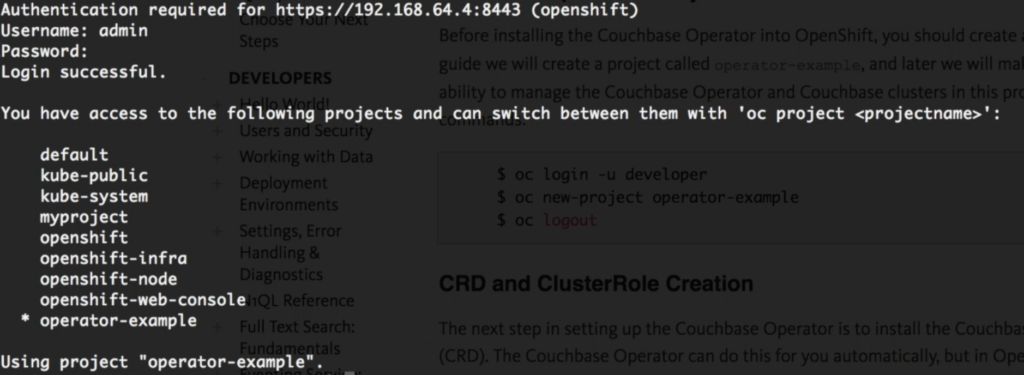
Now, to access OpenShift, you can use the following command:
|
1 |
oc login -u admin |
Configuring Minishift
There are a few things that should be created before we start. I will just list all the necessary commands, but you can view the official documentation here.
1 – Create an Openshift Project
|
1 2 3 |
oc login -u developer oc new-project operator-example oc logout |
2 – Create a new Custom Resource Definition and Cluster Role
|
1 2 3 4 |
oc login -u admin oc create -f https://packages.couchbase.com/kubernetes/0.8.1-beta2/openshift/crd.yaml oc create -f https://packages.couchbase.com/kubernetes/0.8.1-beta2/openshift/cluster-role-sa.yaml oc create -f https://packages.couchbase.com/kubernetes/0.8.1-beta2/openshift/cluster-role-user.yaml |
3- Setting Up RBAC for an OpenShift Project
|
1 2 3 4 5 |
oc create serviceaccount couchbase-operator --namespace operator-example oc create rolebinding couchbase-operator --clusterrole couchbase-operator --serviceaccount operator-example:couchbase-operator oc adm policy add-scc-to-user anyuid system:serviceaccount:operator-example:couchbase-operator oc create rolebinding couchbasecluster --clusterrole couchbasecluster --user developer --namespace operator-example oc create clusterrolebinding couchbasecluster --clusterrole couchbasecluster --user developer |
Deploying Couchbase’s Operator on OpenShift
Now that we have set up everything, let’s deploy Couchbase’s Operator. As I have mentioned in a previous blog post, the Operator is responsible for automating part of the DBA’s work, such as joining a new node to the cluster, rebalancing data, consolidating logs, etc.
You can deploy the operator by running the following command:
|
1 |
oc create -f https://packages.couchbase.com/kubernetes/0.8.1-beta2/openshift/operator.yaml |
Execute the command below to verify that your deployment has been executed successfully:
|
1 |
oc get pods: |

Deploying Couchbase on OpenShift
Deploying Couchbase on OpenShift is nearly the same as deploying it on Kubernetes; you just need to execute the following command inside the “kubernetes” directory:
|
1 2 |
oc create -f secret.yaml // create the user and password we are going to use to log-in to the web console oc create -f couchbase-cluster.yaml |
Our yaml file contains the cluster specification, like the name of the bucket, the number of servers, services, etc:
secret.yaml
|
1 2 3 4 5 6 7 8 |
apiVersion: v1 kind: Secret metadata: name: cb-example-auth type: Opaque data: username: QWRtaW5pc3RyYXRvcg== #base64 for Administrator password: cGFzc3dvcmQ= #base64 for password |
couchbase-cluster.yaml
|
1 2 3 4 5 6 7 8 9 10 11 12 13 14 15 16 17 18 19 20 21 22 23 24 25 26 27 28 29 30 31 32 33 34 35 |
apiVersion: couchbase.database.couchbase.com/v1beta1 kind: CouchbaseCluster metadata: name: cb-example spec: baseImage: couchbase/server version: enterprise-5.0.1 authSecret: cb-example-auth exposeAdminConsole: true cluster: dataServiceMemoryQuota: 256 indexServiceMemoryQuota: 256 searchServiceMemoryQuota: 256 indexStorageSetting: memory_optimized autoFailoverTimeout: 30 buckets: - name: couchbase-sample type: couchbase memoryQuota: 128 replicas: 3 ioPriority: high evictionPolicy: fullEviction conflictResolution: seqno enableFlush: true enableIndexReplica: false servers: - size: 3 name: all_services services: - data - index - query - search dataPath: /opt/couchbase/var/lib/couchbase/data indexPath: /opt/couchbase/var/lib/couchbase/data |
Please refer to the official documentation to understand the function of each property.
In the file above, we have specified that we want 3 nodes, which means that we should have 3 nodes running Couchbase:
|
1 |
oc get pods |

Accessing your Database on OpenShift
There are many ways in which you can expose the web console to the external world. In this article, let’s simply forward the port to the local machine with the following command:
|
1 |
oc port-forward cb-example-0000 8091:8091 |
Now, you should be able to access Couchbase’s Web Console on your local machine at http://localhost:8091:
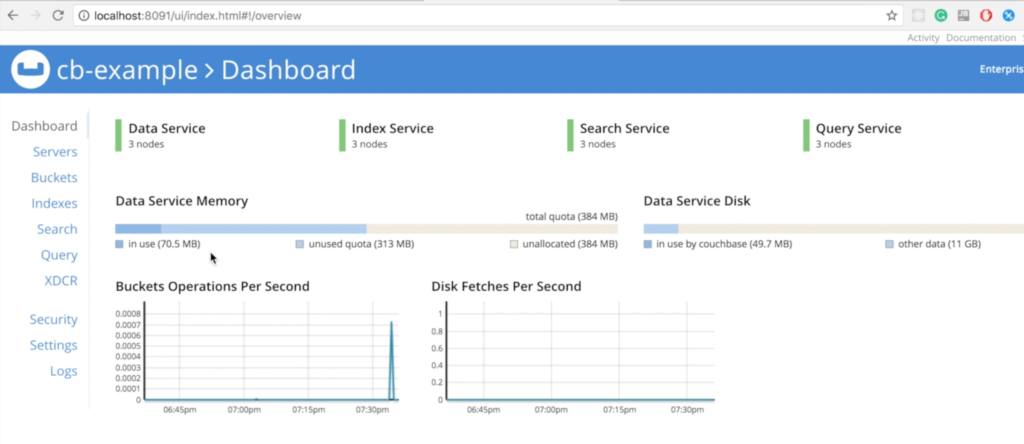
Notice that all nodes created are already part of a cluster. It was all done automatically by the Couchbase’s Operator.

Recovering from a Database Node Failure on OpenShift
Let’s kill one of our instances to see how the cluster behaves:
|
1 |
oc delete pod cb-example-0001 |

Couchbase will immediately notice that a node “disappeared” and the recovery process will start. As we specified at couchbase-cluster.yaml that we always want 3 servers running, Kubernetes will start a new instance called cb-example-0004:
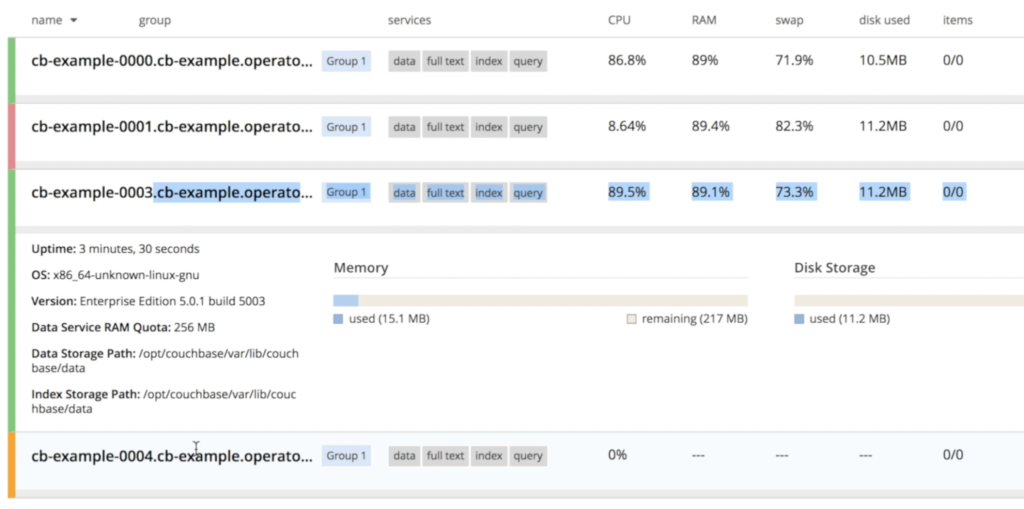
Once cb-example-004 is up, the operator kicks in to join the newly created node to the cluster and then triggers data rebalancing

Scaling Down Couchbase on Open Shift
If you think that scaling up a database is difficult, you should try to scale it down. Luckily, it is something really simple with Couchbase and OpenShift. All you need is change your cluster configuration:
couchbase-cluster.yaml
|
1 2 3 4 5 6 7 8 9 10 11 12 13 14 15 16 17 18 19 20 21 22 23 24 25 26 27 28 29 30 31 32 33 34 35 |
apiVersion: couchbase.database.couchbase.com/v1beta1 kind: CouchbaseCluster metadata: name: cb-example spec: baseImage: couchbase/server version: enterprise-5.0.1 authSecret: cb-example-auth exposeAdminConsole: true cluster: dataServiceMemoryQuota: 256 indexServiceMemoryQuota: 256 searchServiceMemoryQuota: 256 indexStorageSetting: memory_optimized autoFailoverTimeout: 30 buckets: - name: couchbase-sample type: couchbase memoryQuota: 128 replicas: 3 ioPriority: high evictionPolicy: fullEviction conflictResolution: seqno enableFlush: true enableIndexReplica: false servers: - size: 1 //changed name: all_services services: - data - index - query - search dataPath: /opt/couchbase/var/lib/couchbase/data indexPath: /opt/couchbase/var/lib/couchbase/data |
And then execute the following command to push your change to OpenShift:
|
1 |
oc replace -f couchbase-cluster.yaml |
However, there is a small detail here as we can’t just kill 2 nodes at the same time without some risk of data loss. To avoid this problem, the operator scales down the cluster gradually, a single instance at a time, triggering rebalancing to ensure that no data is lost during the process:

Scaling Up Couchbase on OpenShift
Let’s scale it up again to 3 nodes. As you might have guessed, all we have to do is change the size parameter on couchbase-cluster.yaml back to 3:
|
1 2 3 4 5 6 7 8 9 10 11 12 13 14 15 16 17 18 19 20 21 22 23 24 25 26 27 28 29 30 31 32 33 34 35 |
apiVersion: couchbase.database.couchbase.com/v1beta1 kind: CouchbaseCluster metadata: name: cb-example spec: baseImage: couchbase/server version: enterprise-5.0.1 authSecret: cb-example-auth exposeAdminConsole: true cluster: dataServiceMemoryQuota: 256 indexServiceMemoryQuota: 256 searchServiceMemoryQuota: 256 indexStorageSetting: memory_optimized autoFailoverTimeout: 30 buckets: - name: couchbase-sample type: couchbase memoryQuota: 128 replicas: 3 ioPriority: high evictionPolicy: fullEviction conflictResolution: seqno enableFlush: true enableIndexReplica: false servers: - size: 3 //back to 3 servers name: all_services services: - data - index - query - search dataPath: /opt/couchbase/var/lib/couchbase/data indexPath: /opt/couchbase/var/lib/couchbase/data |
Then, we update our configuration by running
|
1 |
oc replace -f Couchbase-cluster.yaml |
After a few minutes, you will see that we now have 3 nodes again:
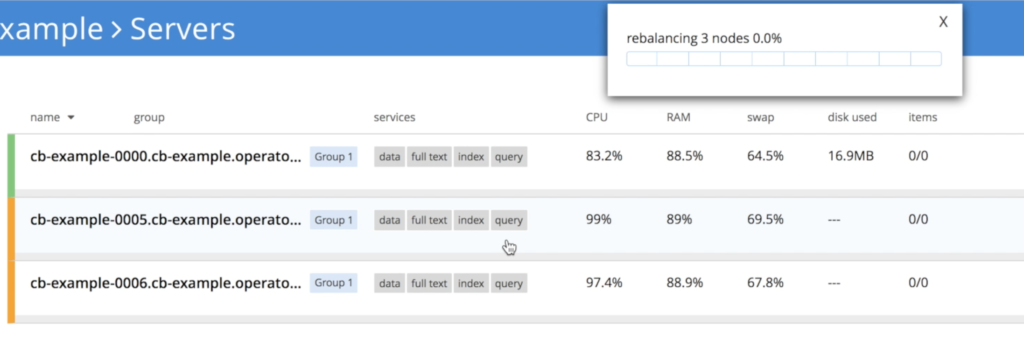
Multidimensional Scaling
You can also leverage multi-dimensional scaling by specifying the services you want to run in each node:
couchbase-cluster.yaml
|
1 2 3 4 5 6 7 8 9 10 11 12 13 14 15 16 17 18 19 20 21 22 23 24 25 26 27 28 29 30 31 32 33 34 35 36 37 38 39 40 |
apiVersion: couchbase.database.couchbase.com/v1beta1 kind: CouchbaseCluster metadata: name: cb-example spec: baseImage: couchbase/server version: enterprise-5.0.1 authSecret: cb-example-auth exposeAdminConsole: true cluster: dataServiceMemoryQuota: 256 indexServiceMemoryQuota: 256 searchServiceMemoryQuota: 256 indexStorageSetting: memory_optimized autoFailoverTimeout: 30 buckets: - name: couchbase-sample type: couchbase memoryQuota: 128 replicas: 3 ioPriority: high evictionPolicy: fullEviction conflictResolution: seqno enableFlush: true enableIndexReplica: false servers: - size: 2 name: data_and_index services: - data - index dataPath: /opt/couchbase/var/lib/couchbase/data indexPath: /opt/couchbase/var/lib/couchbase/data - size: 1 name: query_and_search services: - query - search dataPath: /opt/couchbase/var/lib/couchbase/data indexPath: /opt/couchbase/var/lib/couchbase/data |
Again, we need to push our changes to OpenShift with the following command:
|
1 |
oc replace -f couchbase-cluster.yaml |

In this scenario, three new nodes will be created: two running data and index and one running full-text search and query

Connecting your Application to Couchbase on OpenShift
Deploying an application on OpenShift is very similar to deploying it on Kubernetes. The main difference is that you should use oc instead of using kubectl. This article shows a step-by-step process of how to do it.
If you have any questions, tweet me at @deniswsrosa or leave a comment below.
Read Also:
Very well written blog! Its good to show how to scale up/down, show Multi-Dimension Capability, all in the same blog.
thanks a lot!, if you have any questions, feel free to ask.
Hi Denis
Thanks for this article, it looks fantastic, but it seems like the link no longer work ie https://packages.couchbase.com/kubernetes/0.8.1-beta2/openshift/crd.yaml
Can you point me to where they now live?
Many thanks, Adrian