Following up from the blog where we installed the Couchbase AMI (Amazon Machine Image) on AWS, we will now explore how to connect Couchbase Sync Gateway to Couchbase Server that is running on Amazon EC2 in a working mobile application.
[1] Couchbase Web Console
To see our Couchbase Server instance and the Data Buckets we will log into the Couchbase Web Console, which we did in Step 4 of the previous blog. When you log in and click on the ‘Server Nodes’ tab, you will see the Couchbase Server instance running. This is spung from the Couchbase AMI when we launched it from the AWS marketplace.

Also you will see the Data Buckets tab that has pre-configured buckets from the AMI installations. For this blog where we will connect together Couchbase Sync Gateway to Couchbase Server and the first thing we need to do is to modify one of the data bucket names.

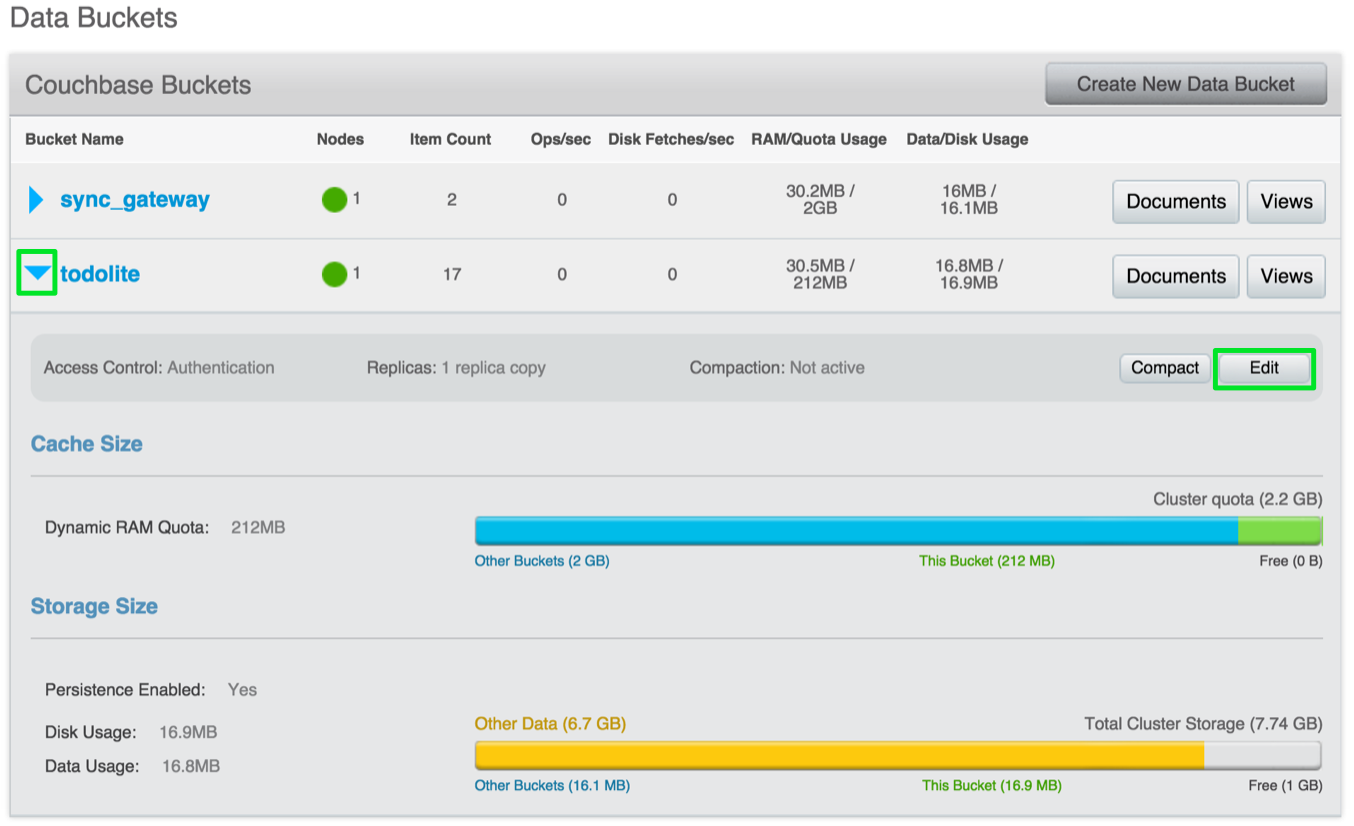
To modify the name of our bucket, we will first click on the arrow next to the bucket name to drop down the bucket’s information like shown below. Then we will click on the ‘Edit’ button to bring us to the configuration menu.
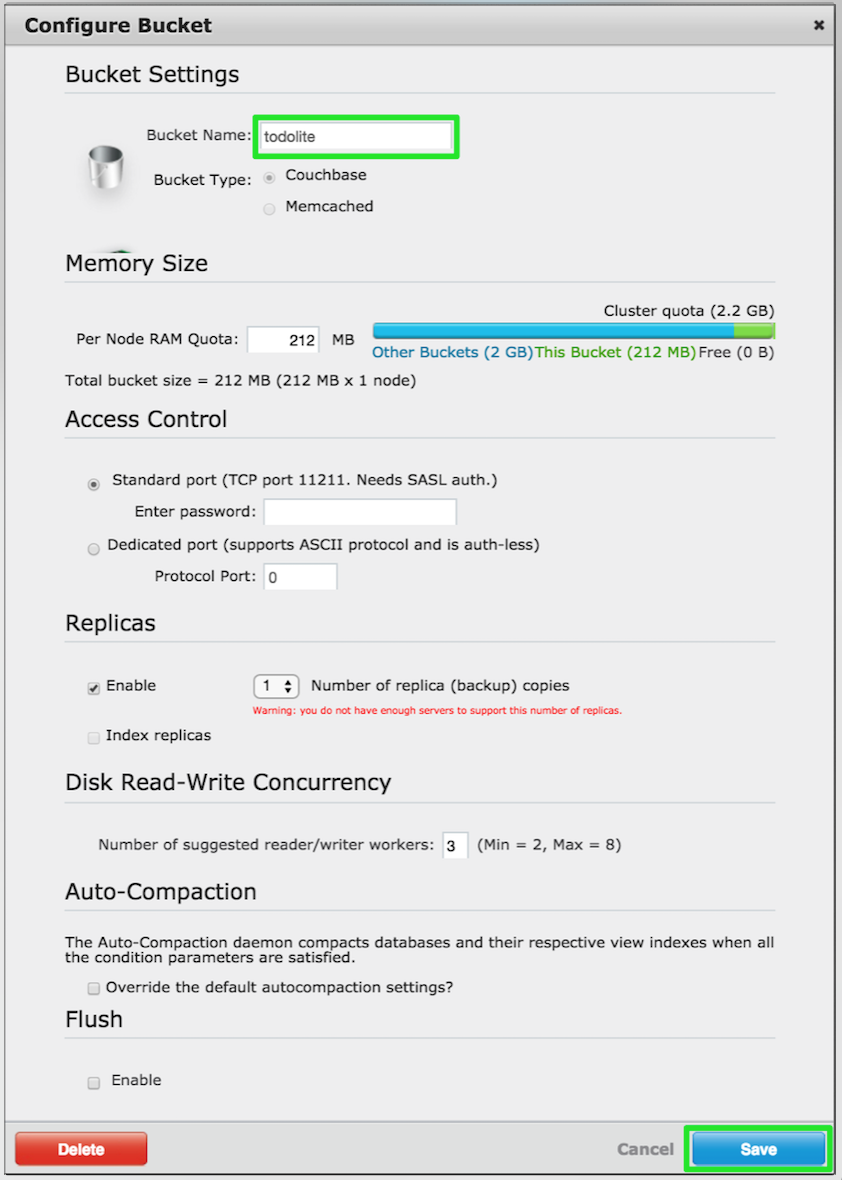
Next in our ‘Configure Bucket’ menu, we will change the name of our Bucket Name field value to be ‘todolite’ as this will be our target for the mobile application to point to. Make the bucket naming modification while leaving everything else and then click on ‘Save’ in the bottom right as shown below.
Now you should be seeing two data buckets in the Data Buckets tab where one of them is the ‘todolite’ bucket that we will be using next in our application.
[2] Connecting to Couchbase AWS instance
Next we will need to obtain the ‘Public IP’ from the AWS console. You may reference Step 4 of the previous blog again in getting to the AWS web console where the Public IP can be obtained. Once you locate the Couchbase instance that is running, copy down the Public IP address.

Open up your terminal application and locate the folder where you stored the private key pair file that you downloaded previously. This would be a .pem extension file and you would need to be in that folder to connect to the Couchbase instance on AWS.
![]()
Your key must not be publicly viewable for SSH to work and a command to run if needed would be:
|
1 2 |
chmod 400 'name_of_key.pem' |
![]()
From the previous example, the .pem file was named ‘couchbase_aws’ and so the command to run is ‘chmod 400 couchbase_aws.pem’
Next we will SSH into our Amazon Linux AMI and we will do that from the location of our private key folder. The command to run would be:
|
1 2 |
ssh -i "name_of_key.pem" ec2-user@"public_ip" |
where the “name_of_key.pem” and “public_ip” will be respectively your own that you have named and have from the Amazon web console. This is illustrated below in the terminal console screen.

[3] Modify Sync Gateway Config file
The last step before we connect the Couchbase Sync Gateway and Couchbase Server together is to modify the Couchbase Sync Gateway Configuration file. The config.json content that we need is located on the GitHub ToDoLite repo and we will need to copy the content from that repo and bring it into our config.json file in our AWS instance.
![]()
We will open our configuration file named ‘config.json’ and paste the content from the ‘sync-gateway-config.json’ file located in the ToDoLite repo. Below we show the content of what the config.json will have after we execute the command in the Terminal app: nano config.json
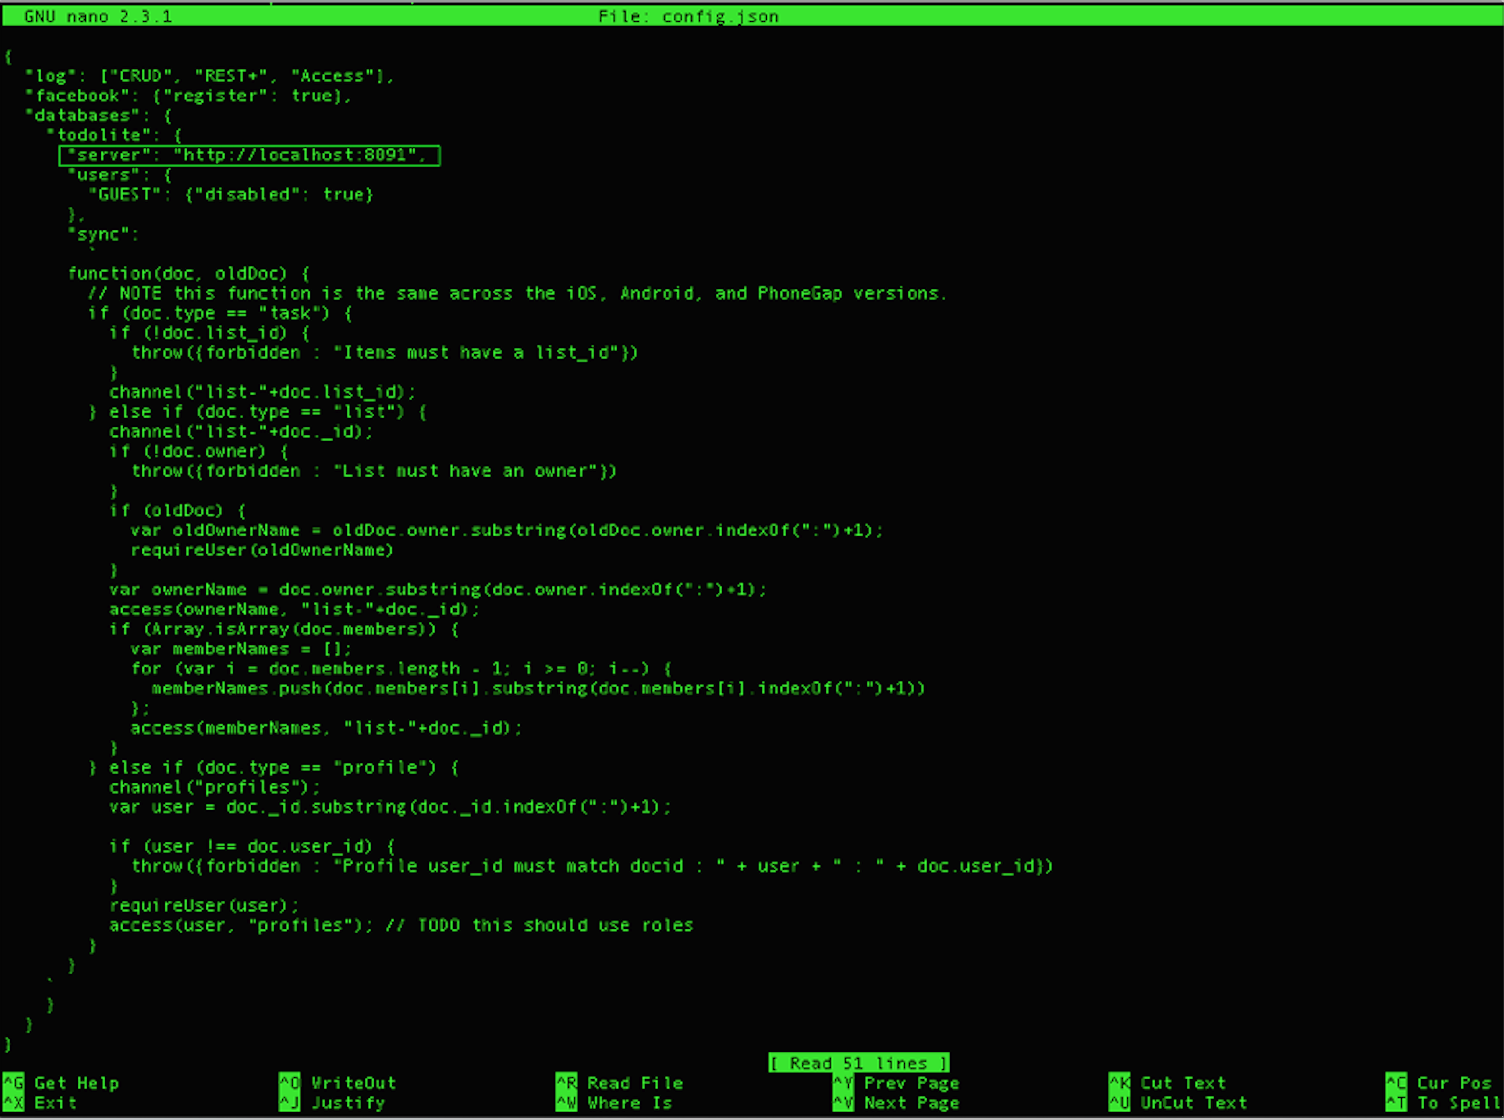
You will notice that there is a slight modification and difference with this config.json file that is shown above than what we have in the GitHub repo. The “server” value is now ‘http://localhost:8091’ as oppose to ‘walrus’ which is a simple, limited, in-memory database that was used in place of Couchbase Server. You may read more about using Walrus during development over at the Mobile Portal. Walrus can be used for unit testing but for us here, we are going to have Sync Gateway target Couchbase Server on our local AWS instance in the cloud which is located on port: ‘8091’. We modify the server value to be:
|
1 2 |
"server" : "http://localhost:8091" , |
You will also notice that the “databases” value has “todolite” which is specifically the Data Bucket that we have created or modified in our Couchbase Web Console in step 1 of this blog. This Sync Gateway is now ready to target the specific data bucket named ‘todolite’ which is located on our Couchbase Server instance in AWS on port ‘8091’. execute together ‘control+x’ on the keyboard to exit out of the ‘nano’ program and save the changes you have made to the config.json file.
[4] Running Couchbase Mobile Application
Now that we have the Sync Gateway configuration file, config.json, ready for our application; the next step will be to point our mobile application to the end point we wish to target. Download the ToDoLite Couchbase Mobile sample application found on GitHub and for this blog we will reference the Android version. There is an iOS ToDoLite version as well and the steps to connecting the application to Couchbase Sync Gateway and Couchbase Server are similar. You may reference the Mobile Portal guide on how to Build ToDoLite in Android. We will assume that you have the mobile application running on your device or emulator and our next step is to modify the Sync URL.

To modify our Sync URL, we will locate our ‘BuildConfig.java’ file and you may do that by clicking on the magnifying glass icon on the topic right within Android Studio and type in ‘BuildConfig.java’, press enter and open up the file. You should see the above where the SYNC_URL_HTTP variable is pointing to “http://demo.couchbasemobile.com:4984/todolite/” end point. This is a demo box that we have setup originally but now since you have your own Couchbase Sync Gateway and Couchbase Server instance on AWS, we will modify that accordingly and point it to the instance you have set up. To do that first locate the ‘Public DNS’ on your Amazon web console as this will be your target instance. You may reference Step 4 of the AMI blog on how and where to obtain the Public DNS. The Sync Gateway listens on port 4984 for the Sync API commands and the data bucket we are targeting is named ‘todolite’; therefore for the modified Sync URL we will have the structure to be:
|
1 2 |
<span style="color: #cc7832">public static final </span>String <span style="color: #9876aa;font-style: italic">SYNC_URL_HTTP </span>= <span style="color: #6a8759">"http://'Public DNS':4984/todolite/"</span><span style="color: #cc7832">;</span> |
where the ‘Public DNS’ is your own that is obtained from the AWS console. Now before you build and run your mobile application you would need to start the Sync Gateway from within your EC2 instance.
[5] Start Sync Gateway
From within the Terminal application, log into your EC2 instance that we did towards the end of Step 2 of this blog and add a path to your ‘.bash_profile’ file. You should be in your user directory ‘/home/ec2-user’ and then execute ‘nano .bash_profile’ like below

Next you will add an additional line to the ‘.bash_profile’ file so that you can access the Couchbase Sync Gateway program from anywhere within your instance without having to type out the entire path of the Sync Gateway location. The location of Sync Gateways is located in ‘/opt/couchbase-sync-gateway/bin’ when the Couchbase AMI got created and the additonal line you would add is:
|
1 2 |
PATH=$PATH:/opt/couchbase-sync-gateway/bin |
From within the nano program, you can reference the image below on where the PATH value is added.
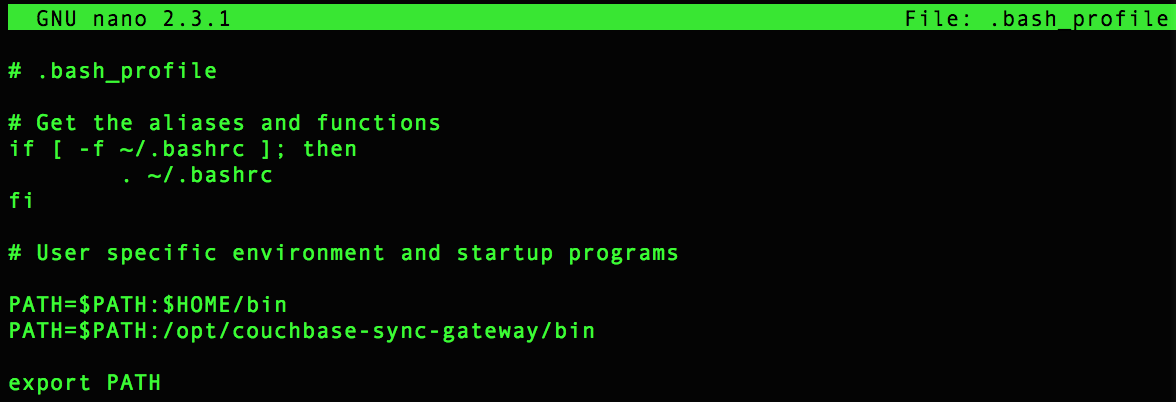
Execute ‘control+x’ on the keyboard to exit out of nano and save the changes you have made to the ‘.bash_profile’ file. Exit out of the instance by typing in ‘exit’ and hit ‘enter’ on the keyboard and then SSH back in so that you now have the PATH in your profile. And if you wish to access the directory of where the Sync Gateway is located, you may follow below starting from within your user directory ‘/home/ec2-user’. The green arrow points to the actual Sync Gateway program that we will be running.

Finally we are ready to run Sync Gateway from within our EC2 instance and we will return back to the directory where our ‘config.json’ file is located as we will need to specify the configuration we wish to run our Couchbase Sync Gateway against. Follow the commands below to return back to the ‘/home/ec2-user’ directory and run:
|
1 2 |
sync_gateway config.json |
This is shown below as the last command.

After we execute our Sync Gateway against the ‘config.json’ file, we will see the below information about our configurations where the Couchbase Server and Couchbase Sync Gateway are now both ready for our mobile application to replicate data against at the appropriate ports.

[6] Replicate Data to Couchbase Sync Gateway and Server
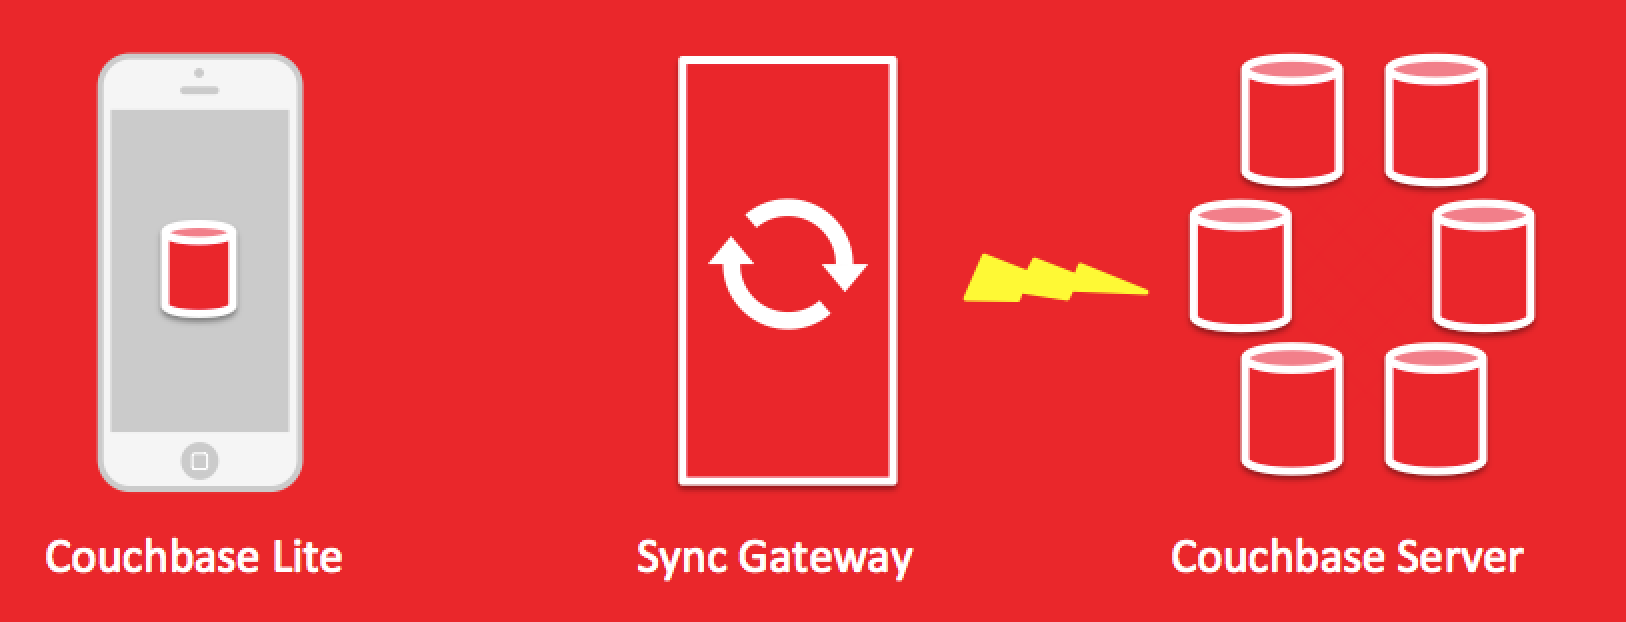
Finally we can run our Android ToDoLite application and sync data against our Couchbase Sync Gateway and Couchbase Server in the cloud. Recall that the Couchbase Mobile stack consists of Couchbase Lite, the embedded JSON database that is consumed within the ToDoLite project and we have now setup our Sync Gateway and Server to be targeted by the application. This was done from within Android Studio by modifying the ‘SYNC_URL_HTTP’ variable from within the ‘BuildConfig.java’ file.
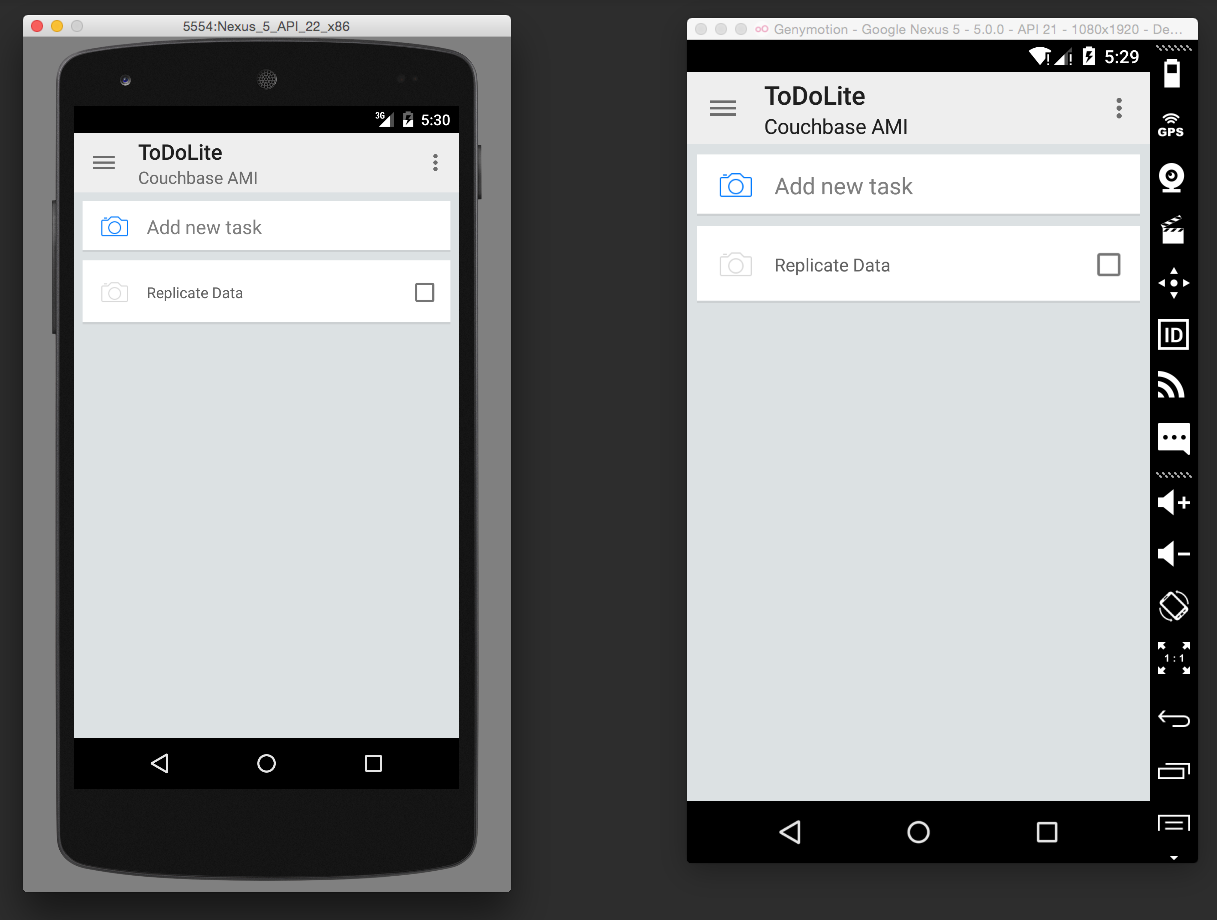
From within Android Studio we will launch two separate instances of the application and log in with two separate users. This would allow us to show replication across the two different instances. We will launch one with the stock Android emulator and another using Genymotion as shown below. Upon logging in and sharing the list across to the users, you are able to see that not only the list is shared across but the task that is entered is replicated to both client devices.
Below we have a List named ‘Couchbase AMI’ that we created by entering and sharing to users on the same database. From within the list, we created a task named ‘Replicate Data’ and the title got sync accordingly through Couchbase Sync Gateway.
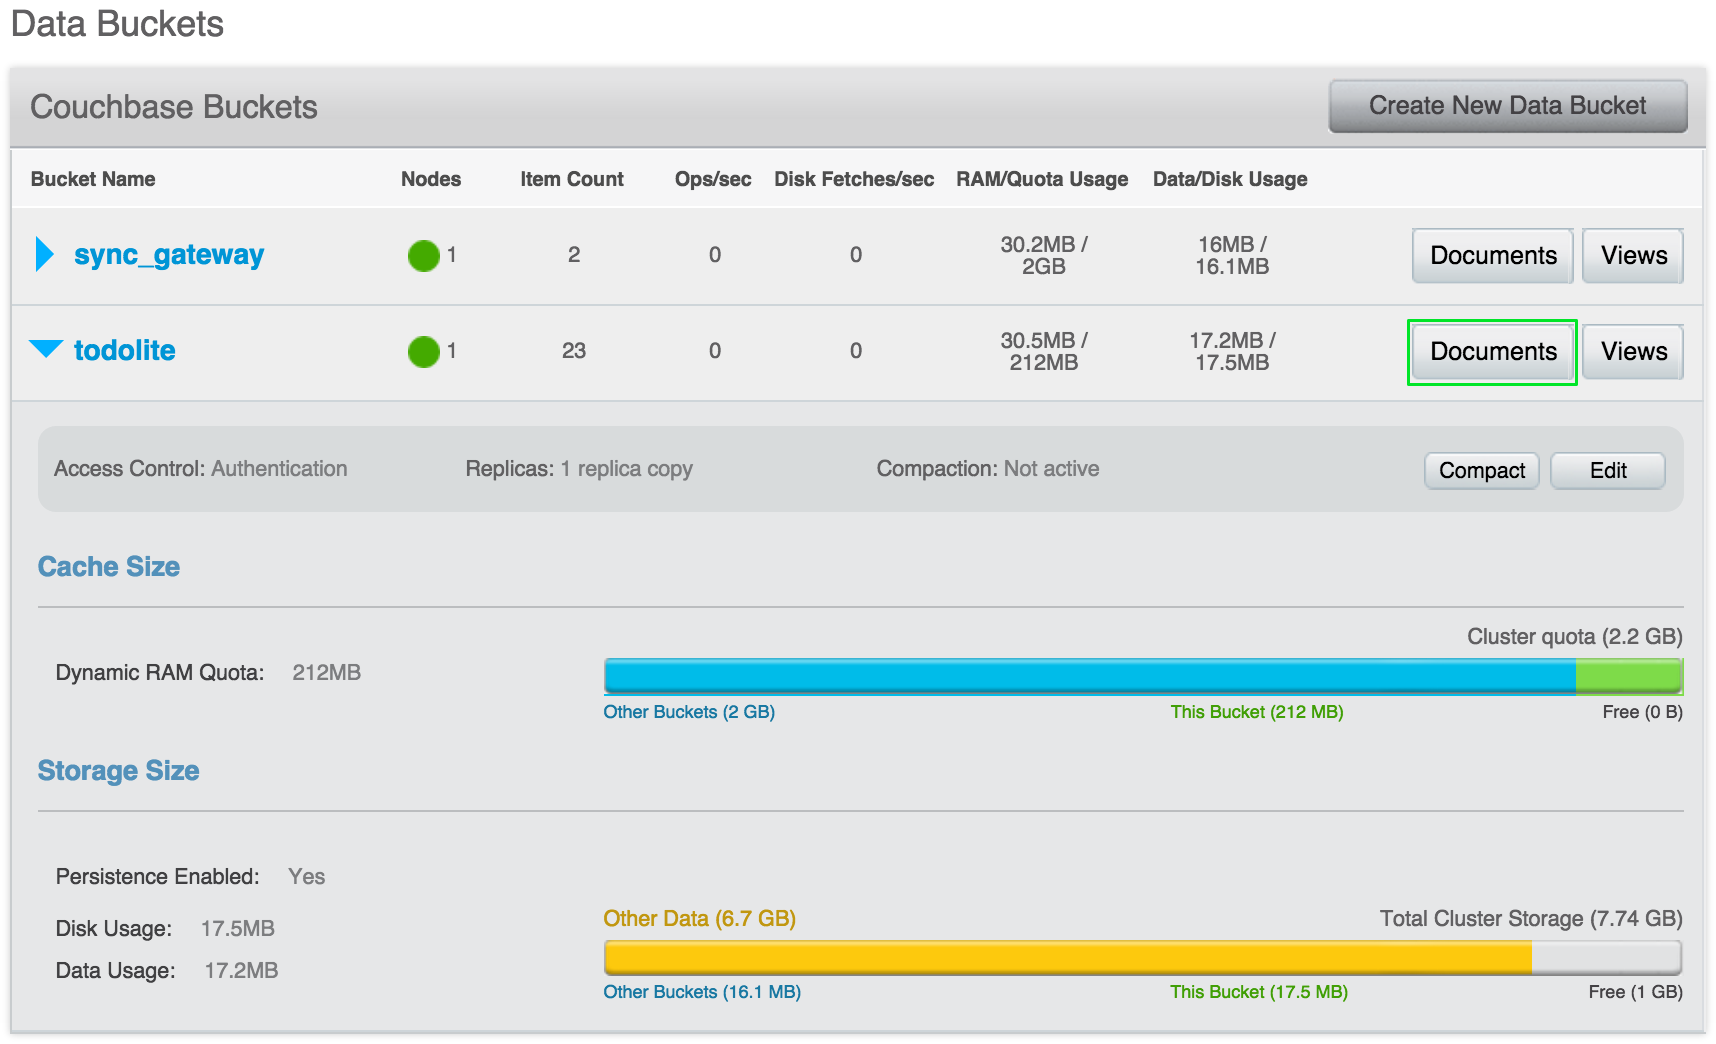
Another place to see this replication working is to open up the Couchbase web console again where you will see the Data Buckets populate with the Task item title that you created. Log into the Couchbase console and click on Data Buckets tab as we did in Step 1. Click on the arrow pointing to ‘todolite’ and then click ‘Documents’ like below.
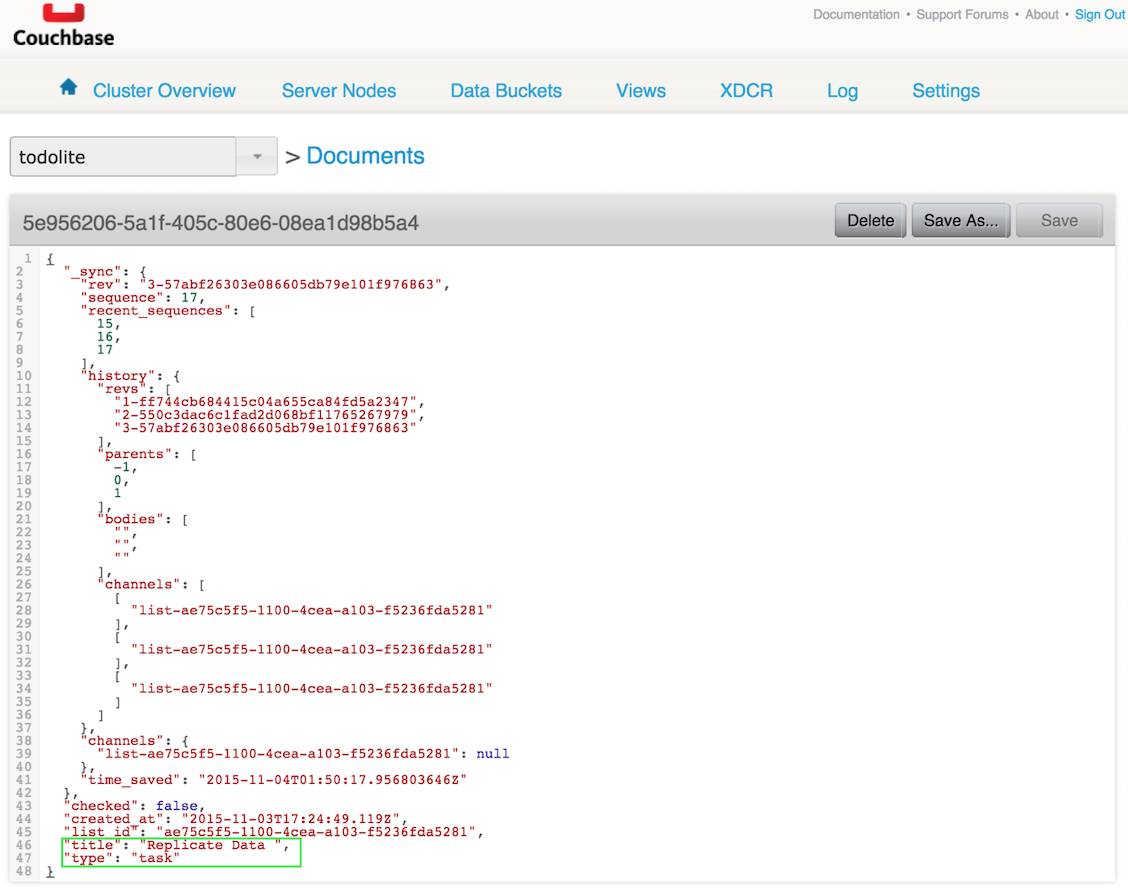
Upon opening up the ‘Documents’, you will see all the documents that are created when we entered a task into the list from within out ‘ToDoLite’ mobile applicaton. If you click and open a document, you will see the type, ‘task’ that was created and we named the title here in this example to be, “Replicate Data” as shown below.
Congratulations! You have now got Couchbase as a service running on Amazon AWS and also have a mobile application, ToDoLite, running against Couchbase Sync Gateway and Couchbase Server in production. You are able to sync data across both Android client devices using the Sync Gateway through the config.json file configurations and while having the data stored on the server in the cloud. You can read more about the Couchbase Lite APIs over on our Mobile Developer Portal and also on how to install the Couchbase AMI from part 1.