Couchbase Server, being software, can be installed and deployed in very diverse locations. Container strategies such as Docker can be used, home-grown servers running Windows or Linux, as well as hosted services such as Microsoft Azure and Amazon Web Services (AWS).
AWS if very popular amongst enterprises. As of today, it is within the top 10 most deployed services on Amazon. This is largely related to Amazon having single click deployments using AMIs and CloudFormation.
We’re going to see how to get started in minutes with Couchbase Server on Amazon Web Services.
Before continuing, you will need an AWS account. With an account ready to go, navigate to the Amazon Marketplace for Couchbase.

After reviewing information about the soon to be deployment, click the Continue button to proceed.
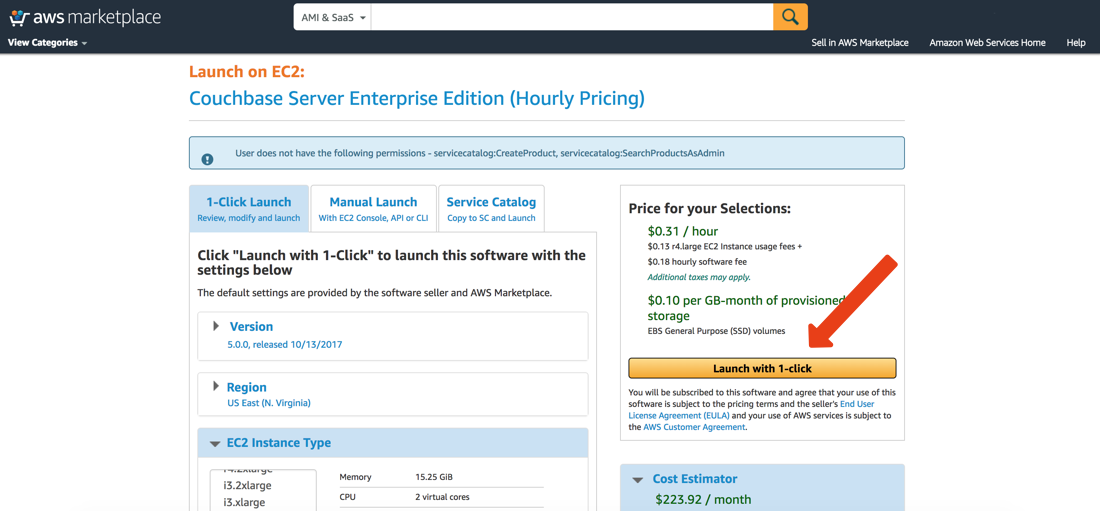
The next step is to define the AWS EC2 instance size. Depending on your use case, the instance sizing for memory, CPU, or disk should be considered.

When you’re happy with the sizing information, you’ll want to proceed with the deployment. By clicking Launch with 1-click, the instance will be created. This process can take a few minutes.
Back in your EC2 Management Console, you should see the deployment and whether or not it has finished deploying.

When it has completed, navigate to the public DNS listed and make sure to include the administrative dashboard port, 8091.
With a fresh node of Couchbase Server deployed, a very short configuration wizard can be completed, further configuring the database before usage.
Within minutes, Couchbase was deployed, configured, and made ready for use and development through Amazon Web Services (AWS).