One of the most challenging parts of deploying your application in the cloud is to set up a proper infrastructure, common tasks like creating a VPC, configuring auto-scaling, load balancers and gateways rapidly become time-consuming and cumbersome.
That’s is why we developed in partnership with the guys from ClearScale a Couchbase Quick Start AWS Deployment, it helps you to set up Couchbase Server and Sync Gateway in minutes using all AWS best practices to make your deployment secure and easy to scale.
Check out the step-by-step documentation here.
To give you an overview of how it works, let’s quickly go through some of the steps to create a new stack:
Deploying a new stack on AWS
First of all, deploying this Quick Start for a new virtual private cloud (VPC) with default parameters will build the following Couchbase environment in the AWS Cloud.
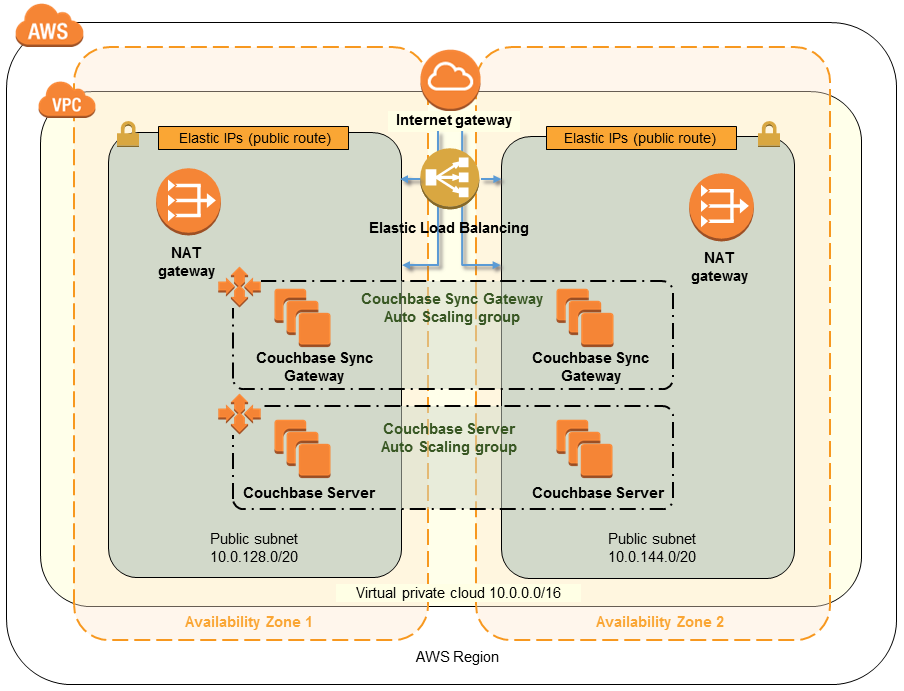
Couchbase Quickstart Default Architecture
NOTE: you can also deploy it into an existent VPC
The whole process is made of 3 simple steps:
- Create EC2 key pairs (if you don’t have one yet)
- Subscribe to the Couchbase AMIs
- Launch the Quick Start
Assuming you already know how to create EC2 Key pairs, let’s jump to step 2:
Subscribe to the Couchbase AMIs
Go to Couchbase Enterprise Edition on AWS Marketplace, and then click on Continue to subscribe.
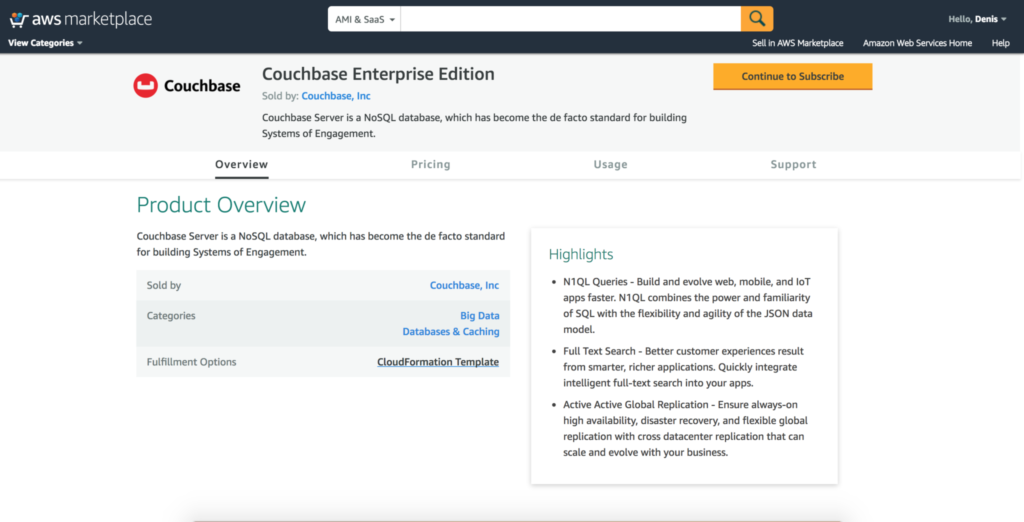
Couchbase Enterprise Edition on AWS
In the next page, you can choose your licensing type: Hourly Pricing or BYOL (Bring your own license). Please review the conditions and then click on Accept Terms
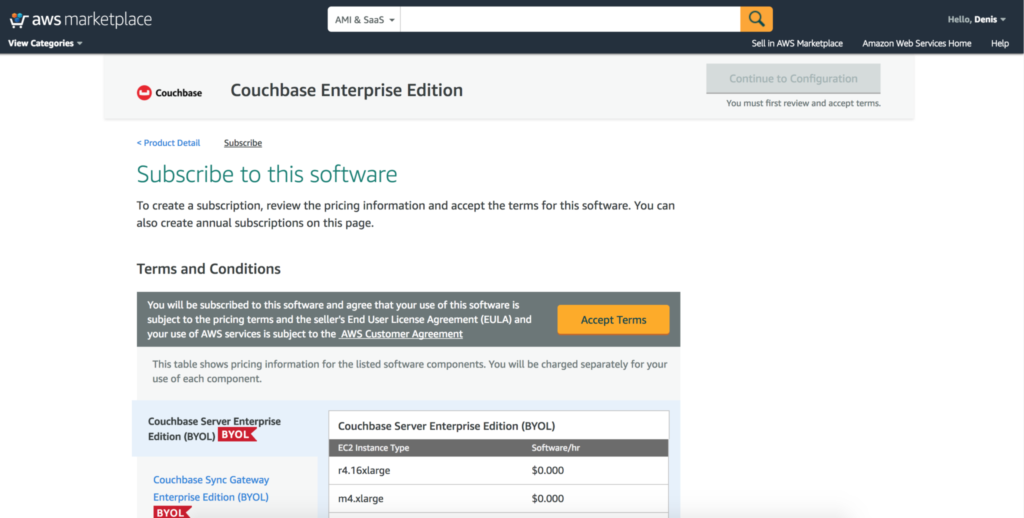
Choosing a license type on AWS
At the end, the following screen will be presented:
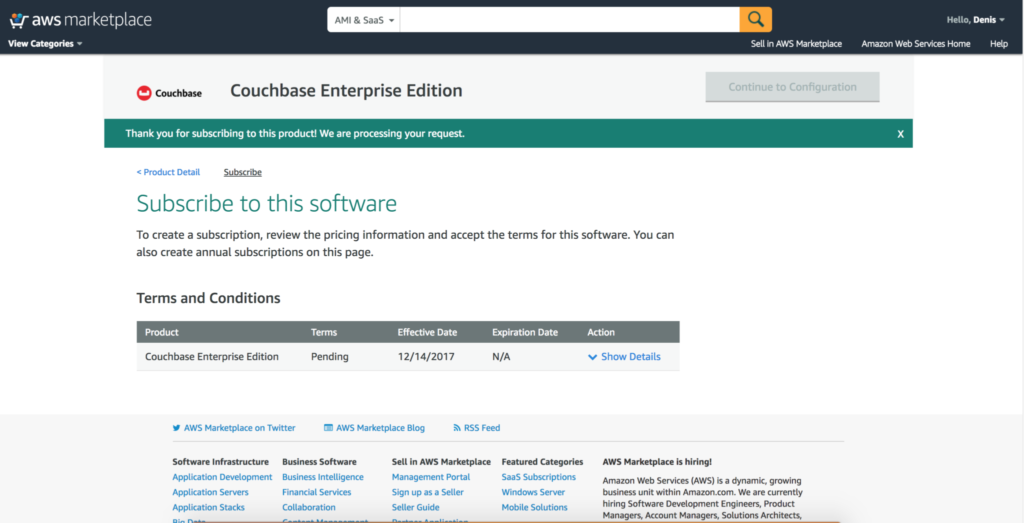
Launching the Quick Start
Go to Couchbase Quick Start on AWS homepage and click in Deploy Couchbase on AWS into a new VPC (if you want to deploy it into an existent VPC click here)
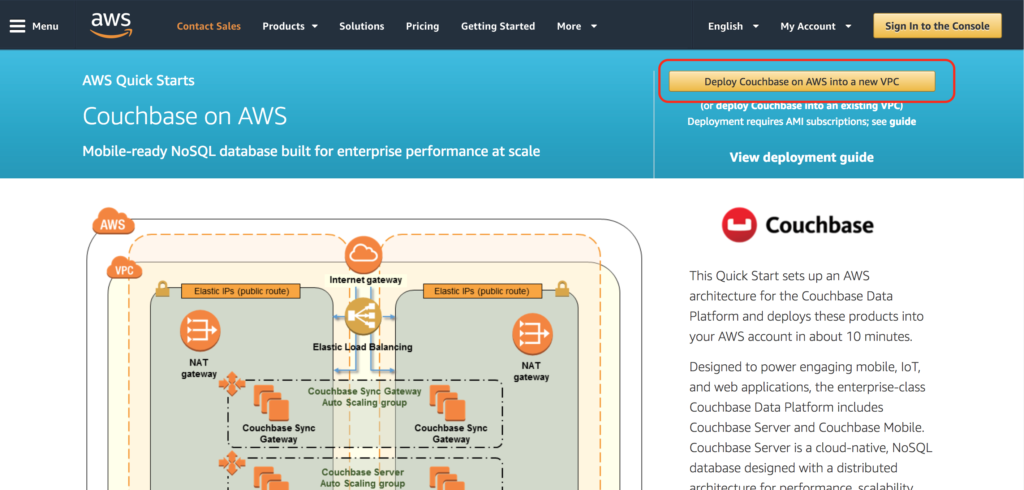
Tip: Double check that you are in the correct AWS Region.
The following page will be presented:
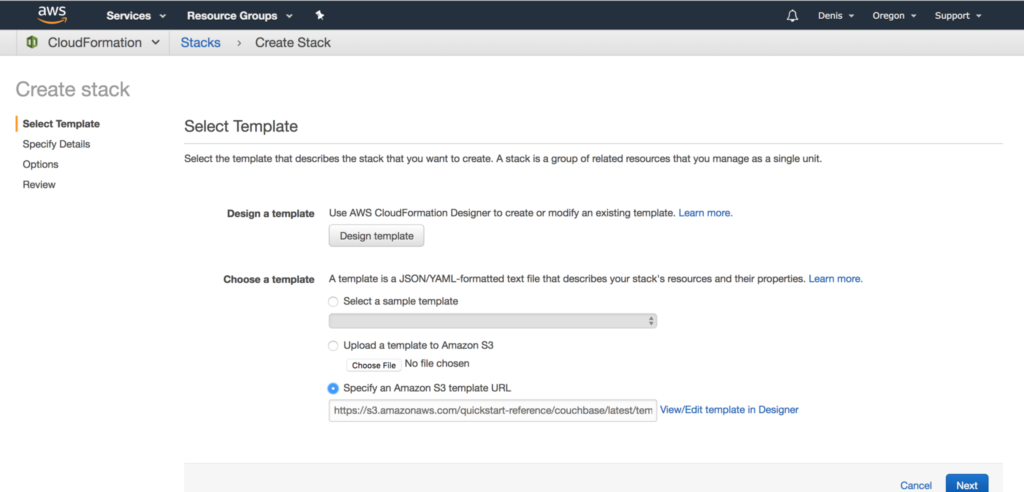
Tip: If you are familiar with Cloud Formation, click on View/Edit template in Designer to view what is going to be created
Click Next and then you will see the Specify Details screen:
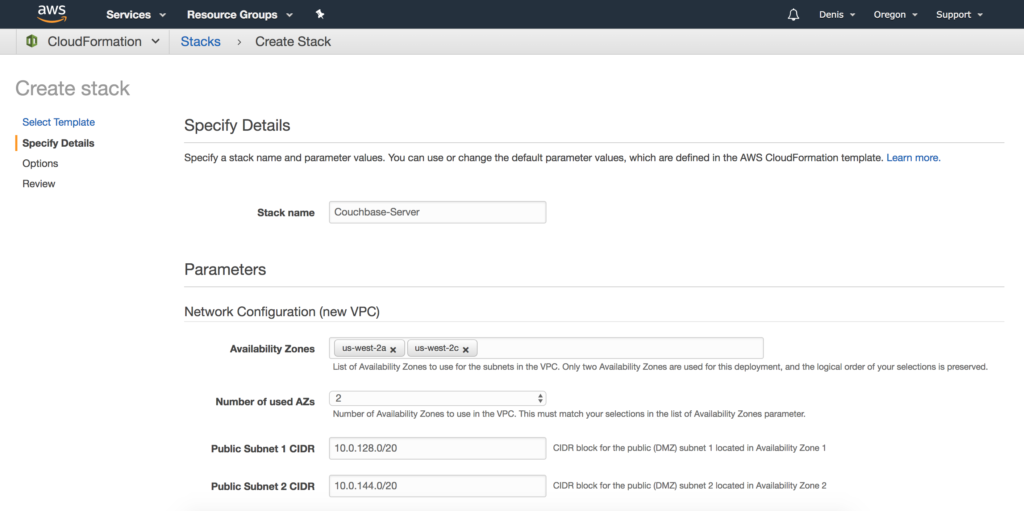
I highly recommend you here to read the official documentation, it explains exactly how to fill out all fields. Once you finish, click on Next.
On the Options page, you can specify tags (key-value pairs) for resources in your stack and set advanced options. When you’re done, choose Next
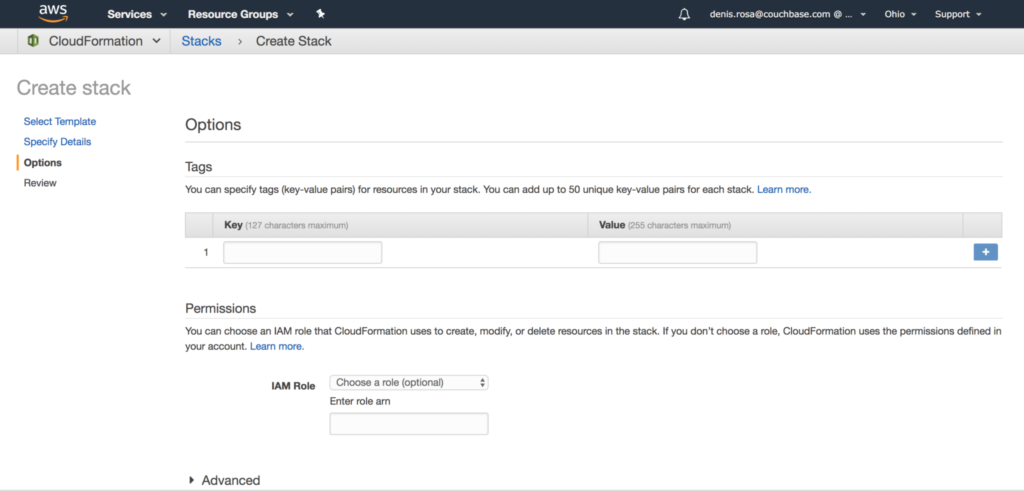
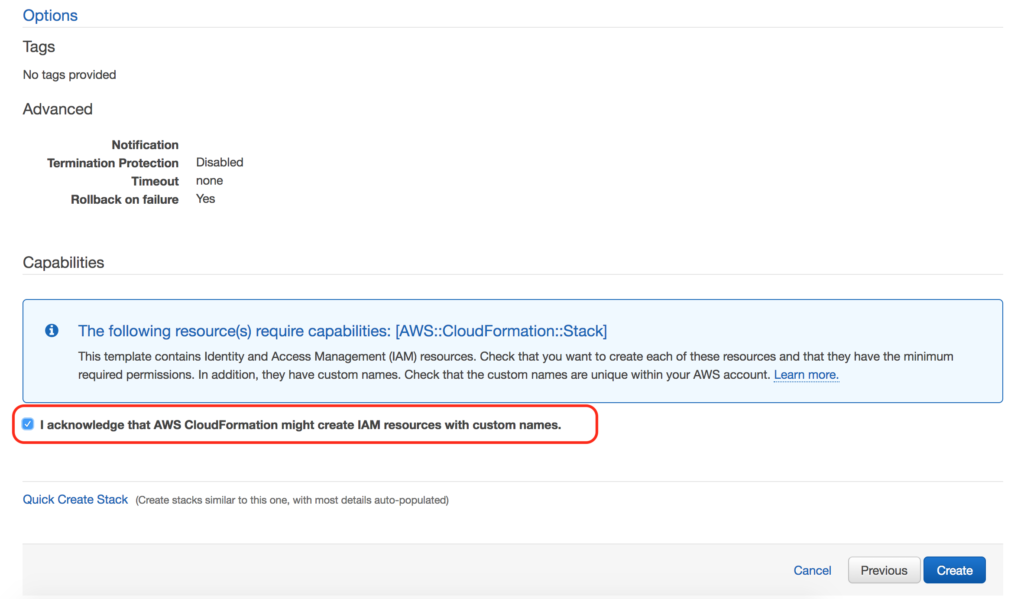
Finally, on the Review Page don’t forget to mark the following checkbox:
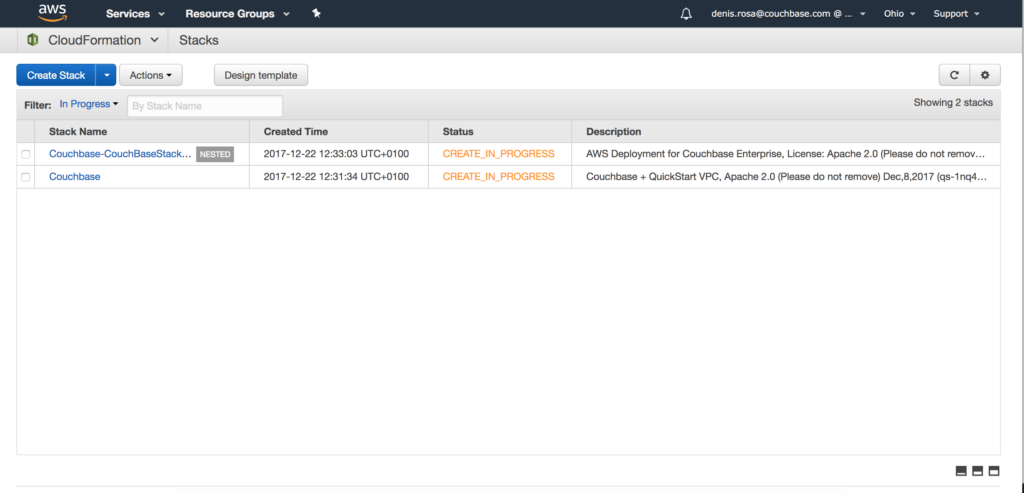
Congratulations! Now all you have to do is to wait for your stack to be created, go grab a cup of coffee as it will take a few minutes.
How to access your new cluster
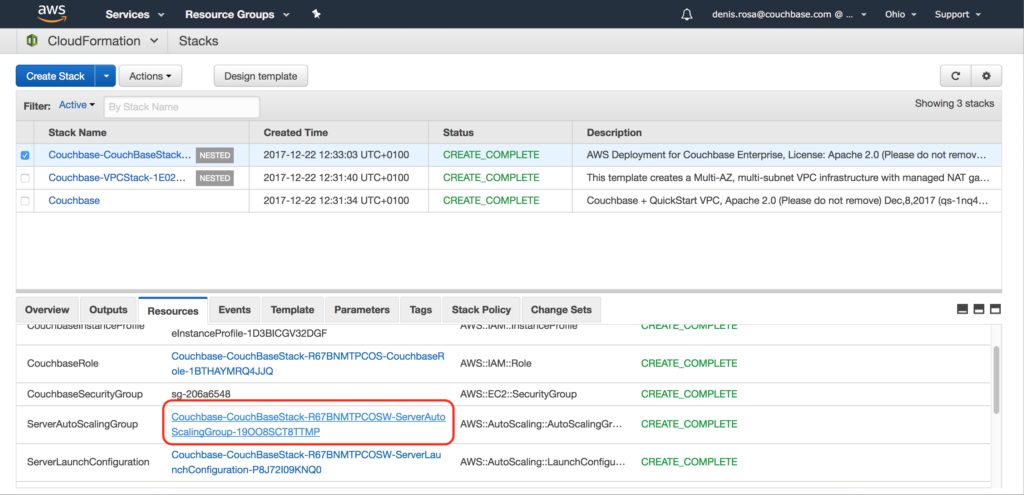
Once your stack state is CREATE_COMPLETE, click on Resources tab, choose the physical ID for ServerAutoScalingGroup.
The Auto Scaling group will be displayed in the Amazon EC2 console, choose the Instances tab, and then pick one of the instances to view its details.
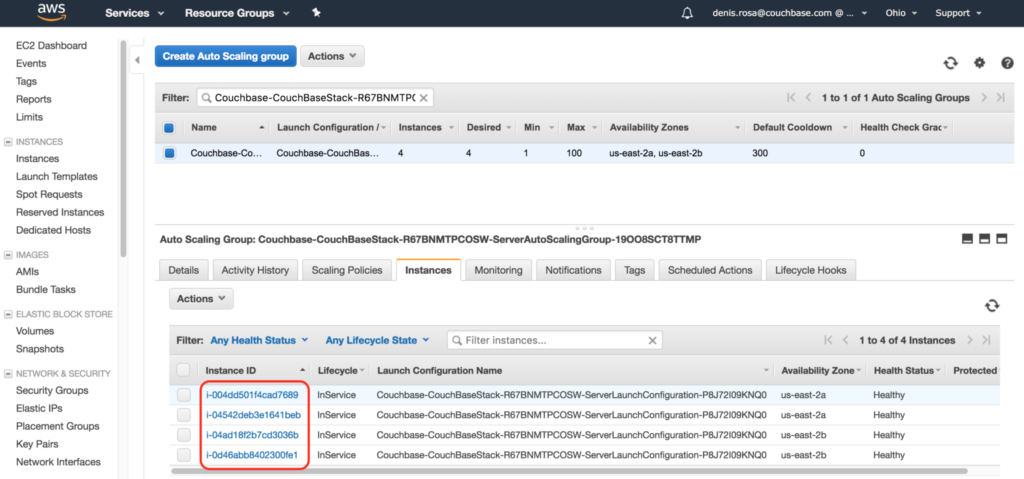
In the Description tab of the instance, copy the public DNS name.
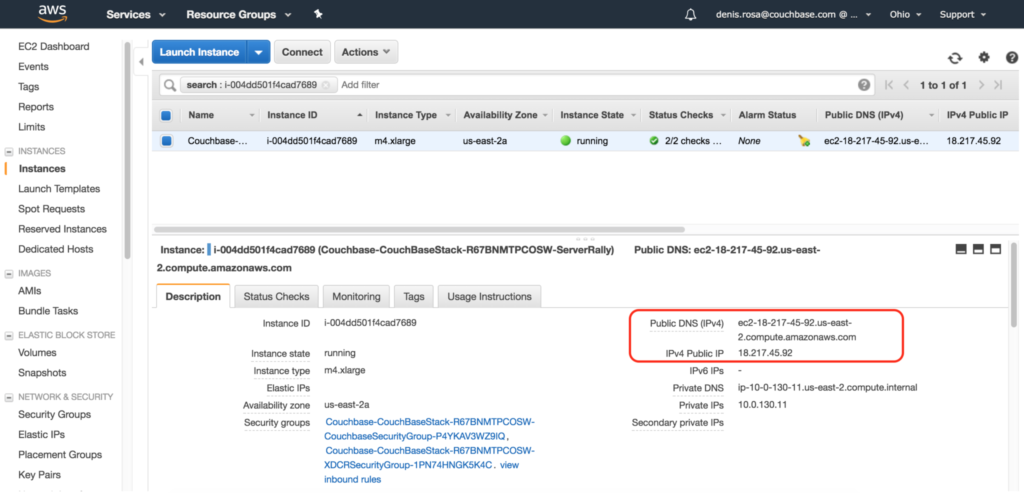
Finally, in your browser, navigate to https://hostname:8901, where hostname refers to the public DNS you copied in the previous step. For example:
|
1 2 |
https://18.217.45.92:8091 or http://ec2-18-217-45-92.us-east-2.compute.amazonaws.com:8091 |
The login screen for the Couchbase Web Console will be displayed.
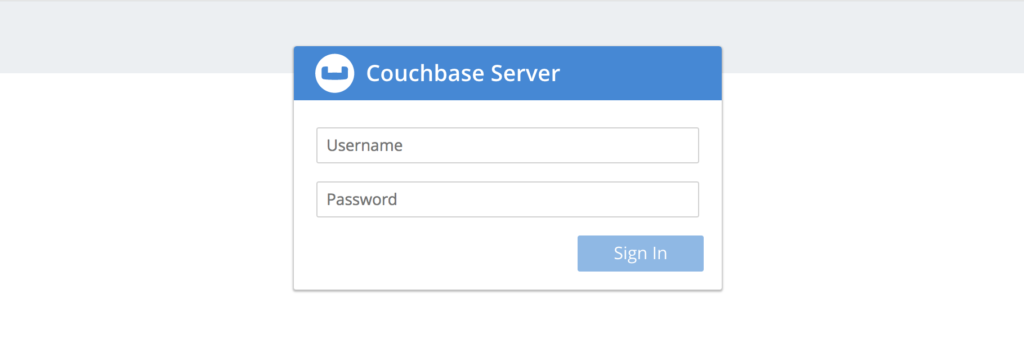
Inform the user and password defined in the Specify Details page during the stack creation and log into your new Couchbase Server instance running on AWS.

Troubleshooting
I can’t access the web console
In this case, you might have configured the wrong CIDR in the Allowed External Access CIDR field on the Specify Details page. Try to recreate your stack with the correct CIDR or just add a new Inbound Rule in the Security group:
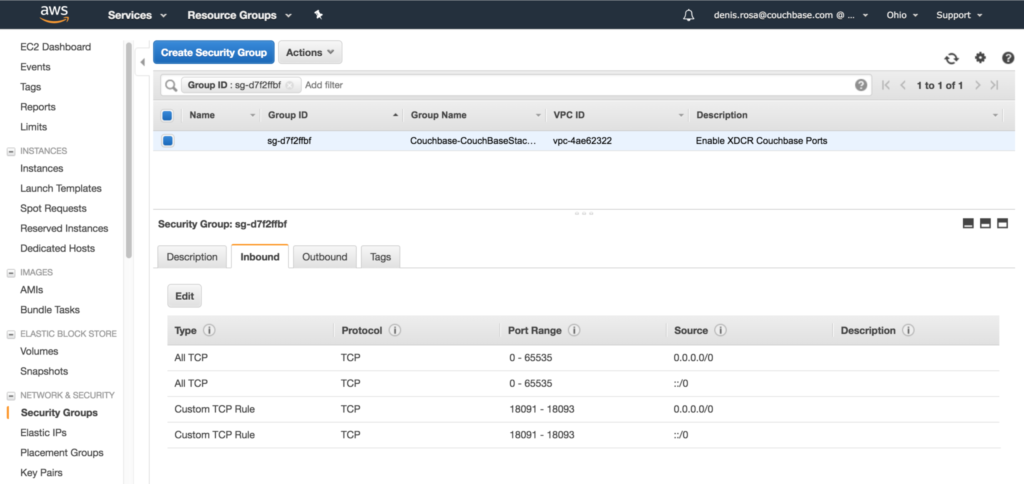
NOTE: In the image above we are allowing inbound traffic from anywhere, in your cluster please allow inbound traffic only from your network.
CREATE_FAILED error when Quick Start is launched
This might occur for many different reasons, the most commons are:
- Lack of AWS privileges
- AWS internal limits, like max number of public IP’s
- An invalid configuration was provided in the Specify Details page .
If you have any question or problems, please check out the manual, ask on Couchbase’s forums or tweet me at @deniswsrosa
Hi Denis,
In the network diagram, I see a load-balancer (lb). Could you please explain what is the role of the lb (in this scenario) and what type of a lb it is?
Thanks.