Google Cloud Platform (GCP) was noticeably behind AWS and Azure in going to market with a cloud compute platform. Despite that, GCP growth percentages have been greater than AWS as enterprises are starting to consider some of the advantages GCP offers over AWS and Azure. For example, only GCP lets you run resources in different worldwide regions on the same private network by default. This means not having to link regions via VPN and your global traffic never touching the public Internet.
We are seeing more prospects and Couchbase customers exploring and using GCP. We have some great Couchbase documentation on getting started with Couchbase in GCP to assist you:
- Couchbase offerings in GCP Marketplace
- Deploy Couchbase Server Using GCP Marketplace
- Best Practices for Running Couchbase on Google Compute Engine
High-availability best practices
While the above references will help you get a cluster up and running, I thought it would be helpful to cover some basics on employing some high-availability best practices for your Couchbase Cluster on GCP by leveraging our Server Group Awareness feature and Cross Data Center (XDCR) capabilities that are available out-of-the-box with every installation of Couchbase Server.
Server Group Awareness provides enhanced availability by providing Couchbase service redundancy to ensure you have nodes for a specific service spread across server groups. Specifically, this protects a cluster from large-scale infrastructure failure, through the definition of groups. More about it here.
XDCR replicates data between a source bucket and a target bucket. The buckets may be located on different clusters, and in different data centers; this protects against data center failure, and also provides high-performance data access for globally distributed, mission-critical applications. You can read more about XDCR here.
Steps to deploying high-availability
In this Part 1 of a two-part blog, we will cover implementing Server Group Awareness on a GCE cluster that is created via the GCP Marketplace. Part 2 will cover Deploying Couchbase for High-Availability in Google Cloud Platform GCE- XDCR for Active/Passive HA.
These are the high-level steps involved and are covered in detail below:
- Deploy a seven-node cluster by altering the default template for a Couchbase Server BYOL option covered in “Deploy Couchbase Server Using GCP Marketplace“
- Capture the zones assigned to each of the seven nodes
- Create a matrix to make sure the nodes for each service are split across the GCP zones available to your regional cluster
- Remove and re-add each of the nodes so that only one Couchbase service is running on each node as the template puts all of our services on every node per the matrix created in the prior step
- Create Server Groups in the Couchbase Server Admin UI that correspond to each of the GCP zones and assign the group to each node per our matrix in step 3
Step 1
Follow the instructions in Deploy Couchbase Server Using GCP Marketplace, but at the place shown in the screenshot below, you will change “Couchbase Server Node Count” from “3” to “7” and the Couchbase Sync Gateway Node Count from “2” to “0”.
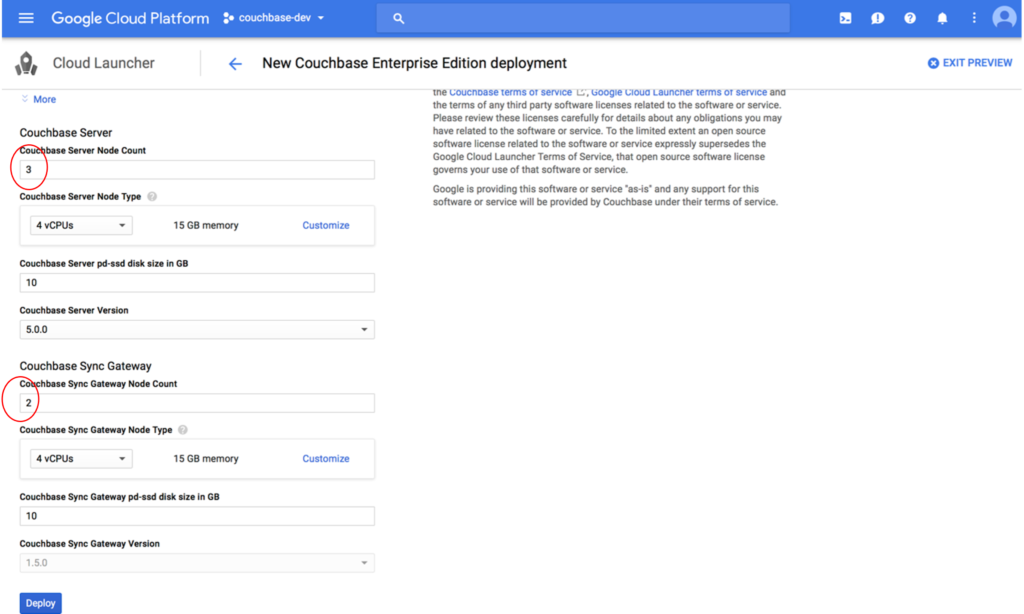
Even though we are making changes to the default launch template, using it will save a lot of time in getting a GCE Couchbase engine up and running. For specific use cases with workload requirements, it is best to work with a Couchbase Solutions Engineer to ensure your Couchbase cluster is adequately sized for your requirements and SLAs.
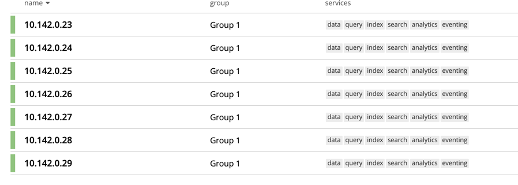
After launching a cluster with the GCP Couchbase marketplace template, notice that all nodes are in one Server Group and they are all running all six Couchbase services as shown in the example below. For this exercise we will reconfigure the nodes to each run Data, Query or Index service only.
Step 2
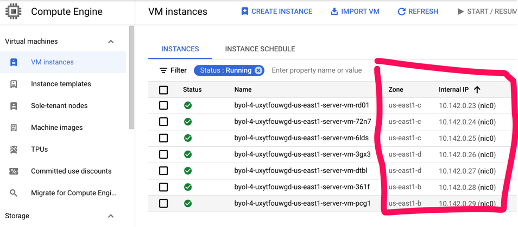
Before we start removing and re-adding nodes with one assigned service, we need to identify what GCE zones each of the nodes were assigned to on launch. You can do this in the GCP Console in the “VM Instances” view as shown below:
Step 3
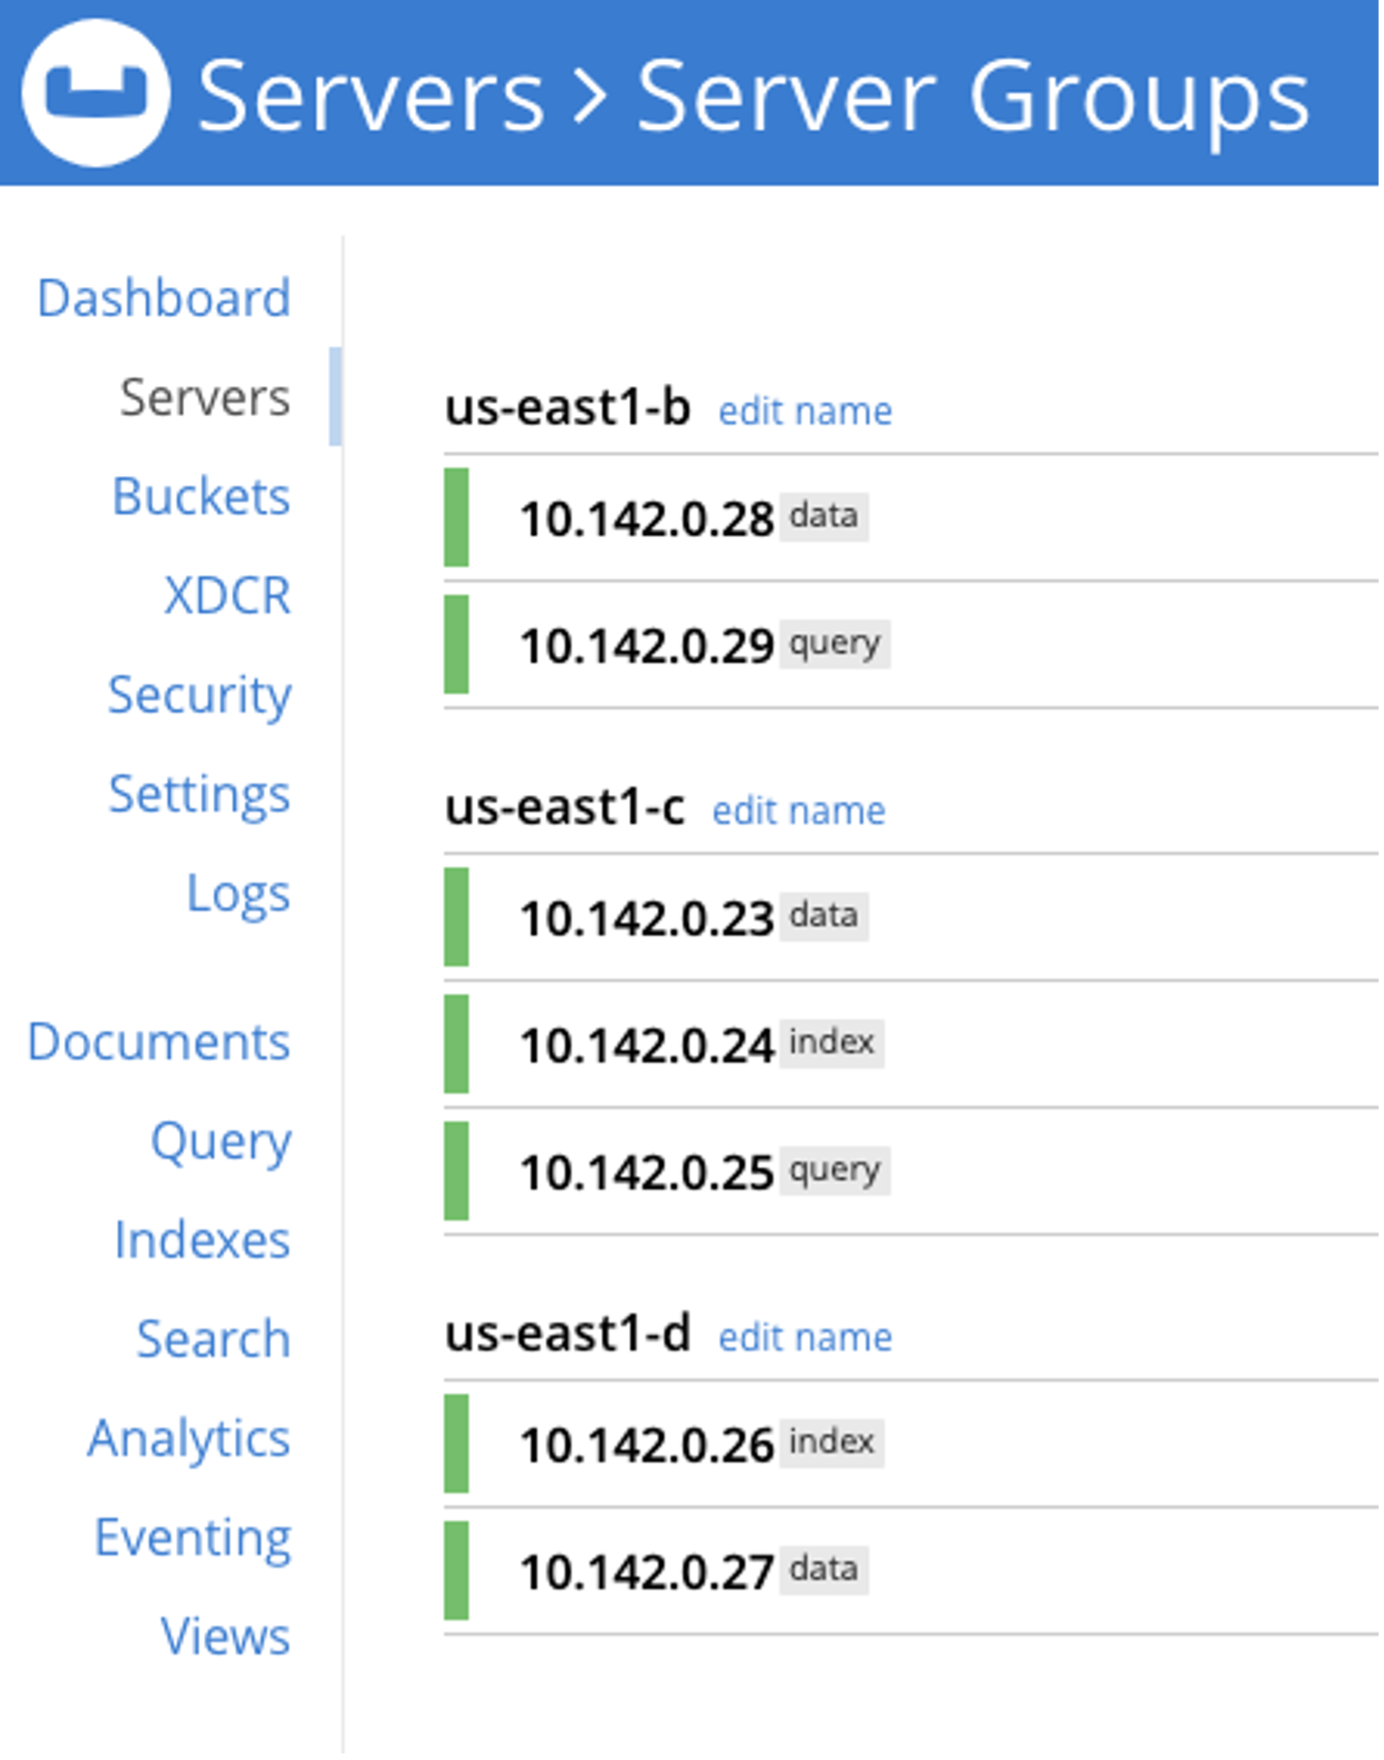
Then we will plan to assign each node as follows to one specific service as shown in the below table:
| IP Address | Zone | Service |
| 10.142.0.23 | us-east-c | Data |
| 10.142.0.24 | us-east-c | Index |
| 10.142.0.25 | us-east-c | Query |
| 10.142.0.26 | us-east-d | Index |
| 10.142.0.27 | us-east-d | Data |
| 10.142.0.28 | us-east-b | Data |
| 10.142.0.29 | us-east-b | Query |
Step 4
Instructions on how to remove a node from a cluster are here. To add the node back to a running cluster, click here. After removing and re-adding nodes with one service per node, it should look like this in the “Servers” UI view:
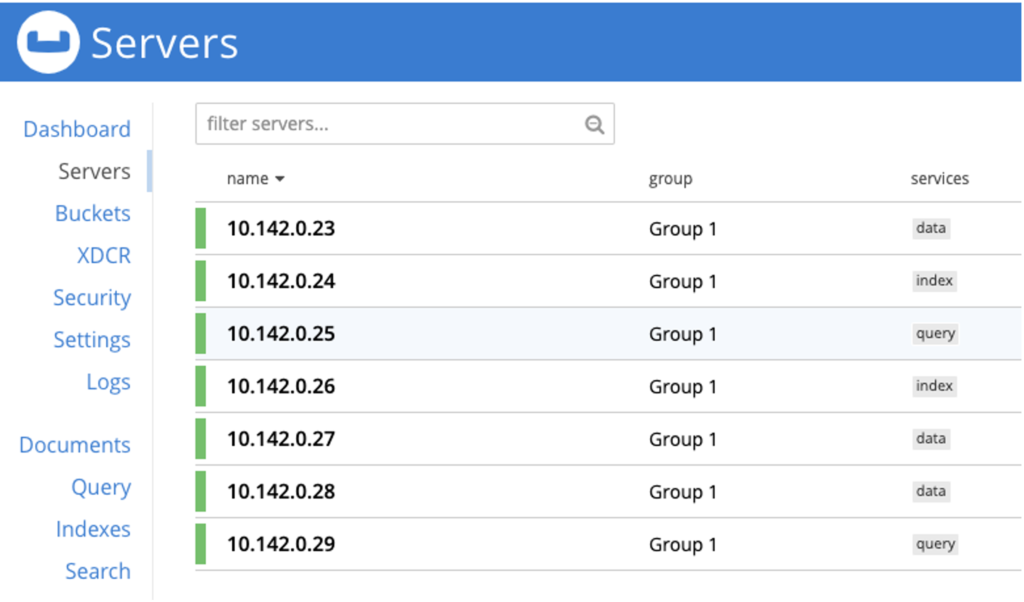
Notice that all nodes are in the “Group 1” group by default.
Step 5
Now we will assign the nodes in the Couchbase cluster to groups that correspond to the GCP zones.
From the Services screen, click on “GROUPS“

Then click “ADD GROUP“. Add a “us-east1-b” and a “us-east1-c”.

Split the nodes for each service equally across groups per the matrix we created in step 3. Index and Query will only be in two groups by clicking the “Move to” on the far right of each node and choosing the group. After choosing the new target group for each of the nodes we want to move, click “Apply Changes”. You can then change the name of Group 1 to “us-east1-d”.
After group reassignment, we have three groups as shown below that correspond to the nodes GCP zone location:
Conclusion
You have now fully implemented Server Group Awareness for your Couchbase cluster on GCE and leveraged Couchbase’s Multi-Dimensional Scaling capabilities by separating services across nodes and assigning them to separate GCP availability zones, making your cluster fault tolerant at the node and service level. This, along with implementing replicas for your data, global secondary and FTS indexes will allow you to have full service redundancy in the event a GCP availability zone has an outage.
In Part 2 of this blog we will cover how to protect your Couchbase Server cluster from a cloud region or data center failure. You may also want to check out the following sessions from our Connect user conference, Preparing for Replication – The Top Deployment Do’s and Don’ts With XDCR.
Follow up by reading these resources to get you started with Couchbase on GCP: