Getting Started with Couchbase and Tableau
With the release of Couchbase 4.0, business intelligence users now have access to document data stored in Couchbase via N1QL and ODBC/JDBC drivers from SIMBA. This is a quick start guide on how to integrate a popular business intelligence tool, Tableau, to Couchbase 4.0. For a quick primer on N1QL, please review the N1QL tutorial.
Required Software:
This tutorial assumes that all the following components are installed on a machine running the Windows operating system.
· Tableau Desktop 9.x (64-bit)
· SIMBA ODBC for Couchbase Driver 1.x (64-bit)
· Couchbase 4.0 with the “travel-sample” bucket installed
The Tableau and ODBC components running on the Windows system can connect to a node on a Couchbase 4.0 cluster running the Couchbase Query Service (port 8093). For Couchbase running under Windows, configure the Windows Firewall to open access to the ports used by Couchbase.
Configuration of the SIMBA ODBC Driver
Install the bit compatible (32 or 64) version of the SIMBA ODBC driver for the version of Tableau being used. Once the ODBC driver is installed, an ODBC data source name (DSN) needs to be configured. The first step is to bring up the ODBC Data Source Administrator in the Windows Control Panel. As a best practice, setup a System DSN, which will be accessible by all users on the Windows machine. By default, Tthe Simba installer, by default creates a System DSN called “Simba Couchbase ODBC DSN”.

Configure the “Simba Couchbase ODBC DSN” to connect a Couchbase server running the query service (port 8093). Refer to the Simba documentation for information on configuring advanced options. The current settings in the ODBC setup default to the demonstration environment. Another blog covers “Getting Started with the SIMBA Couchbase ODBC Driver.”

In the Advanced Options dialog the following values are entered:
- Query Mode is SQL
- Active Schema Location is in the database
- Sample Size of 100 documents with a Type Name List of:
beer-sample:type,travel-sample:type,gamesim-sample:jsonType
Preparing the Sample Buckets for Query
N1QL queries require indexes to exist on the documents being queried. Start by creating a primary index on all the documnts in the travel-samplebucket. As a best practice, you should only index on the attributes being used for query. Creating a primary index on all attributes in a bucket is not a best practice for a production environment. Start up the cbq.exe utility locted in the c:Program FilesCouchbaseServerbin and type:
cbq.exe> create a primary index on travel-sample using GSI;

Using Tableau with Couchbase 4.0
Start up the Tableau Desktop Application, on the Connect side bar, select “Other Databases (ODBC)’ – then select an ODBC DSN configured to connect to the Couchbase cluster. Click Connect and then OK.

The Tableau Data Source Window will then come up, select database (cbdefault), Schema (travel-sample) and within the Table selection control, click on the magnifying glass. A list of document types will appear as “Table”.

Using the Travel-Sample data, the following example joins route documents with route schedule documents, the documents are joined by the PK fields – PK (route) and PK (route schedule).

Sometimes the generated SQL from a tool like Tableau may be incompatible with N1QL, you can override the generated SQL from Tableau by select Data|Convert to Custom SQL. Below is a screenshot of the generated SQL from Tableau.

Building a Report
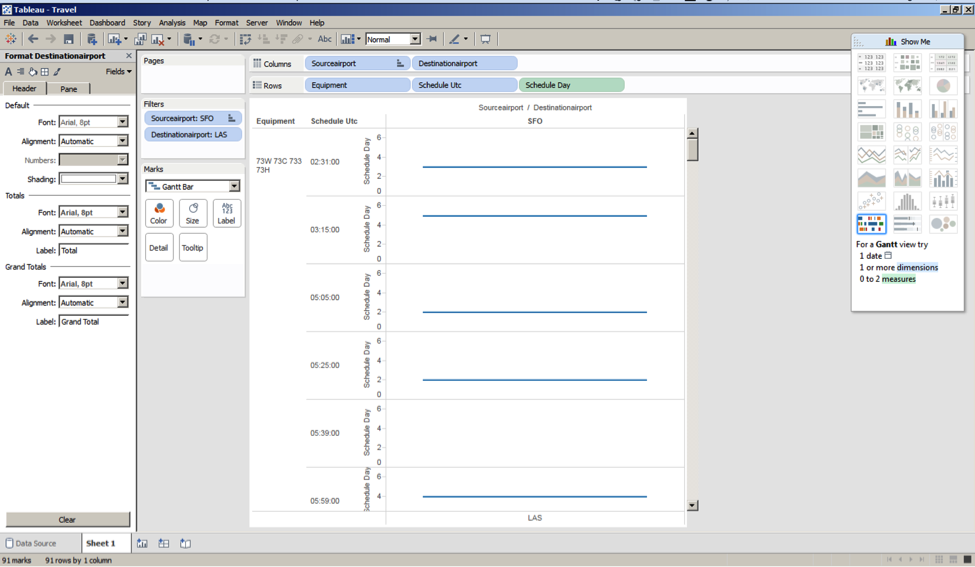
At this point, you can create a new Tableau worksheet and build reports using JSON documents stored in Couchbase!

Summary
With the power of Couchbase 4.0 with N1QL, semi structured JSON documents are now accesible to the Tableau analyst community. This blog entry was intended on being a quick start guide on connecting Tableau Desktop to a Couchbase 4.0 cluster. Hopefully you will find it useful. I would like to thank Jim Haynie from Tableau for the input for this blog article.