When it comes to scaling a database, it is often a task that people want to avoid. For relational databases, which are often vertically sized databases, the administrators would have to take the database offline and add new hardware to the servers. In this scenario, any scaling that happens is a one way operation, meaning you likely won’t ever remove hardware and scale down. For NoSQL databases, which are often distributed databases, hardware is often removed from the equation, but sometimes at the cost of configuration simplicity. Take MongoDB, for example, which has several different nodes that include master, slave, replica, and shard.
This is where Couchbase Server comes in.
Couchbase Server is a distributed NoSQL database that was designed to be able to scale easily. Because of the single node peer-to-peer architecture, clusters can be scaled up or down to meet demand with only a few clicks of the mouse. There are options to use available APIs and CLI tooling as well if the UI doesn’t fit your needs.
We’re going to see exactly how easy scaling a cluster can be when using Couchbase as the database of choice in your organization.
For the sake of this example, we’re going to be exploring cluster scaling using Docker. In production, you could be using any number of solutions for hosting your nodes. Regardless of scenario, the steps to scale to meet an increasing or decreasing demand will be the same.
Creating Couchbase Server Nodes with Docker
Assuming that you already have Docker installed, you’ll want to execute the following commands from the Docker CLI:
|
1 2 3 4 |
docker run -d -p 7091:8091 --name couchbase1 couchbase/server docker run -d -p 8091:8091 --name couchbase2 couchbase/server docker run -d -p 9091:8091 --name couchbase3 couchbase/server docker run -d -p 10091:8091 --name couchbase4 couchbase/server |
The above commands will create four Couchbase containers using the official Docker image found on Docker Hub. Each container will have a different name and a different host port. Couchbase Server uses many ports, but we only need to map the administrator port because it is the only one we’ll be accessing from the host machine. The other ports can be accessed by the containers within the container network.
With the nodes available, we can create a cluster and expand it.
Scaling Couchbase Server for an Increasing Demand
At this point in time we do not have a configured Couchbase cluster. From a web browser, navigate to http://localhost:7091.

Since this is a new node, we’ll be setting up a new cluster. Follow the very few steps of the configuration wizard until you’re brought to the Couchbase administrative dashboard. Congratulations, you have a single node Couchbase cluster!
Create a Bucket, add some documents to it, and proceed.
Fast forward to the future and let’s assume your business is booming. The single node cluster is no longer cutting it and you need some more power. From the web browser, navigate to http://localhost:8091, which is one of your currently unused nodes. Instead of setting up a new cluster, let’s join an existing cluster.

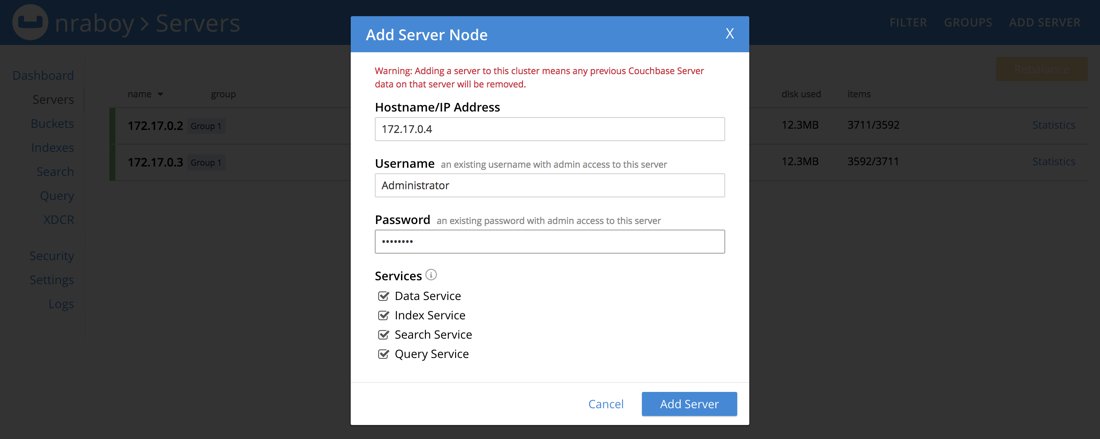
You’ll be prompted for a host of an existing node in the cluster. Since we’re using Docker, make sure you obtain the correct container IP and not the host IP. After you choose to join the cluster, you can checkout the servers within your cluster.

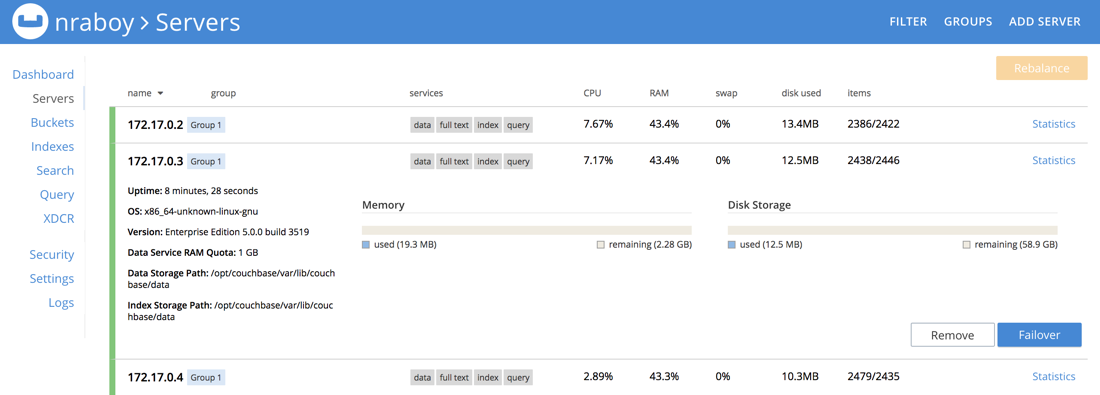
At this point in time there should be two servers in your cluster. Joining the existing cluster and scaling it up is not complete until you rebalance the cluster. By rebalancing the cluster, data is shuffled around so that way no single node carries too much burden. The cluster remains available during a rebalance with no down time.
Let’s say that the demand for your application is out of control and you need to add another node to the cluster. We’re going to do something a little differently this time. From the web browser, navigate to http://localhost:9091, which is currently an unused node. Instead of joining the cluster, let’s create a new cluster. Once the cluster is configured, make note of the container IP.

Head back into the original cluster server list and choose to add a new server. That new cluster that you had just created will be wiped and added to our original cluster. Remember, you aren’t done with scaling your cluster until you do a rebalance.

As your cluster and data needs grow, the rebalance might take a while. Remember, the cluster remains online during this time which is convenient for operations.
Scaling Couchbase Server for a Decreasing Demand
So you’ve had a good year, but let’s say that the demand on your servers has decreased. It happens, but when it does, you probably don’t want to be stuck paying for these resources that you’re not using. Lucky for us, scaling Couchbase down is just as easy as scaling it up.
Head back into the list of servers for your cluster.

Pick a server from the list that you wish to get rid of. However, there are a few things that you should be aware of before you start dropping nodes from your cluster:
- Make sure your cluster can truly handle the load without the resources it once had.
- Understand the difference between a removal and a failover situation.
When it comes to failover or removal, note that failover is generally for node maintenance. In other words, you’re planning to bring the node back, not get rid of it forever. Removing a node doesn’t just drop it from the cluster. You’ll have to do a rebalance to finalize the removal so that the data isn’t destroyed. Once the rebalance completes, you now have a smaller cluster.
Conclusion
You just saw how easy it was to scale Couchbase up or down to meet the demand of your applications. While possible in most other database solutions, whether it be relational or NoSQL, they don’t compare when it comes to the convenience factor that Couchbase offers. With just a few clicks of the mouse, nodes can be added or removed from any cluster.
For more information on using Couchbase, check out the Couchbase Developer Portal.