Using Java with Couchbase doesn’t have to be hard, even for a new developer.
In this quickstart tutorial, we’re going to walk through the basics of creating and fetching JSON documents in Couchbase using the Java SDK. With minimalist code samples, you can be connecting and testing your application right away.
Set Up a Basic Java Application
Before you get started, make sure you have the most recent version of Couchbase installed, along with the travel-sample bucket.
Naturally, we need a basic Java development environment too. To set up a development environment on a new computer, consider using the Coding Pack for Java from Microsoft.
This package is handy because it helps install the JDK along with supporting extensions for the Visual Studio Code environment. I used OpenJDK 11 for my configuration and set it as my main JAVA_HOME once I downloaded it with their GUI.
The Java Tools get started page was helpful to create a new project, select Maven build tools and specify a project folder. I select all the default values and the Maven project is automatically created under the JAVA PROJECTS file explorer and called demo.
Open the demo -> src/main/java -> com.example -> App file.
Run a test build to ensure Java is configured properly, using the Play button at the top right of the editor. The output terminal window should show:
Hello World!
That confirms that Java is running properly and that your environment is ready to go.
Couchbase java-client Dependency for Maven
Add the Couchbase java-client dependency from com.couchbase.client, version 3.1.6 as a Maven dependency in the pom.xml file.
If using a GUI to do this, be careful to get java-client and not couchbase-client libraries.
|
1 2 3 |
com.couchbase.client java-client 3.1.6 |
Adding imports from the Couchbase Java SDK (in the code sample below) enables the cluster connection classes for your project. We’ll add more throughout this exercise, but feel free to skip to the full code sample at the end of the post.
|
1 |
import com.couchbase.client.java.*; |
Add a basic cluster connection string to main(), as you see in the example below. Connection parameters include the IP address or the name of a node in the Couchbase cluster along with the username/password. Note that I use my main administrator login here for simplicity because it has full permissions.
|
1 2 3 4 5 |
public static void main( String[] args ) { System.out.println( "Hello World!" ); Cluster cluster = Cluster.connect("192.168.0.158","Administrator","Administrator"); } |
When you have the connection info entered, run another test build and the output should show that a node was connected:
|
1 |
INFO: [com.couchbase.node][NodeConnectedEvent] Node connected {"coreId":"0x9bb7352900000001","managerPort":"8091","remote":"192.168.0.158/"} |
Get a Document
If you made it this far, you’re more than halfway there!
Next, we’re going to request a specific document using its ID. Document IDs are unique names for every document in the bucket or collection of documents in a bucket.
The travel-sample bucket that comes with Couchbase includes airlines, hotels, and more – all so you can test your code on real data.
The image below shows how you can browse available documents in a bucket using the web console.
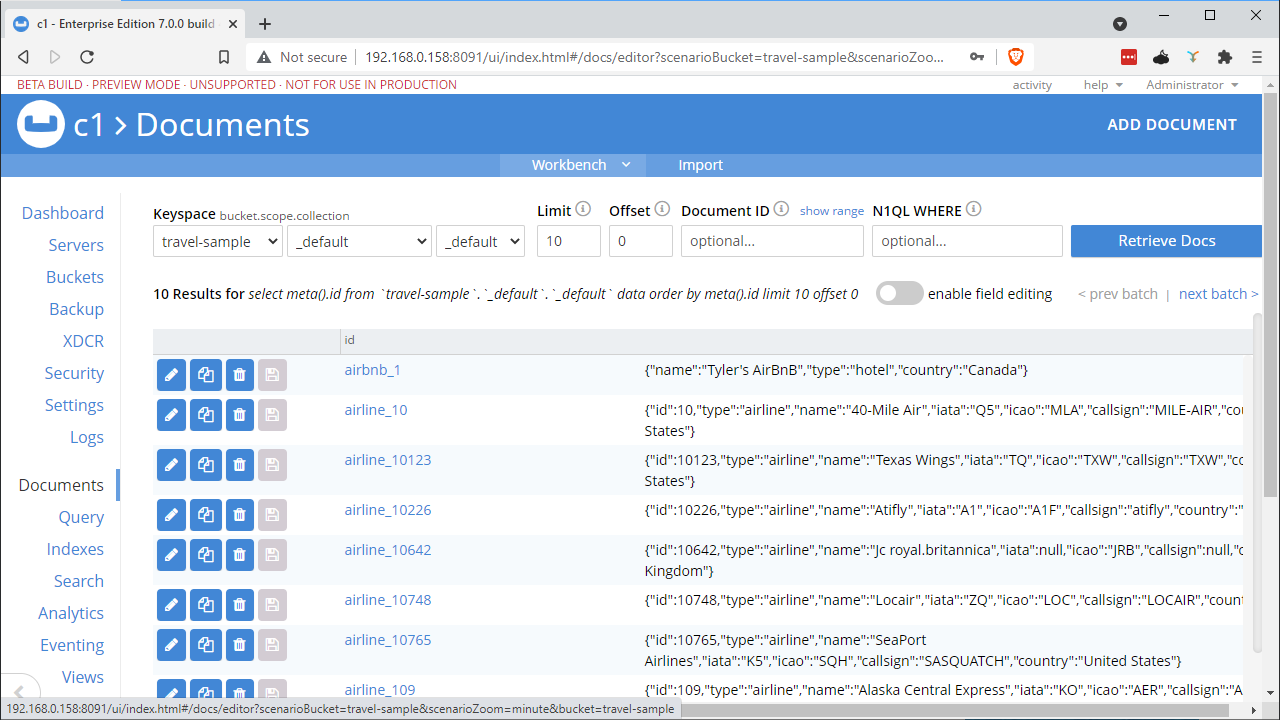
Couchbase document viewer in the web console
To access documents in the database, we need some more classes that interact with key-value operations like getting and setting documents.
Here’s how you add import for key-value operations:
|
1 |
import com.couchbase.client.java.kv.GetResult; |
Next, you need to define a collection and bucket to connect to and provide a document ID to fetch:
|
1 2 3 4 5 6 |
Bucket bucket = cluster.bucket("travel-sample"); Collection collection = bucket.defaultCollection(); // Get a Document GetResult getResult = collection.get("airline_10"); System.out.println(getResult); |
Scopes and collections are used to group similar types of documents for different applications. In this example, we just use the defaults that include everything.
Be more precise if you want. For example, you can just print the name of the document:
|
1 2 |
String name = getResult.contentAsObject().getString("name"); System.out.println(name); |
Run this code and the output will show the raw JSON of the document, plus the above string taken from the name field:
|
1 2 3 |
{"country":"United States","iata":"Q5","name":"40-Mile Air","callsign":"MILE-AIR","icao":"MLA","id":10,"type":"airline"} 40-Mile Air |
That’s all it takes to fetch a specific document. Congratulations if you made it this far!
Create or Upsert a Document
Creating a document isn’t much harder than fetching one.
Ensure that your user settings allow you to create new documents in the given bucket. Then we’ll add a couple imports and build a simple JSON document that we send/insert/update/upsert into the database.
While we aren’t going to do anything fancy with tracking versions of documents or related mutations, the SDK does return the status of the operation for us to use later on. Here’s how to add a couple more imports to handle the update of documents and create JSON objects:
|
1 2 |
import com.couchbase.client.java.kv.MutationResult; import com.couchbase.client.java.json.*; |
Then we add code for creating a basic document, including any field you want in the JSON document:
|
1 2 3 4 5 6 |
MutationResult upsertResult = collection.upsert( "airbnb_1", JsonObject.create().put("name", "Tyler's AirBnB") .put("country", "Canada") .put("type", "hotel") ); |
Note that an ID is provided (airbnb_1) and then the JSON document is formed and submitted to the database (upsert) all in one command. Note that the ID itself is not part of the JSON but is a string passed to the function.
An upsert will create a new document if none exists, or update any existing ones with the same ID.
Now let’s change the original document fetch to get the new document we just created:
|
1 |
GetResult getResult = collection.get("airbnb_1"); |
The terminal log should print the raw result object and then the name from our new document:
|
1 2 |
GetResult{content={"name":"Tyler's AirBnB","type":"hotel","country":"Canada"}, flags=0x2000000, cas=0x16917e1447b40000, expiry=Optional.empty} Tyler's AirBnB |
And that’s it!
Next Steps
This simple tutorial should get you started with the Couchbase Java SDK quickly. Future posts in this series will examine other services such as Query and Full-Text Search.
For more information, check out the Couchbase Java SDK documentation that covers similar concepts.
Full Couchbase Client Code Example
|
1 2 3 4 5 6 7 8 9 10 11 12 13 14 15 16 17 18 19 20 21 22 23 24 25 26 27 28 29 30 31 32 33 |
package com.example; import com.couchbase.client.java.*; import com.couchbase.client.java.kv.GetResult; import com.couchbase.client.java.kv.MutationResult; import com.couchbase.client.java.json.*; public class App { public static void main( String[] args ) { System.out.println( "Hello World!" ); Cluster cluster = Cluster.connect("192.168.0.158","Administrator","Administrator"); Bucket bucket = cluster.bucket("travel-sample"); Collection collection = bucket.defaultCollection(); MutationResult upsertResult = collection.upsert( "airbnb_1", JsonObject.create().put("name", "Tyler's AirBnB") .put("country", "Canada") .put("type", "hotel") ); // Get a Document //GetResult getResult = collection.get("airline_10"); GetResult getResult = collection.get("airbnb_1"); System.out.println(getResult); // Print specific field in document results String name = getResult.contentAsObject().getString("name"); System.out.println(name); } } |