Windows Server 2016 is adding support for Docker containers. Technology Preview 5 was recently released and provides basic support for Docker. This multi-part blog series will show how to configure, build, and run Docker containers on Windows. The first part shows how to install Windows Server 2016 using VirtualBox. A couple of tweaks are required in order to make sure Docker containers can be started later on, so read on!
Download Windows Server 2016
Download Windows Server 2016 Technology Preview 5 from microsoft.com/en-us/evalcenter/evaluate-windows-server-technical-preview. Download the ISO and install it using VirtualBox.
Windows Server 2016 Virtual Box Configuration
Switch to Expert Mode as some of the default configuration settings need to be updated.
Here are the screenshots of configuration.
Change memory to ~8GB.

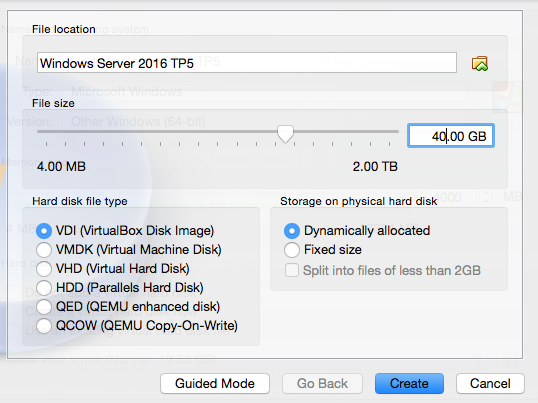
Change disk space to 40GB. Default of 20 GB will not work for installing containers later.

Create a new virtual drive from the downloaded ISO:

Windows Server 2016 Configuration
Select the defaults:

Click on “Install Now” to start the install:

Enter the product key as specified in “Preinstall Information” section at microsoft.com/en-us/evalcenter/evaluate-windows-server-technical-preview

Select the Desktop version, otherwise just a command shell is started:

Accept the license:

Choose “Custom” installation. “Upgrade” was getting stuck in an infinite loop:

Take defaults:

Click on “Next” to start installation:

Create an administrator account:  Click on Finish to come to the welcome screen:

Windows Server 2016 Login/Welcome
Use VirtualBox Input -> Keyboard menu to send Ctrl+Alt+Del to Windows to get the login screen:

Enter your password to see the opening screen:

As of this writing, it is in Technology Preview 5 and so the functionality and experience will evolve. Stay tuned for subsequent blogs to actually configure, build and run Docker containers.