In modern distributed systems, the ability to replicate data between separate environments is crucial for ensuring high availability, disaster recovery, and performance optimization. Couchbase’s XDCR (Cross Data Center Replication) feature allows seamless replication of data between clusters, enabling robust data sharing across geographically or logically isolated environments.
This guide will walk you through setting up XDCR between two Couchbase clusters hosted in separate Amazon EKS (Elastic Kubernetes Service) clusters within different VPCs. We’ll dive into each step, from infrastructure setup to configuring DNS for cross-cluster communication and deploying Couchbase for real-time replication. By the end of this walkthrough, you’ll have a production-ready setup with the skills to replicate this in your environment.
Prerequisites
To follow this guide, ensure you have:
-
- AWS CLI installed and configured
- An AWS account with permissions for creating VPCs, EKS clusters, and security groups
- Familiarity with Kubernetes and tools like kubectl and Helm
- Helm installed to deploy Couchbase
- Basic knowledge of networking concepts, including CIDR blocks, routing tables, and DNS
Step 1: Deploy EKS clusters in separate VPCs
What are we doing?
We will create two Kubernetes clusters, Cluster1 and Cluster2, in separate VPCs using eksctl. Each cluster will operate independently and have its own CIDR block to avoid IP conflicts.
Why is this important?
This separation ensures:
-
- Isolation for better security and management
- Scalability and flexibility for handling workloads
- Clear routing rules between clusters
Commands to create clusters
Deploy cluster1
|
1 2 3 4 5 6 7 8 9 10 |
eksctl create cluster \ --name cluster1 \ --region us-east-1 \ --zones us-east-1a,us-east-1b,us-east-1c \ --node-type t2.medium \ --nodes 2 \ --nodes-min 1 \ --nodes-max 3 \ --version 1.27 \ --vpc-cidr 10.0.0.0/16 |
Deploy cluster2
|
1 2 3 4 5 6 7 8 9 10 |
eksctl create cluster \ --name cluster2 \ --region us-east-1 \ --zones us-east-1a,us-east-1b,us-east-1c \ --node-type t2.medium \ --nodes 2 \ --nodes-min 1 \ --nodes-max 3 \ --version 1.27 \ --vpc-cidr 10.1.0.0/16 |
Expected outcome
-
- Cluster1 resides in VPC 10.0.0.0/16
- Cluster2 resides in VPC 10.1.0.0/16

Step 2: Peer the VPCs for Inter-Cluster Communication
What are we doing?
We are creating a VPC Peering connection between the two VPCs and configuring routing and security rules to enable inter-cluster communication.
Steps
2.1 Create a peering connection
-
- Go to the AWS Console > VPC > Peering Connections
- Click Create Peering Connection
- Select the Requester VPC (Cluster1 VPC) and Accepter VPC (Cluster2 VPC)
- Name the connection eks-peer
- Click Create Peering Connection
2.2 Accept the peering request
-
- Select the peering connection
- Click Actions > Accept Request
2.3 Update route tables
-
- For Cluster1 VPC, add a route for 10.1.0.0/16, targeting the peering connection
- For Cluster2 VPC, add a route for 10.0.0.0/16, targeting the peering connection

2.4 Modify security groups
Why is this necessary?
Security groups act as firewalls, and we must allow traffic between the clusters explicitly.
How to modify
-
- Navigate to EC2 > Security Groups in the AWS Console
- Identify the security groups associated with Cluster1 and Cluster2
- For Cluster1’s security group:
- Click Edit Inbound Rules
- Add a rule:
- Type: All traffic
- Source: Security group ID of Cluster2
- Repeat for Cluster2, allowing traffic from Cluster1’s security group


Step 3: Test Connectivity by Deploying NGINX in Cluster2
What are we doing?
We are deploying an NGINX pod in Cluster2 to verify that Cluster1 can communicate with it.
Why is this important?
This step ensures the networking between clusters is functional before deploying Couchbase.
Steps
3.1 Create a Namespace in Cluster1 and Cluster2
|
1 2 |
kubectl create ns dev #in cluster1 kubectl create ns prod #in cluster2 |
3.2 Deploy NGINX in Cluster1 and Cluster2
-
- Create nginx.yaml:
12345678910111213141516171819202122232425262728293031apiVersion: apps/v1kind: Deploymentmetadata:name: nginxspec:replicas: 1selector:matchLabels:app: nginxtemplate:metadata:labels:app: nginxspec:containers:- name: nginximage: nginxports:- containerPort: 80---apiVersion: v1kind: Servicemetadata:name: nginxspec:clusterIP: Noneports:- port: 80targetPort: 80selector:app: nginx
- Create nginx.yaml:
3.3 Apply the YAML
|
1 |
kubectl apply -f nginx.yaml -n prod |
3.4 Verify Connectivity from Cluster1
-
- Exec into the pod in Cluster1:
1kubectl exec -it -n dev <pod-name> -- /bin/bash
- Exec into the pod in Cluster1:
3.5 Test connectivity to Cluster2
|
1 |
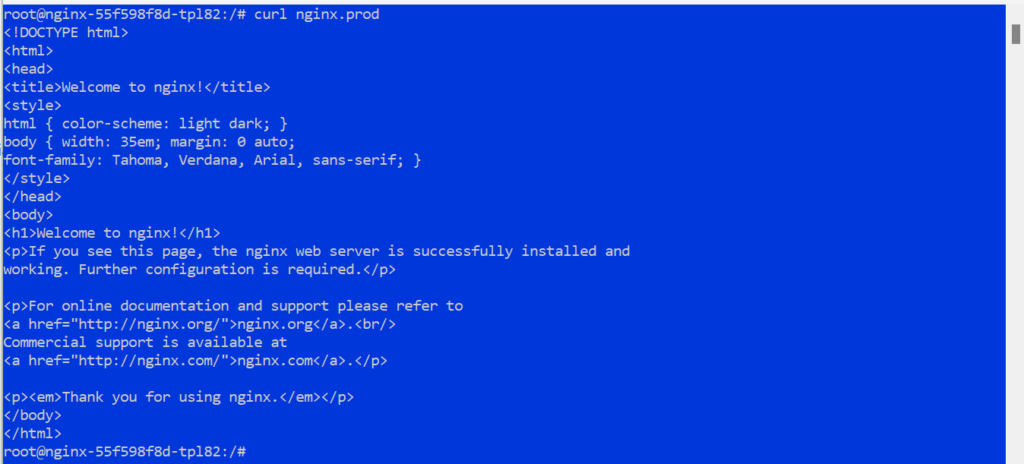
curl nginx.prod |
Expected outcome
The curl command will fail without DNS forwarding, highlighting the need for further DNS configuration.

Step 4: Configuring DNS forwarding
What are we doing?
We’ll configure DNS forwarding so that services in Cluster2 can be resolved by Cluster1. This is critical for allowing applications in Cluster1 to interact with services in Cluster2 using their DNS names.
Why is this important?
Kubernetes service discovery relies on DNS, and by default, DNS queries for one cluster’s services cannot resolve in another cluster. CoreDNS in Cluster1 must forward queries to Cluster2’s DNS resolver.
Steps
4.1 Retrieve Cluster2’s DNS Service Endpoint
-
- Run the following command in Cluster2 to get the DNS service endpoint:
1kubectl get endpoints -n kube-system - Look for the kube-dns or coredns service and note its IP address. For example:
1234----------------------------------------NAME ENDPOINTS AGEkube-dns 10.1.20.116:53 3h----------------------------------------

- Run the following command in Cluster2 to get the DNS service endpoint:
4.2 Edit the CoreDNS ConfigMap in Cluster1
-
- Open the CoreDNS ConfigMap for editing:
1kubectl edit cm coredns -n kube-system
- Open the CoreDNS ConfigMap for editing:
4.3 Add the following block to the Corefile section
|
1 2 3 |
prod.svc.cluster.local:53 { forward . 10.1.20.116 } |
Replace 10.1.20.116 with the actual DNS endpoint IP from Cluster2.
Note: We only need to use one of the CoreDNS endpoints for this ConfigMap. The IP of CoreDNS pods rarely change but can if the Node goes down. The kube-dns ClusterIP service can be used but will require the IP and Port to be open on the EKS Nodes.
4.4 Restart CoreDNS in Cluster1
4.5 Verify DNS Forwarding
Expected outcome
DNS queries from Cluster1 to Cluster2 should resolve successfully.
Step 5: Deploying Couchbase
What are we doing?
We’ll deploy Couchbase clusters in both Kubernetes environments using Helm. Each cluster will manage its own data independently before being connected through XDCR.
Why is this important?
Couchbase clusters form the foundation of the XDCR setup, providing a robust and scalable NoSQL database platform.
Steps
5.1 Add the Couchbase Helm Chart Repository
|
1 2 |
helm repo add couchbase https://couchbase-partners.github.io/helm-charts/ helm repo update |
5.2 Deploy Couchbase in Cluster1
-
- Switch to Cluster1:
1kubectl config use-context <cluster1-context> - Deploy Couchbase:
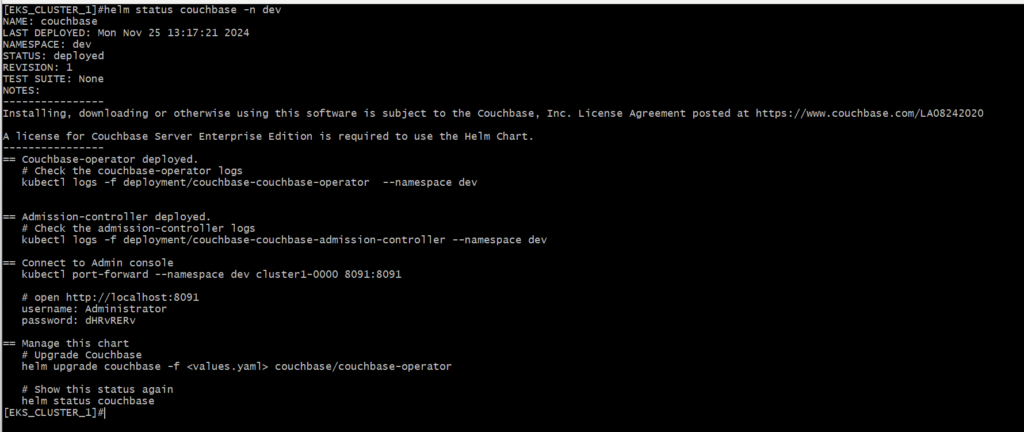
1helm install couchbase couchbase/couchbase-operator --namespace dev
- Switch to Cluster1:
5.3 Deploy Couchbase in Cluster2
-
- Switch to Cluster2:
1kubectl config use-context <cluster2-context> - Deploy Couchbase:
1helm install couchbase couchbase-operator --namespace prod
- Switch to Cluster2:
5.4 Verify Deployment
Note: If you encounter a deployment error, edit the CouchbaseCluster CRD to use a compatible image version:
|
1 |
kubectl edit couchbasecluster <cluster-name> -n <namespace> |
Change:
|
1 |
image: couchbase/server:7.2.0 |
To:
|
1 |
image: couchbase/server:7.2.4 |
Expected outcome
Couchbase clusters should be running and accessible via their respective UIs.
Step 6: Setting Up XDCR
What are we doing?
We’ll configure XDCR to enable data replication between the two Couchbase clusters.
Why is this important?
XDCR ensures data consistency across clusters, supporting high availability and disaster recovery scenarios.
Steps
6.1 Get service name from Cluster2
-
- In cluster2 run the following command to retrieve the service name of one of the pods so we can port-forward to it.
1kubectl get services -n prod
- In cluster2 run the following command to retrieve the service name of one of the pods so we can port-forward to it.
6.2 Access the Couchbase UI for Cluster2
-
-
- Port-forward the Couchbase UI:
1kubectl port-forward -n prod cluster2-0000 8091:8091
- Port-forward the Couchbase UI:
-
-
- Open a browser and navigate to:
http://localhost:8091
- Open a browser and navigate to:
-
- Log in using the credentials configured during the deployment.
6.3 View Documents in Cluster2
-
- In the Couchbase UI, go to Buckets
- Note that no Documents exist in the default bucket
6.4 Access the Couchbase UI for Cluster1
6.5 Add a Remote Cluster
6.6 Set Up Replication
6.7 Test Replication
-
- Add sample documents to the default bucket in Cluster1:
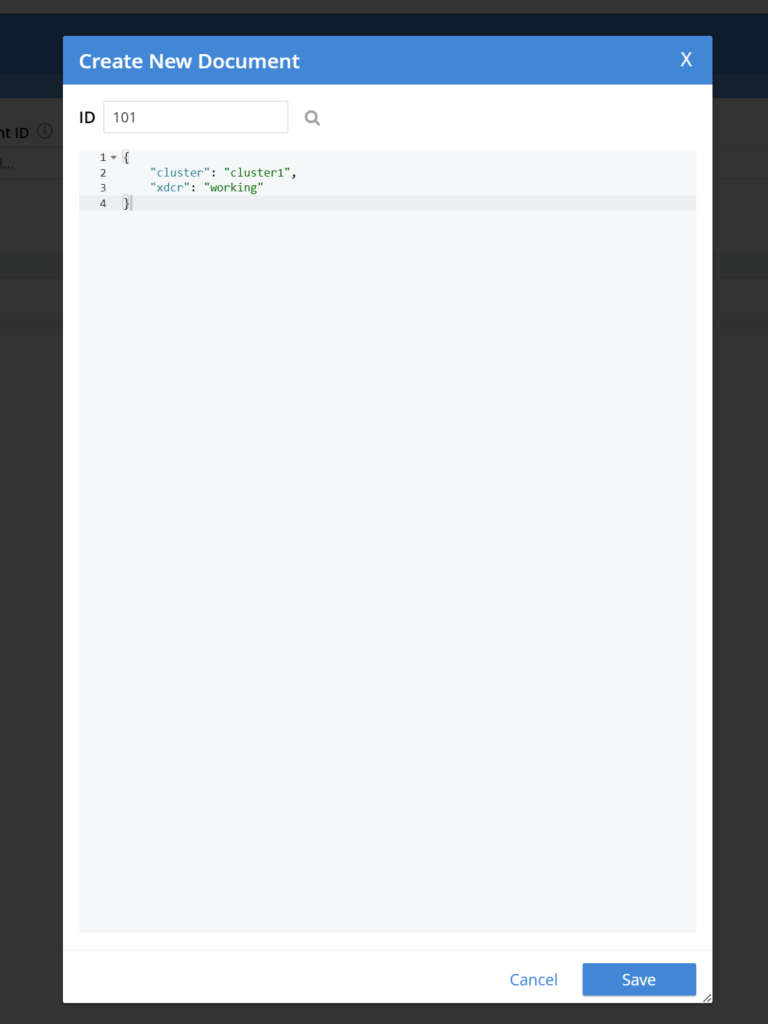
- In the Couchbase UI, navigate to Buckets > Documents > Add Document
- Give the Document a unique ID and some data in JSON format

- Verify that the documents appear in the default bucket of Cluster2:
- Port-forward to Cluster2’s UI and log in:
1kubectl port-forward -n prod cluster2-0000 8091:8091
- Port-forward to Cluster2’s UI and log in:
- Navigate to: http://localhost:8091
- Add sample documents to the default bucket in Cluster1:
Expected outcome
Data added to Cluster1 should replicate to Cluster2 in real time.
Step 7: Cleanup
What are we doing?
We’ll cleanup our AWS environment and delete all the resources we deployed.
Why is this important?
This will prevent you from incurring unnecessary charges.
Steps
7.1 Access the AWS Console
-
- Go to the AWS Console > VPC > Peering Connections
- Select and delete the peering connection
- Go to the AWS Console > CloudFormation > Stacks
- Select and delete the two nodegroup stacks
- Once the two nodegroup stacks have finished deleting select and delete the cluster stacks
Expected outcome
All resources created for this tutorial are deleted from account.
Conclusion
Through this guide, we’ve successfully established XDCR between Couchbase clusters running in separate EKS clusters across AWS VPCs. This setup highlights the power of combining AWS networking with Kubernetes for robust, scalable solutions. With cross-cluster replication in place, your applications gain enhanced resilience, reduced latency for distributed users, and a solid disaster recovery mechanism.
By understanding and implementing the steps outlined here, you’re equipped to tackle real-world challenges involving multi-cluster setups, expanding your expertise in both cloud networking and distributed database management.
-
- Learn more about Couchbase Cross Data Center Replication (XDCR)
- Read the XDCR documentation
- Read how XDCR is essential for globally distributed data, disaster recovery and high availability


